Introduction to Artifact Registry
About 1293 wordsAbout 4 min
This article introduces some basic concepts of the CNB Artifact Registry. You will learn about:
- Supported artifact types
- How to manage the Artifact Registry on the page
- Permission control for the Artifact Registry
- Storage capacity statistics and billing
- Artifact migration
You can also skip this chapter and directly refer to the documentation for the corresponding artifact type.
Don't worry about missing key points; we will add guidance links to relevant sections of this article in each artifact document.
Artifact Types
CNB currently supports the following artifact types:
| Artifact Type | Domain |
|---|---|
| Docker | docker.cnb.cool |
| Docker Model | docker-model.cnb.cool |
| Helm | helm.cnb.cool |
| Maven | maven.cnb.cool |
| npm | npm.cnb.cool |
| ohpm | ohpm.cnb.cool |
| Nuget | nuget.cnb.cool |
| Composer | composer.cnb.cool |
| PyPI | pypi.cnb.cool |
| Cargo | cargo.cnb.cool |
| Conan | conan.cnb.cool |
Managing the Artifact Registry
The hierarchical relationship between artifact types, group, and repository in the UI is as follows:
test-org  # group
├── maven
├── npm
├── ohnpm
├── nuget
├── composer
├── pypi
├── cargo
├── conan
└── test-git-repo # repository
    ├── docker
    ├── helm
    └── docker model
As shown above, Composer/Maven and other artifact types belong to a group, while Docker/Helm/Docker Model artifacts belong to a repository under the group.
Therefore, their usage steps will differ.
Using Docker/Helm/Docker Model Artifacts
Docker/Helm/Docker Model artifacts belong to a repository, so no manual creation is required.
After logging in to CNB, you can click the "+" button in the upper right corner to create a new repository 
Alternatively, click your avatar in the upper right corner, select "Your Repositories" and use an existing repository 
After entering any repository, click "Packages" to see Docker/Helm/Docker Model artifacts. Click "Usage Guidelines" to view the operation guide 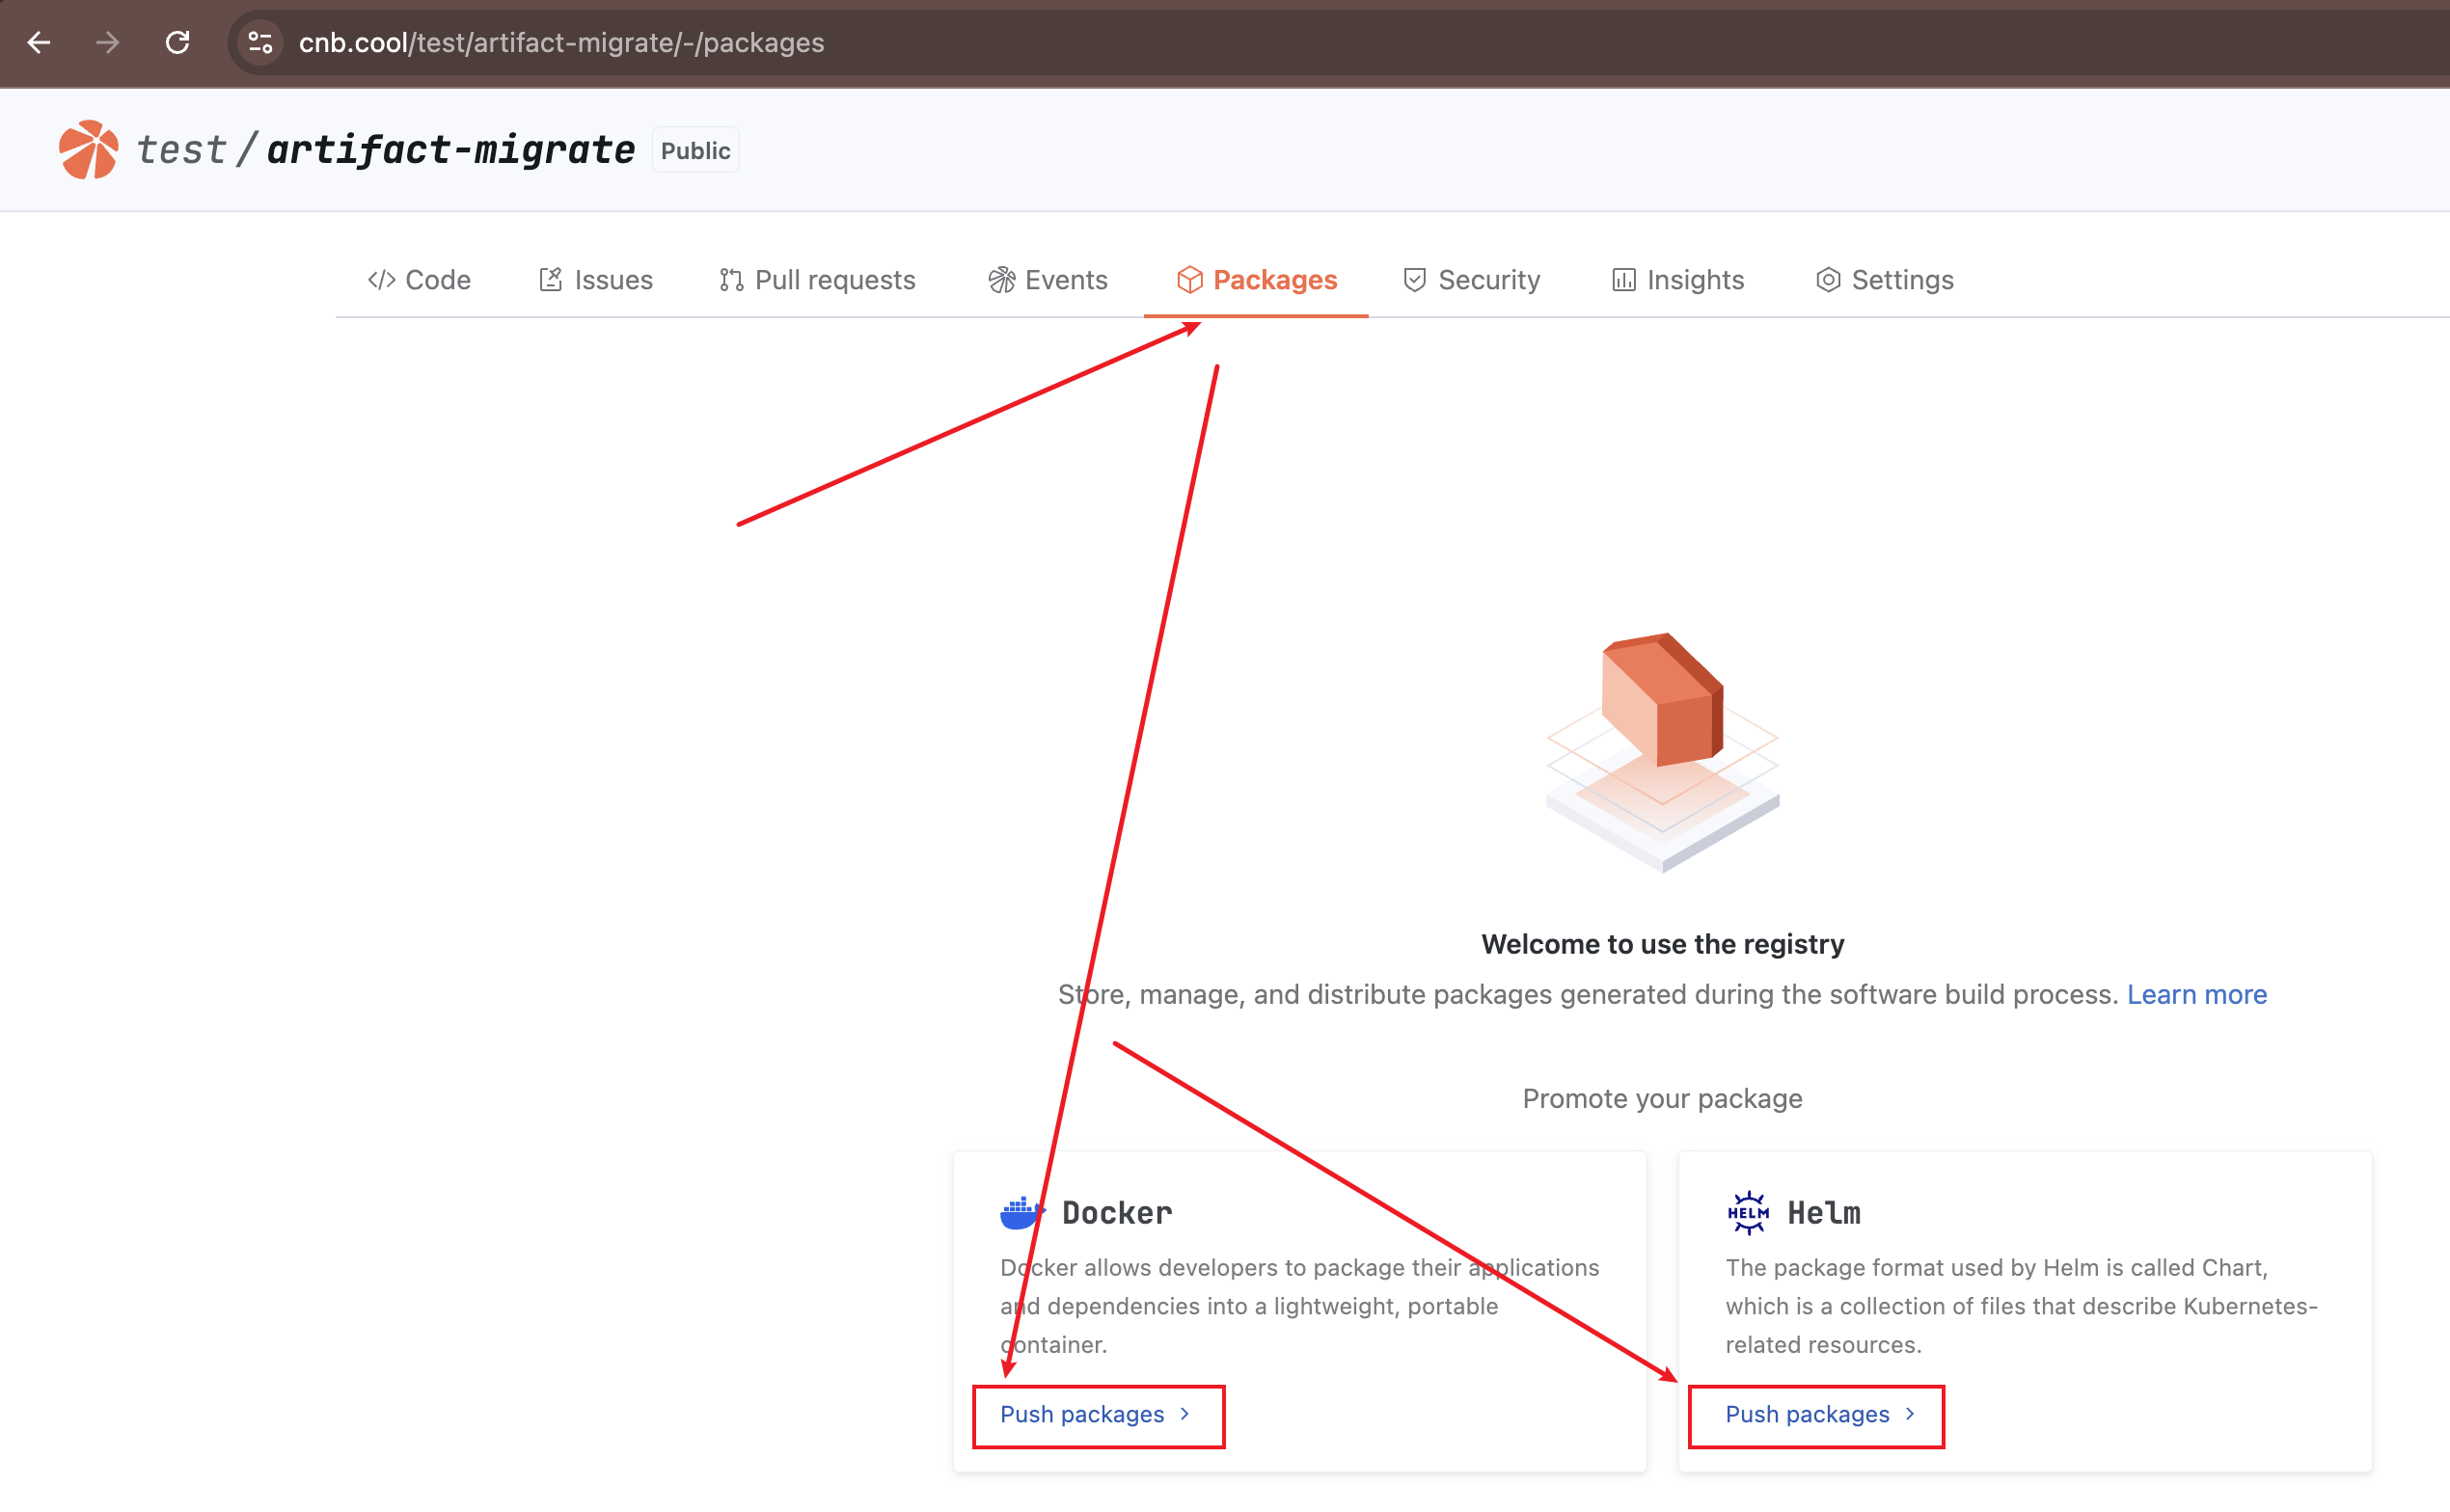
Using Composer/Maven Artifacts
Creating an Artifact Registry
You can click the "+" button in the upper right corner to create a new artifact registry 
Alternatively, click your avatar in the upper right corner, select "Your registries" and use an existing one 
After entering the artifact registry, click "Usage Guidelines" to view the operation guide 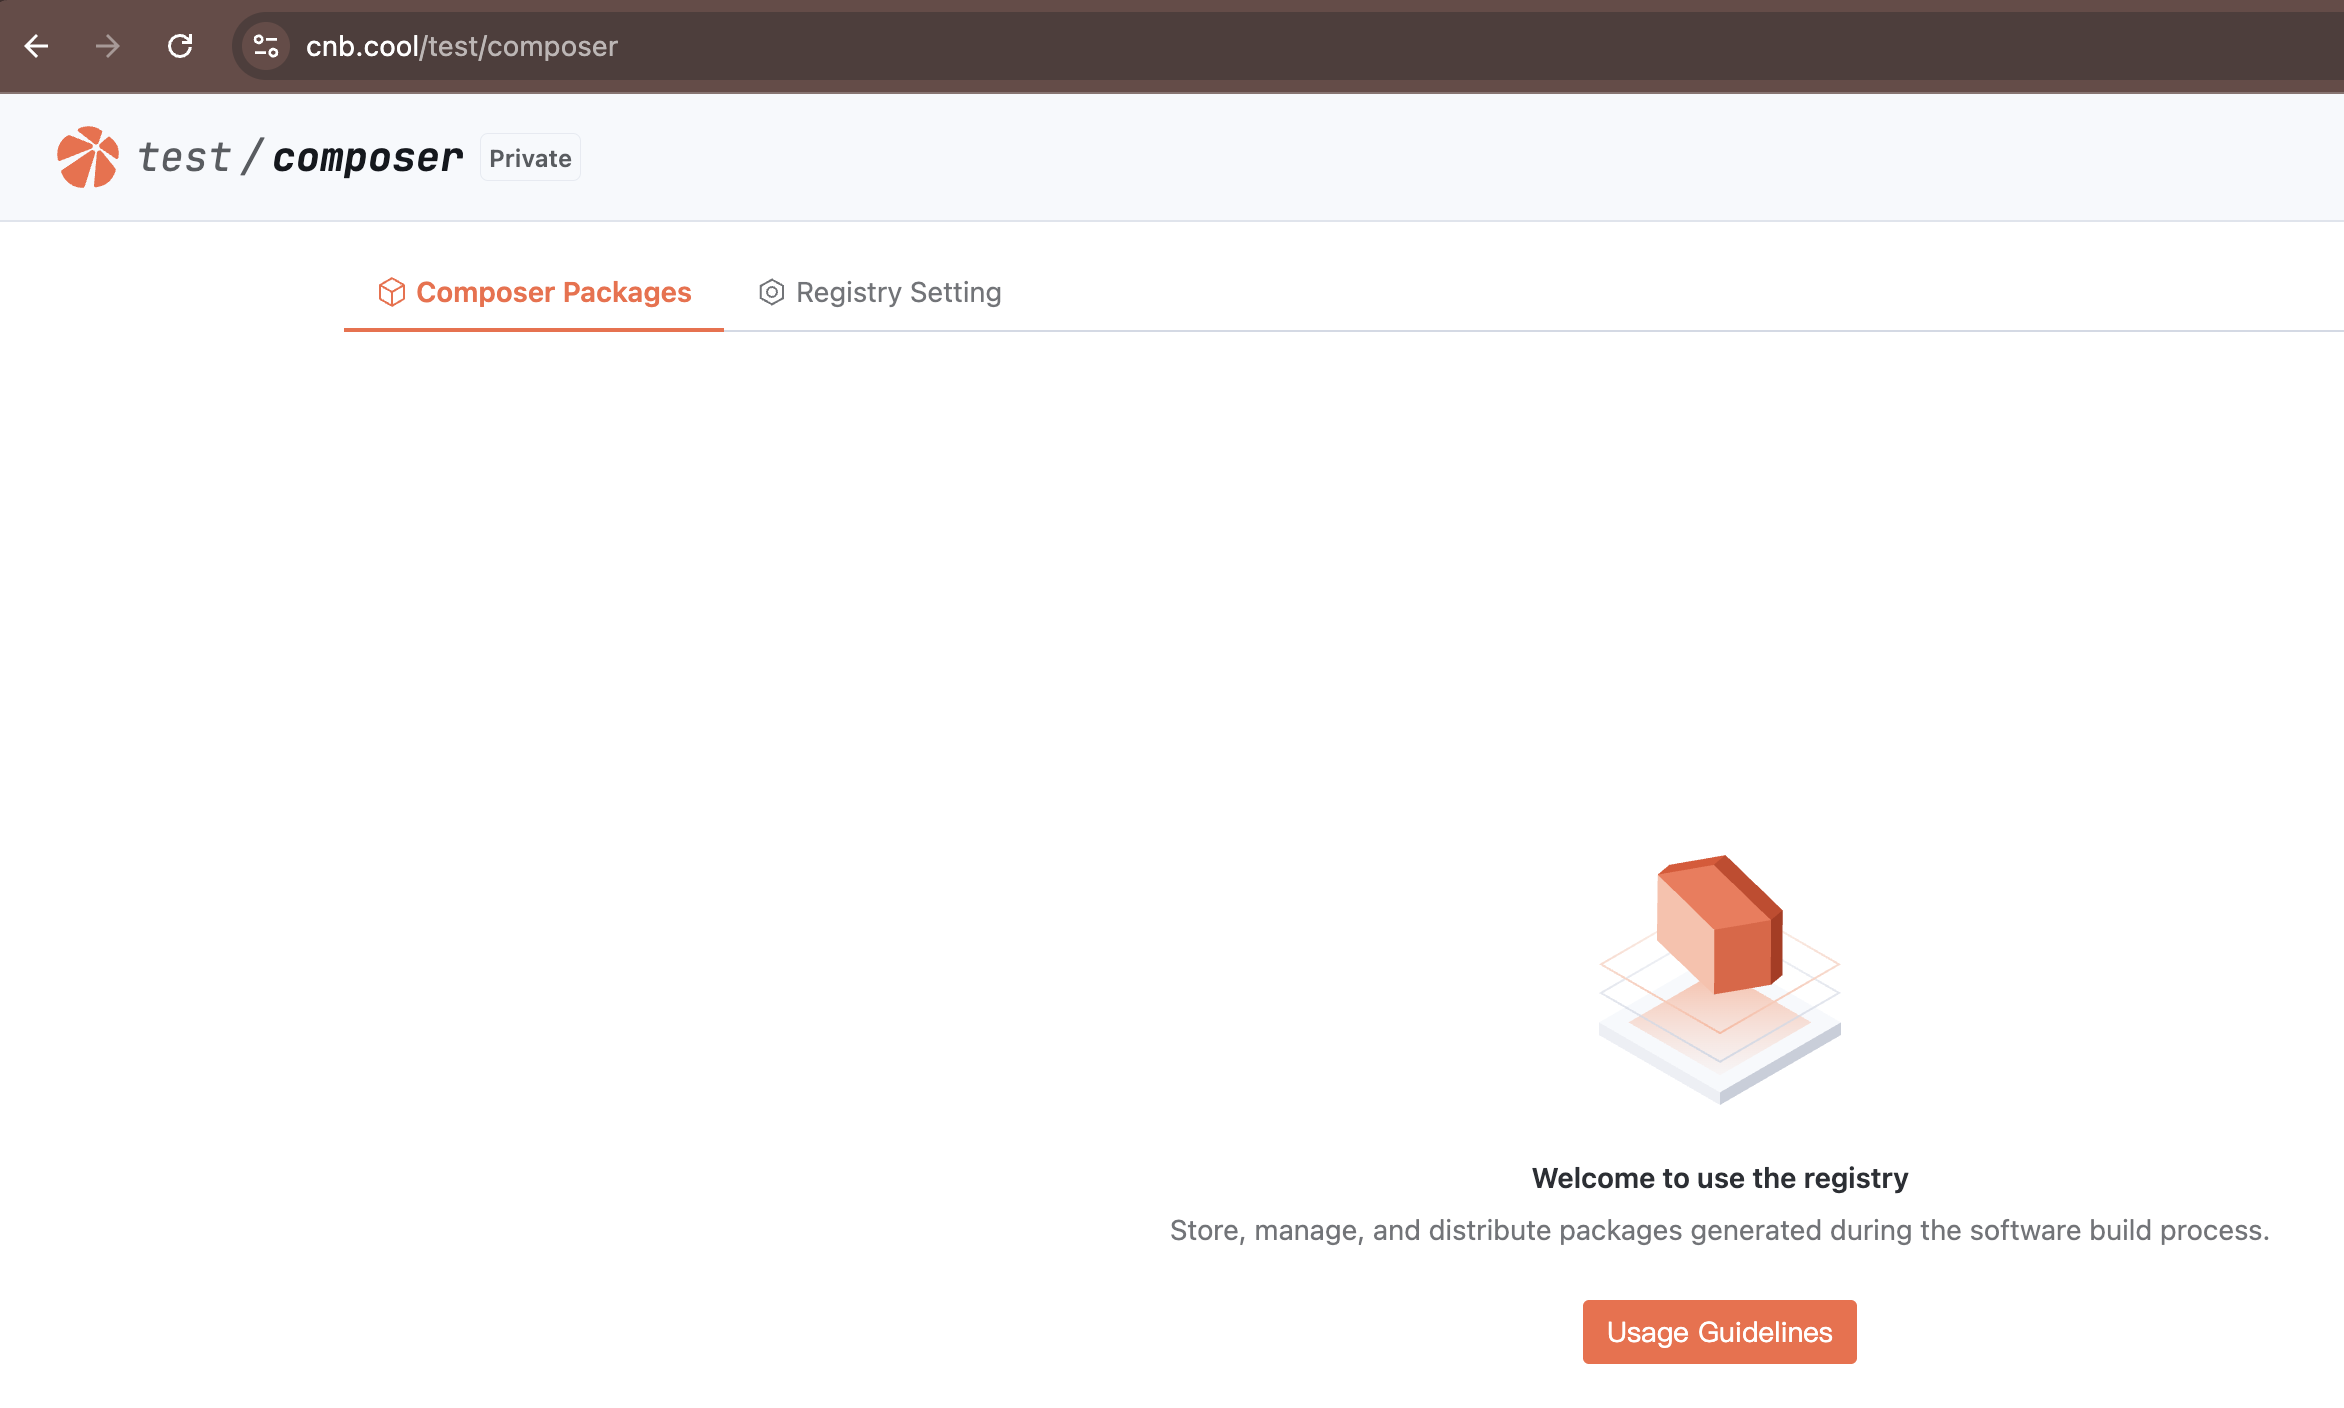
Deleting Artifacts
For example, with Composer artifacts (other artifact types are similar, including Docker/Helm/Docker Model):
After pushing artifacts to the registry, click the artifact name to enter it. 
Click "Delete Package" to delete the entire artifact. Click the "Delete" icon to delete a specific version. 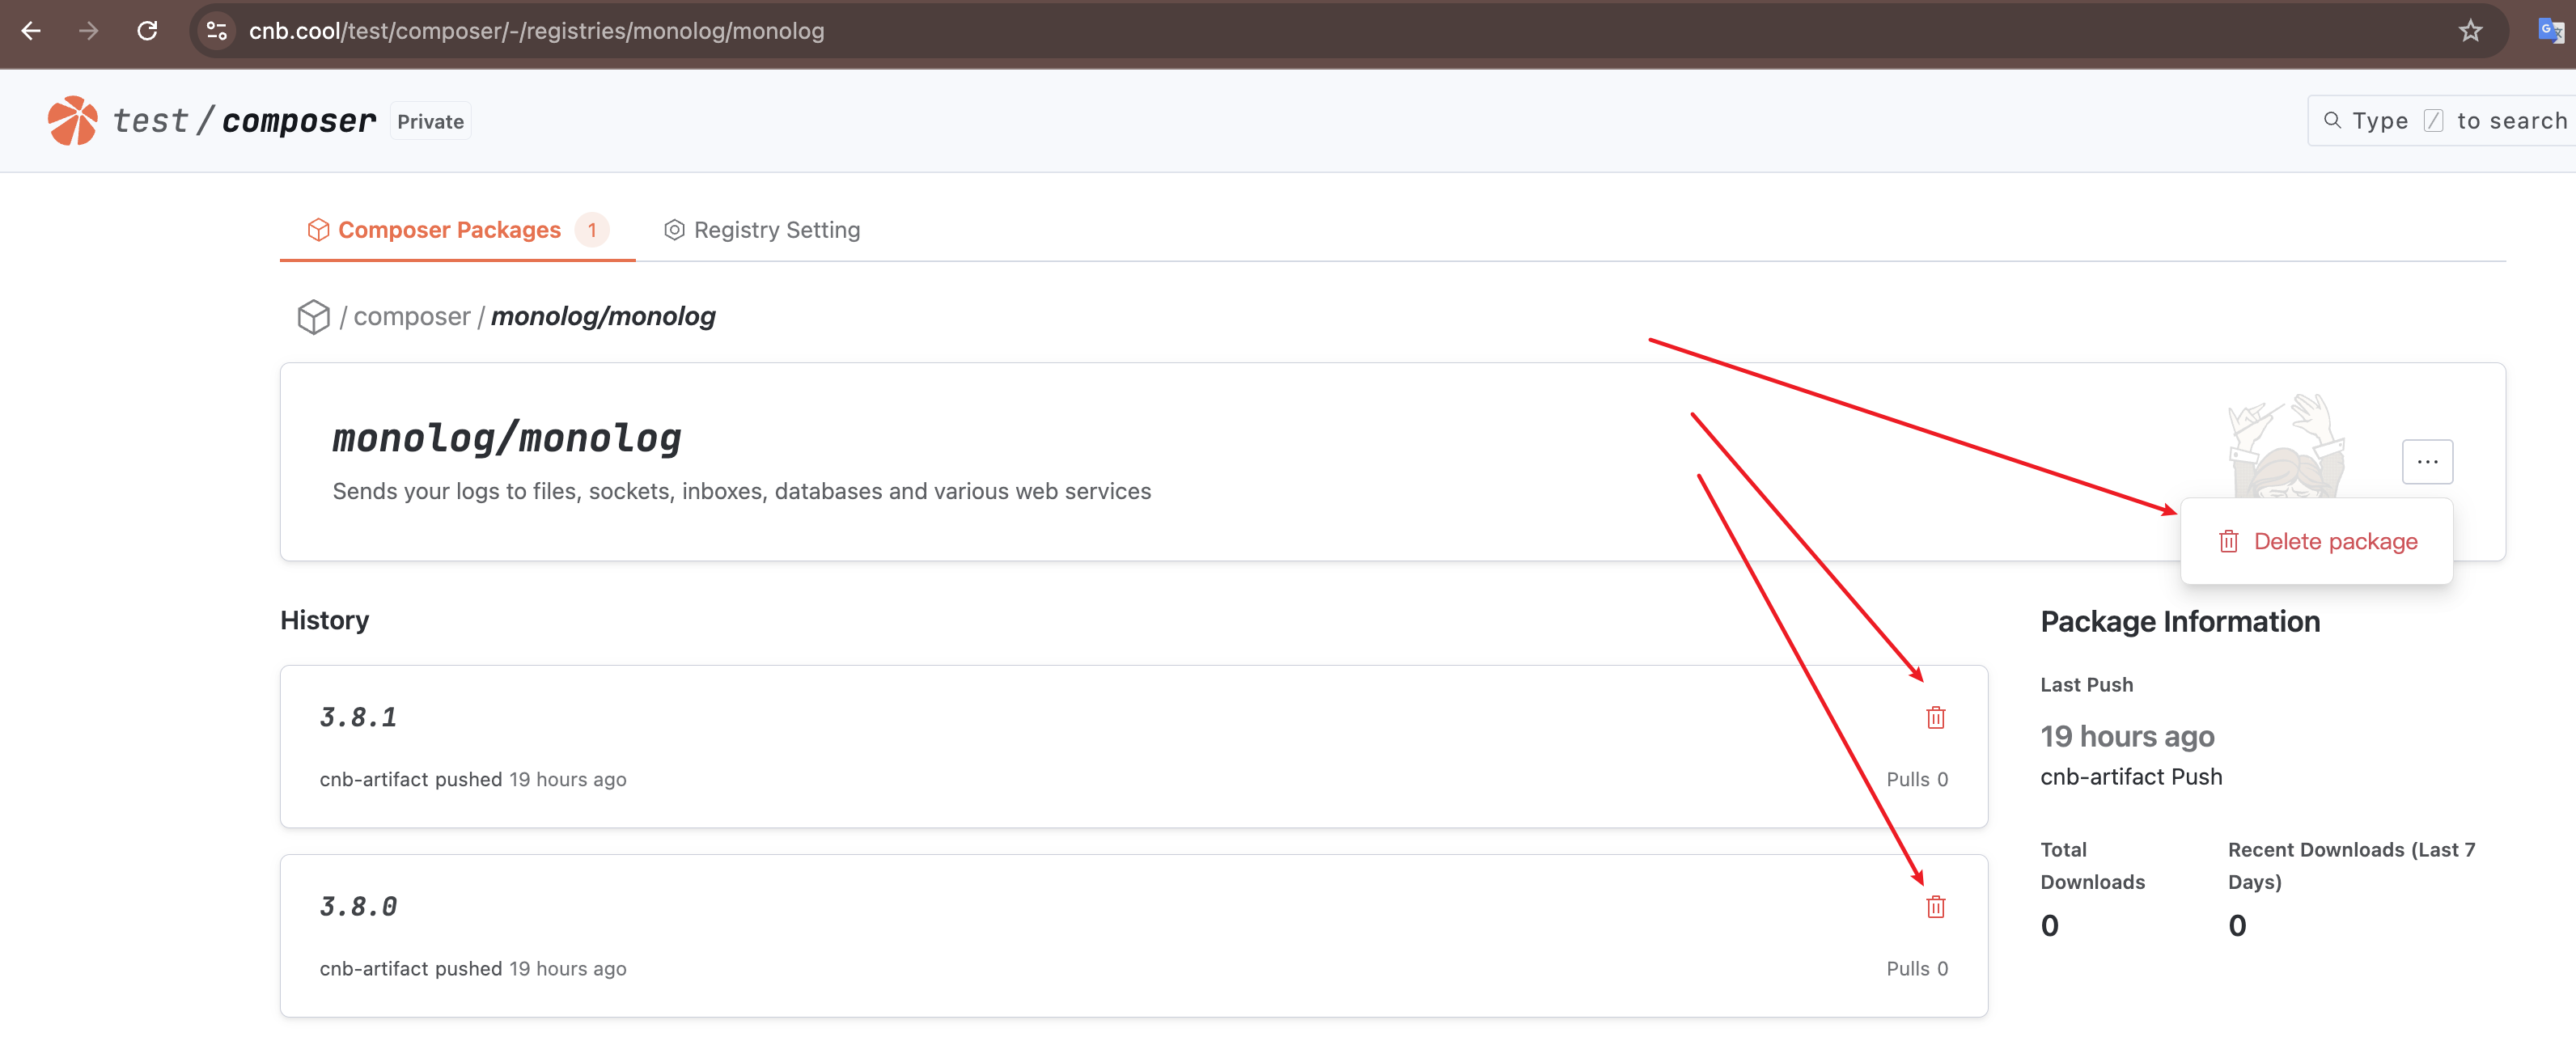
Deleting an Artifact Registry
Docker/Helm/Docker Model artifacts do not require manual creation, so they also do not require manual deletion.
Other artifact types can be deleted in "Registry Setting" 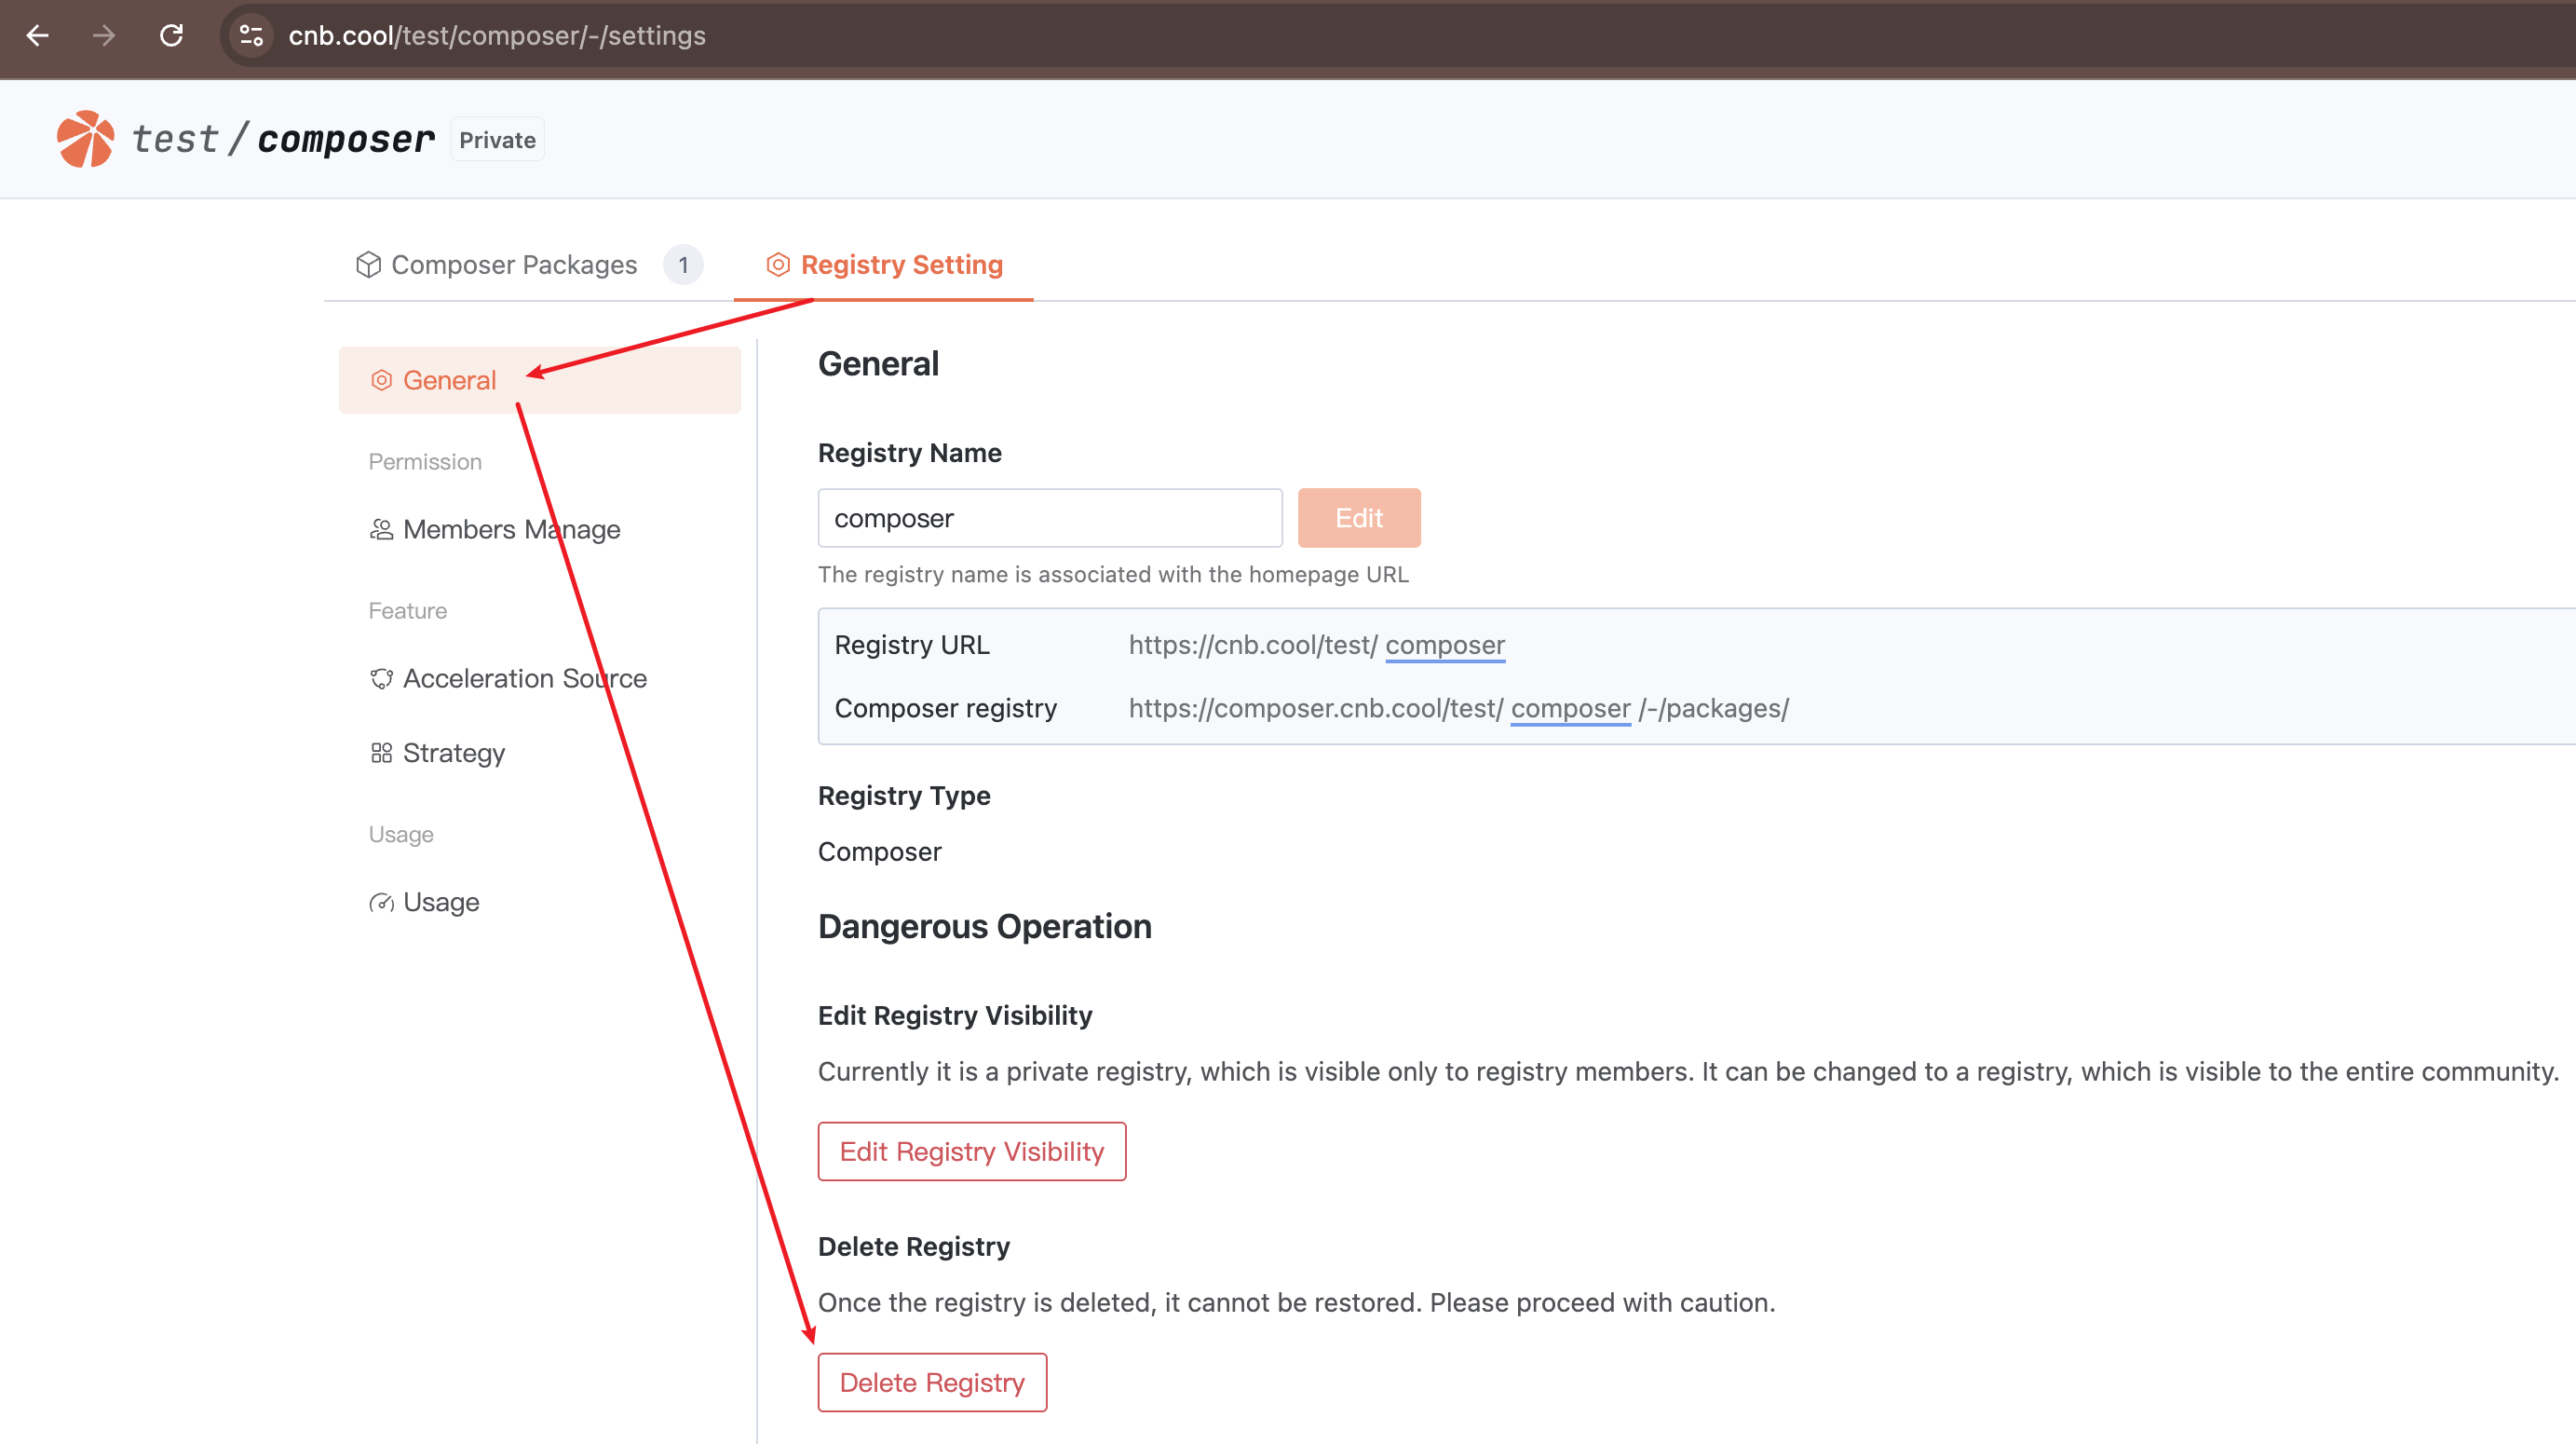
Obtaining the Artifact Registry Address
You can view the artifact registry address in "Registry Setting" > "General" 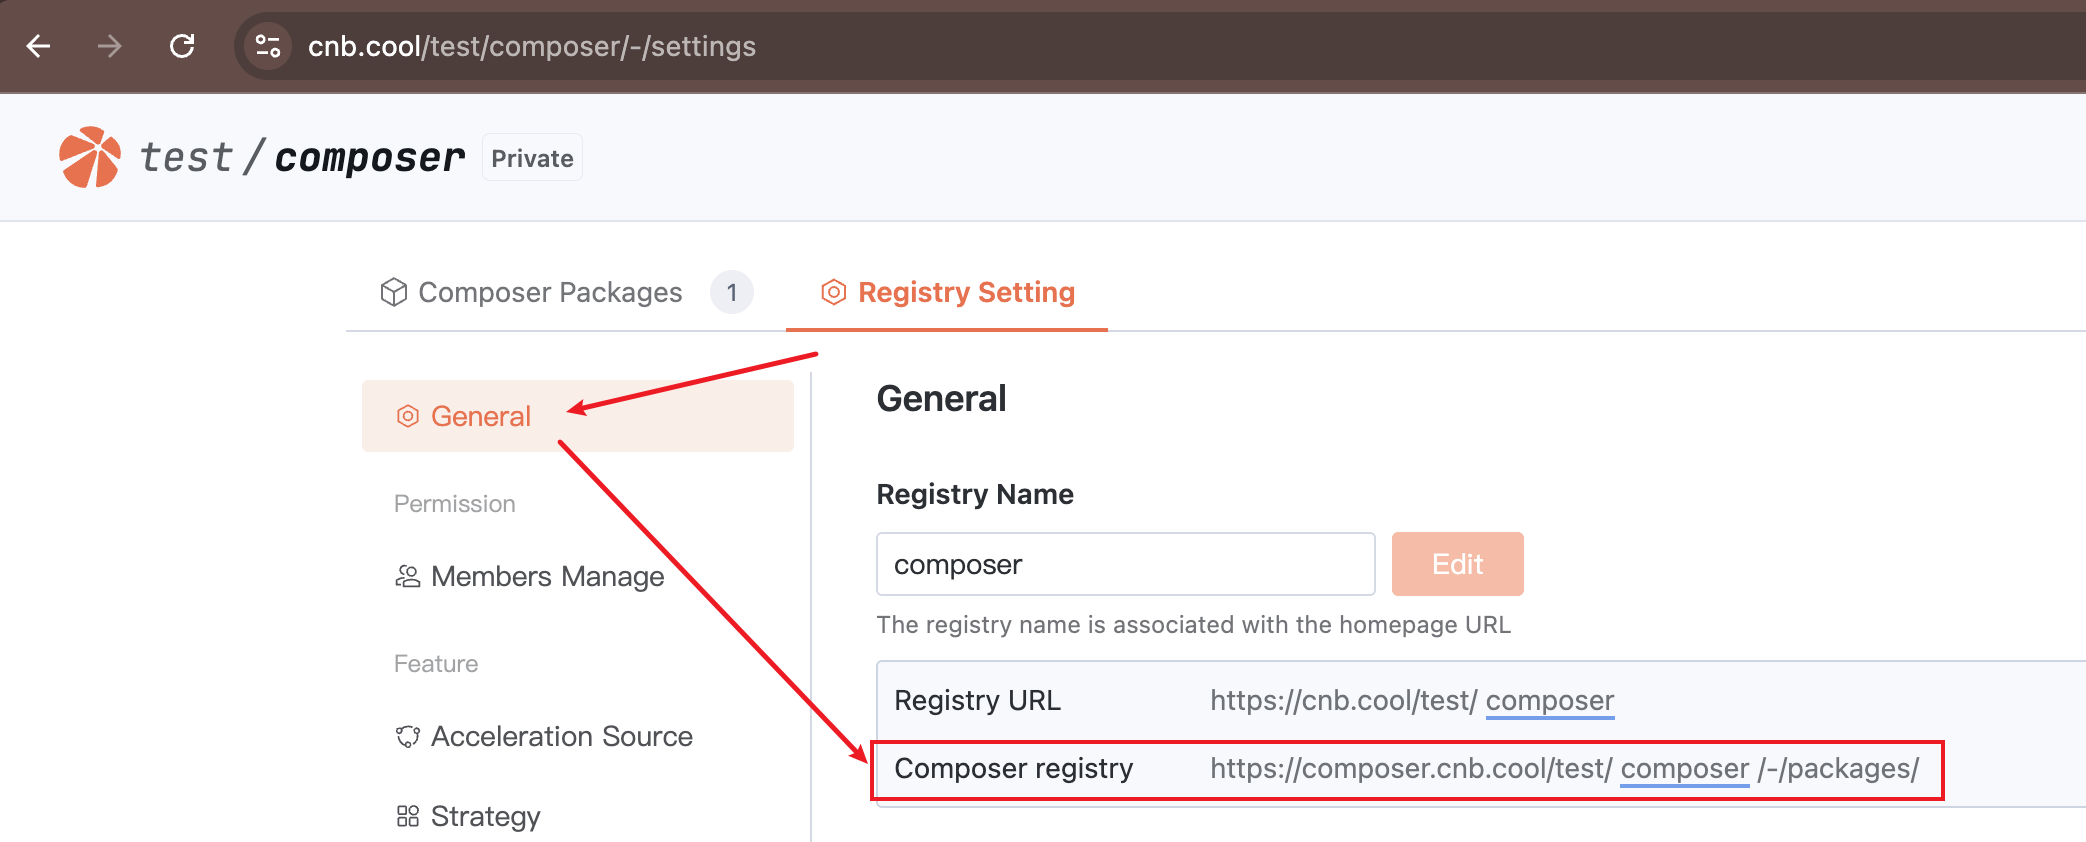
Permission Control
Roles
The visibility of Docker/Helm/Docker Model artifacts is consistent with the visibility of the repository they belong to. User access permissions for artifacts are determined by their role in the repository.
For Composer/Maven and other artifact types, visibility depends on the artifact registry's visibility. User access permissions for artifacts are determined by their role in the artifact registry.
A user's role in a repository can be viewed in "Repository" > "Settings" > "Members": 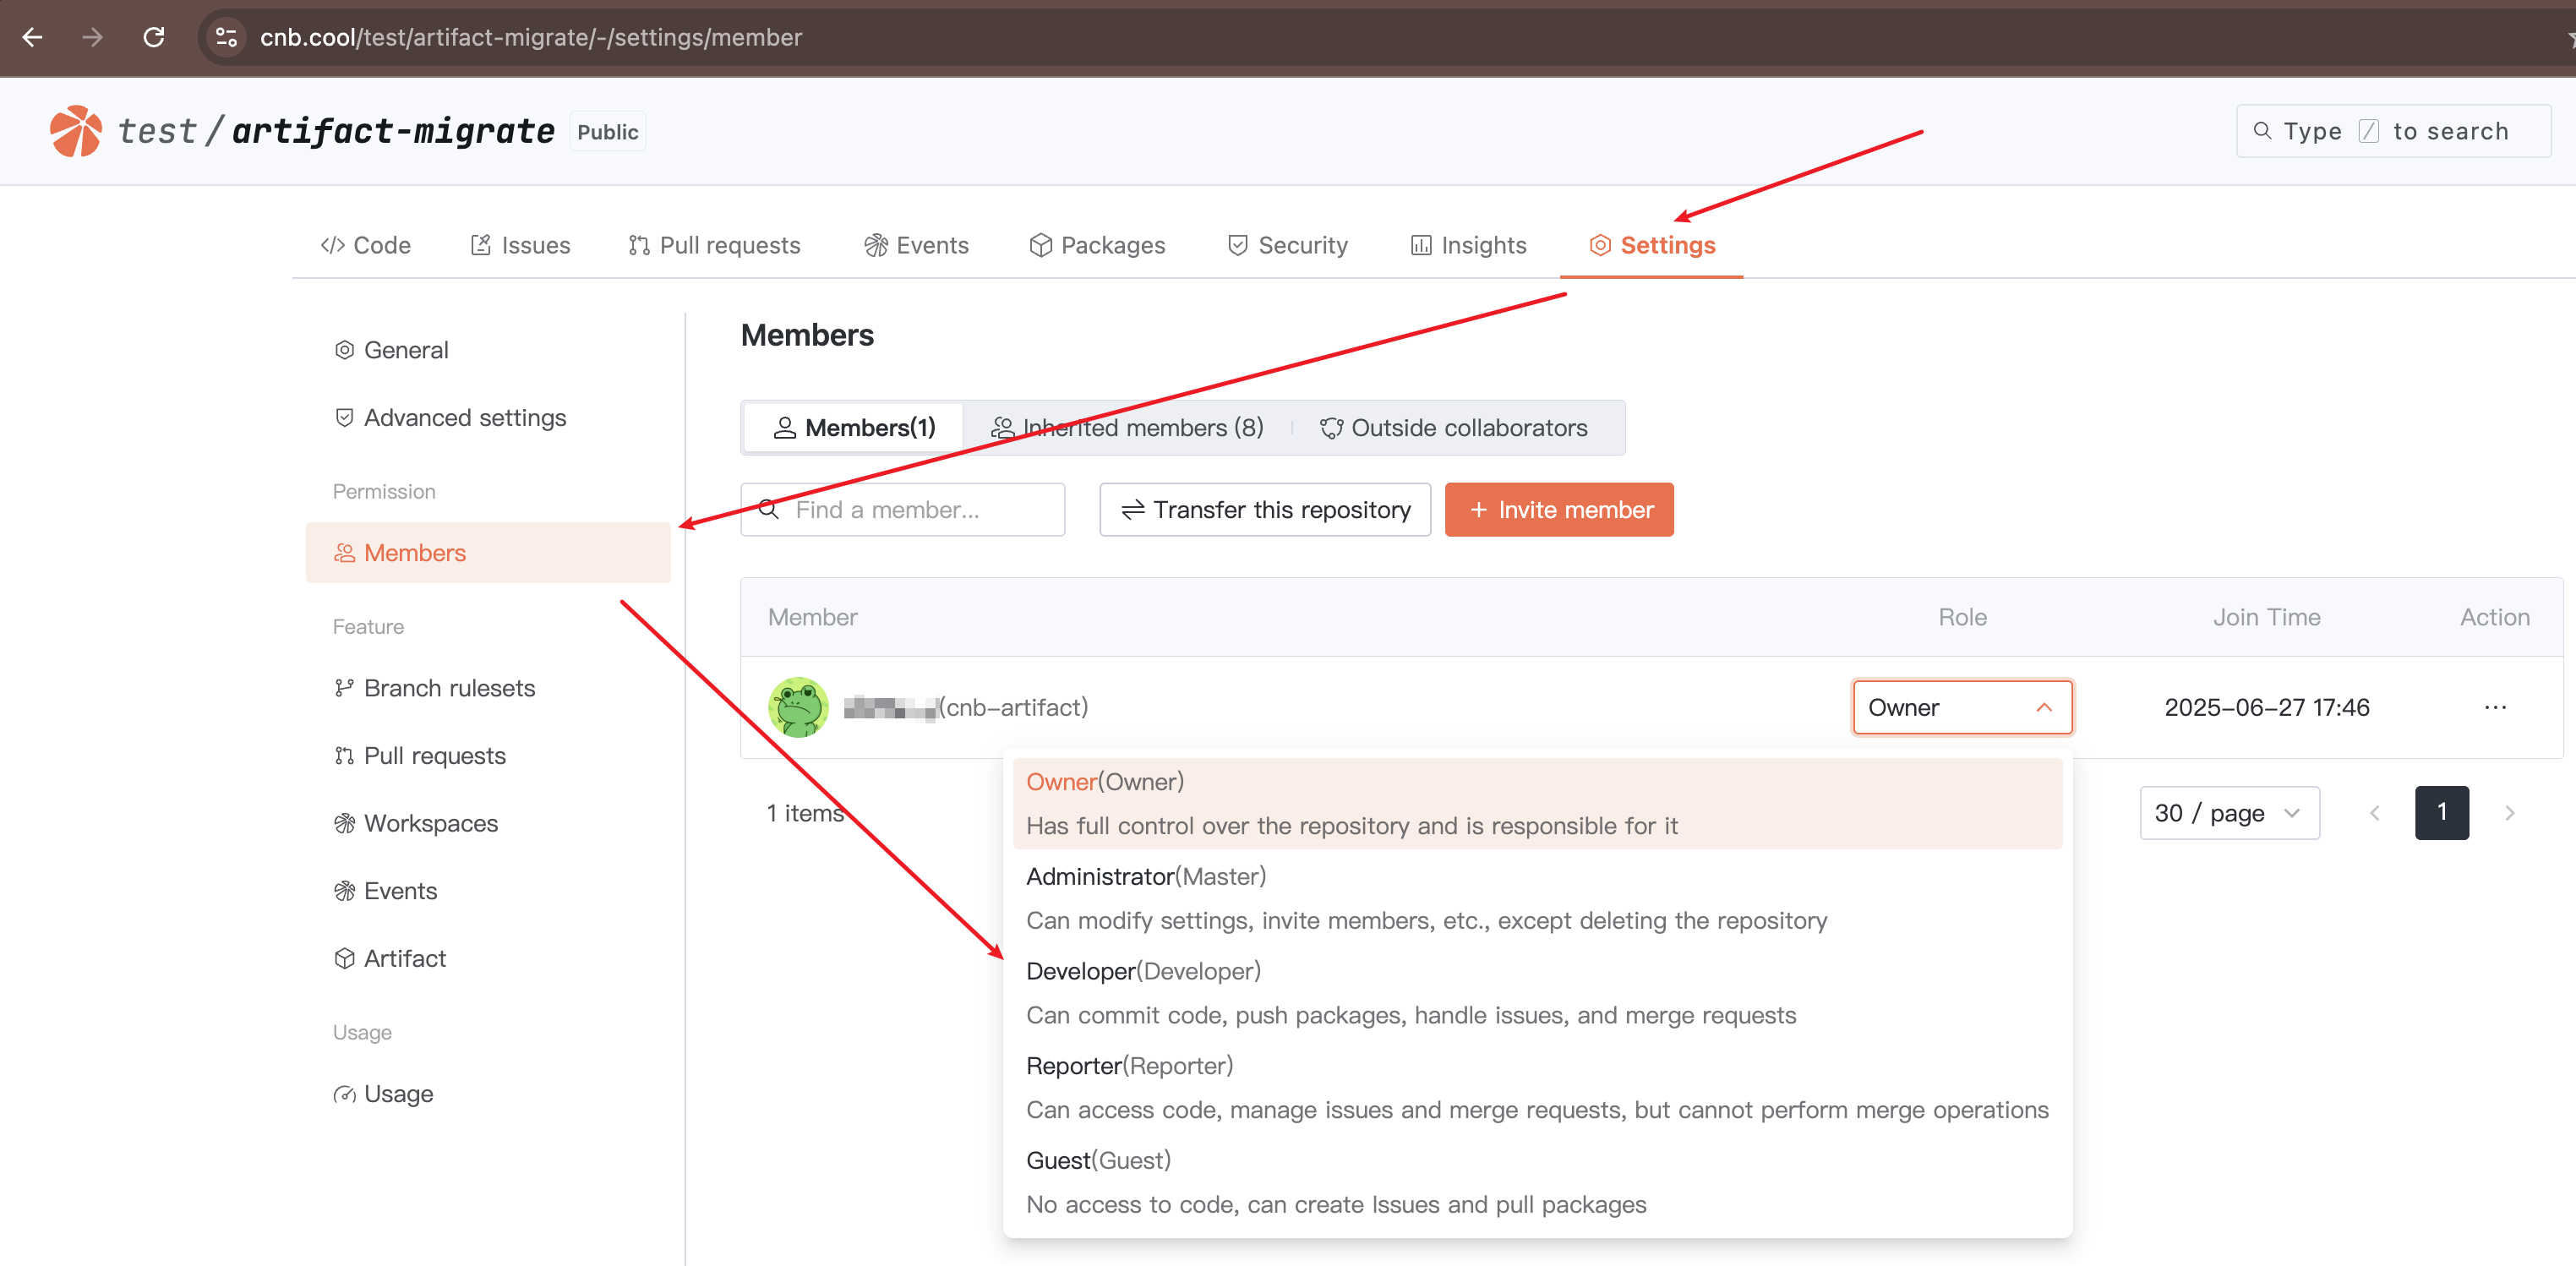
A user's role in an artifact registry can be viewed in "Artifact Registry" > "Registry Setting" > "Members Manage": 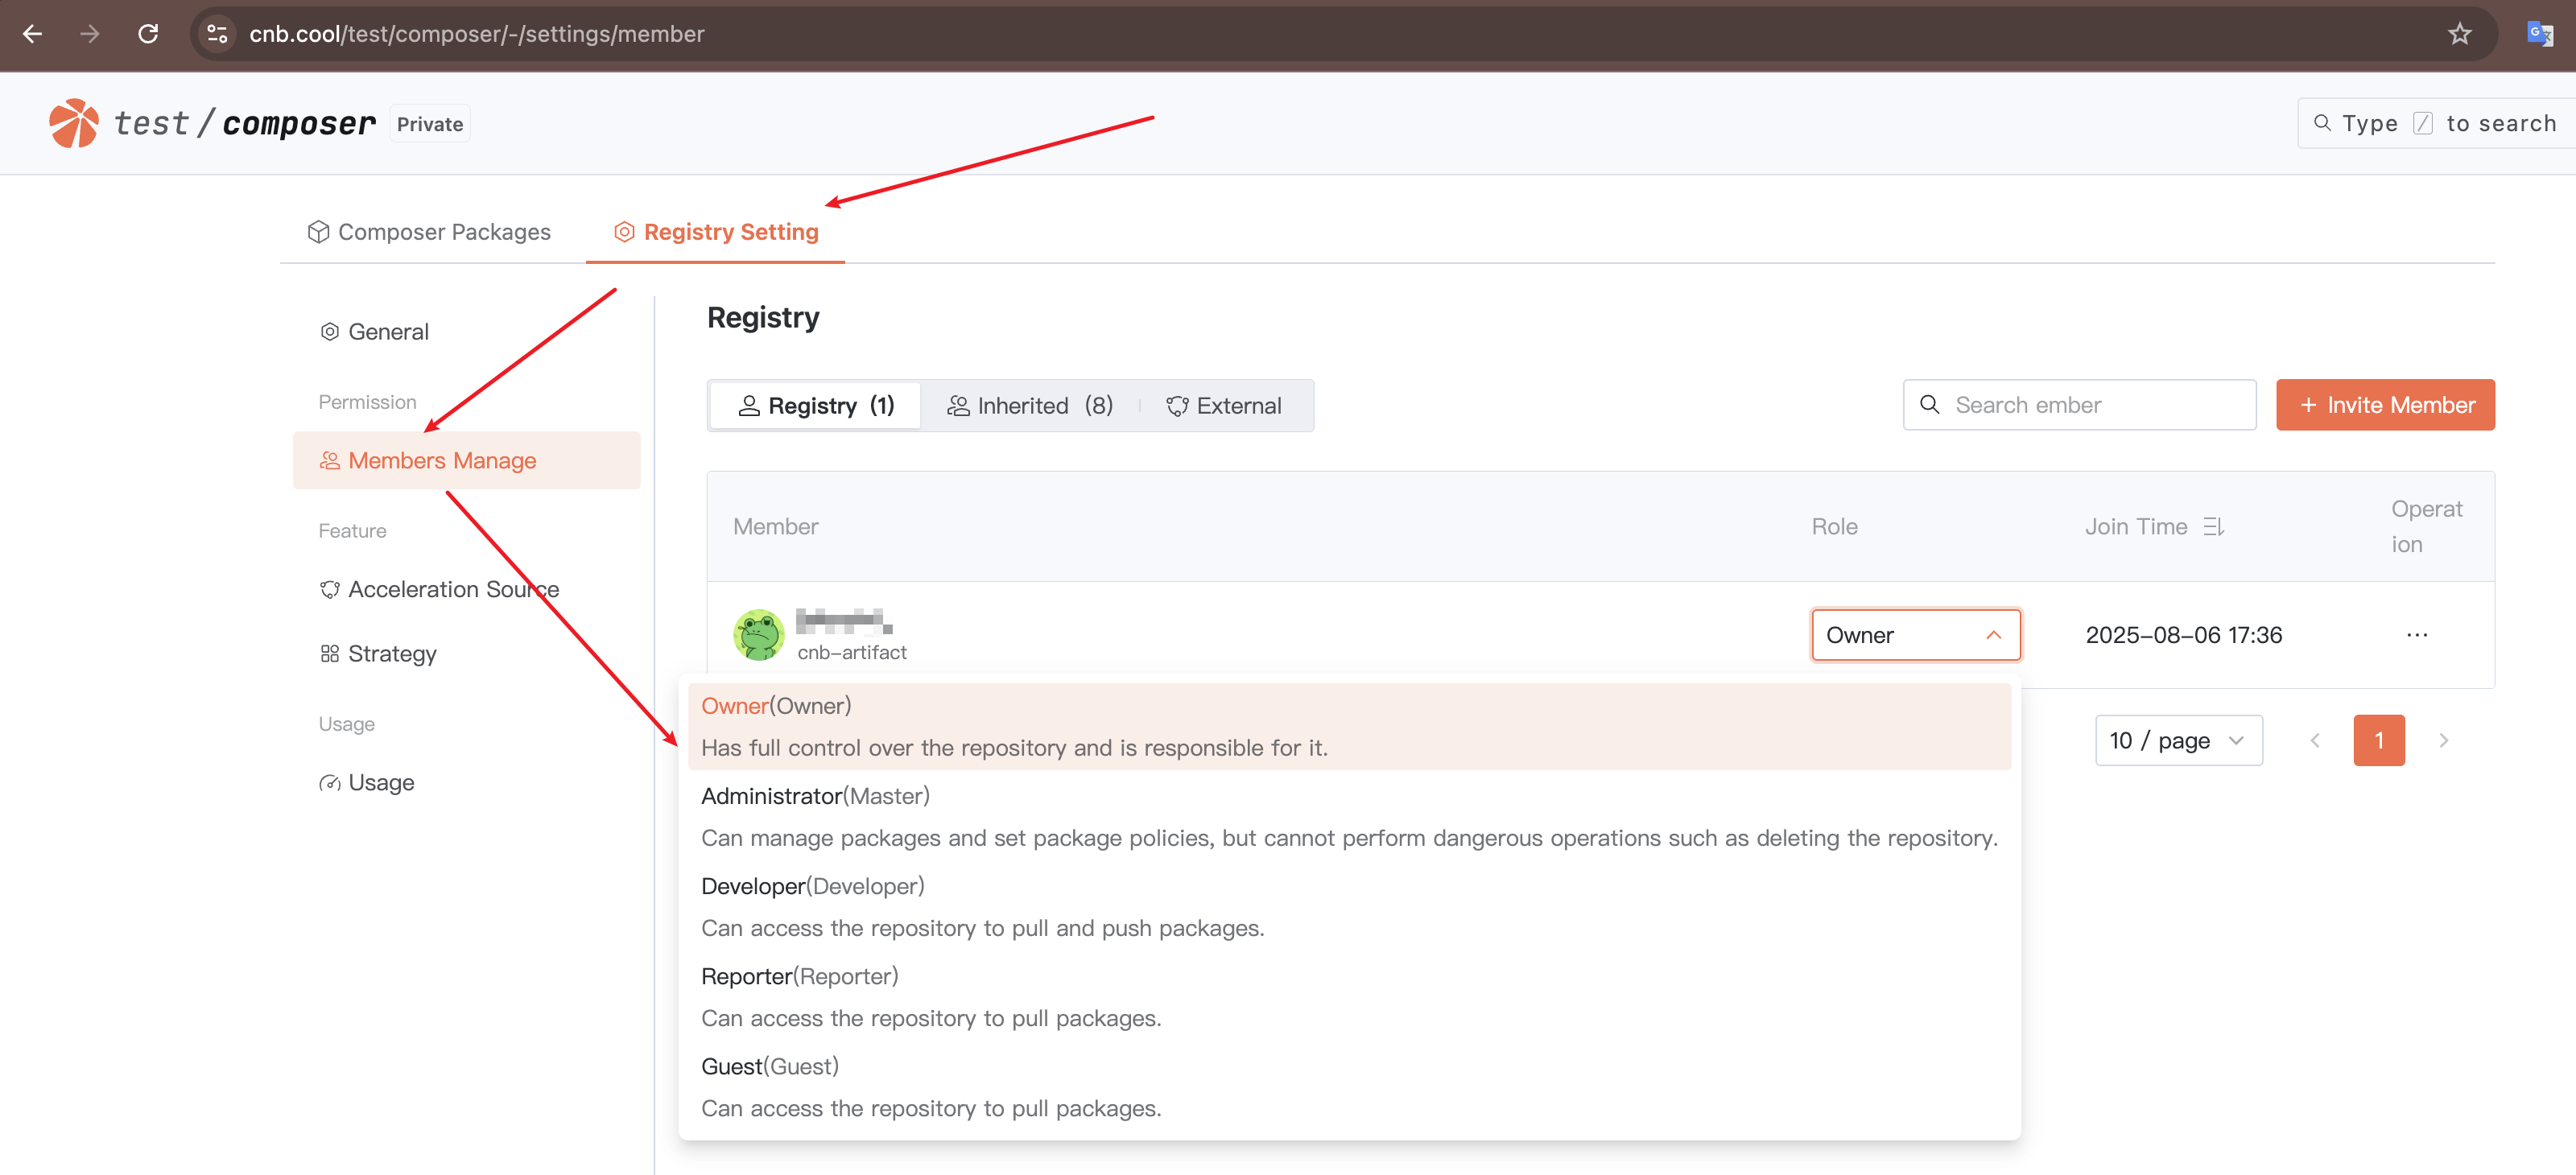
The table below lists the correspondence between artifact behaviors and required roles:
| Resource | Behavior | Required Role |
|---|---|---|
| Public Artifact Registry Artifacts | Pull | Anyone can pull without authentication |
| Public Artifact Registry Artifacts | Push | Developer or above |
| Public Artifact Registry Artifacts | Delete | Administrator or above |
| Private Artifact Registry Artifacts | Pull | Guest or above, requires authentication |
| Private Artifact Registry Artifacts | Push | Developer or above |
| Private Artifact Registry Artifacts | Delete | Administrator or above |
Access Tokens
When using command-line tools to read or write artifacts, whether an operation is authorized depends on the user's role and the permissions of the access token in the request.
If an access token is missing, the system treats it as anonymous access, which limits operation permissions.
The detailed authentication policy for the artifact registry is as follows:
Login: If the
access tokenis valid, login is allowed; otherwise, it is denied.Anonymous operations: Only pulling from public artifact registries is allowed; all other operations are denied.
Query, pull, and push operations: If the user's
rolehas the required permissions and theaccess token'sregistry-packagescope includes the operation, it is allowed; otherwise, denied. Deletion operations are similar.If the
access tokenspecifies a scope (e.g., a specific repository or artifact registry) and the scope matches the accessed resource, the actual authorization scope is returned. Otherwise, the visibility of the resource is checked. If the resource is public, pull operations are still allowed, but other operations are denied. If the resource is private, all operations are denied.If the user, token, or accessed resource is in an abnormal state (e.g., frozen), all operations are denied. Even if an incorrect
access tokenis provided (e.g., expired), pulling from a public artifact registry will be denied.
The above policy is illustrated below (using pull operations as an example, where "token" refers to the CNB access token and "scope" refers to the access token's authorization scope):
Creating an Access Token
You can click your avatar > "Settings" > "Access tokens" > "Add Access Token" to create a new access token.
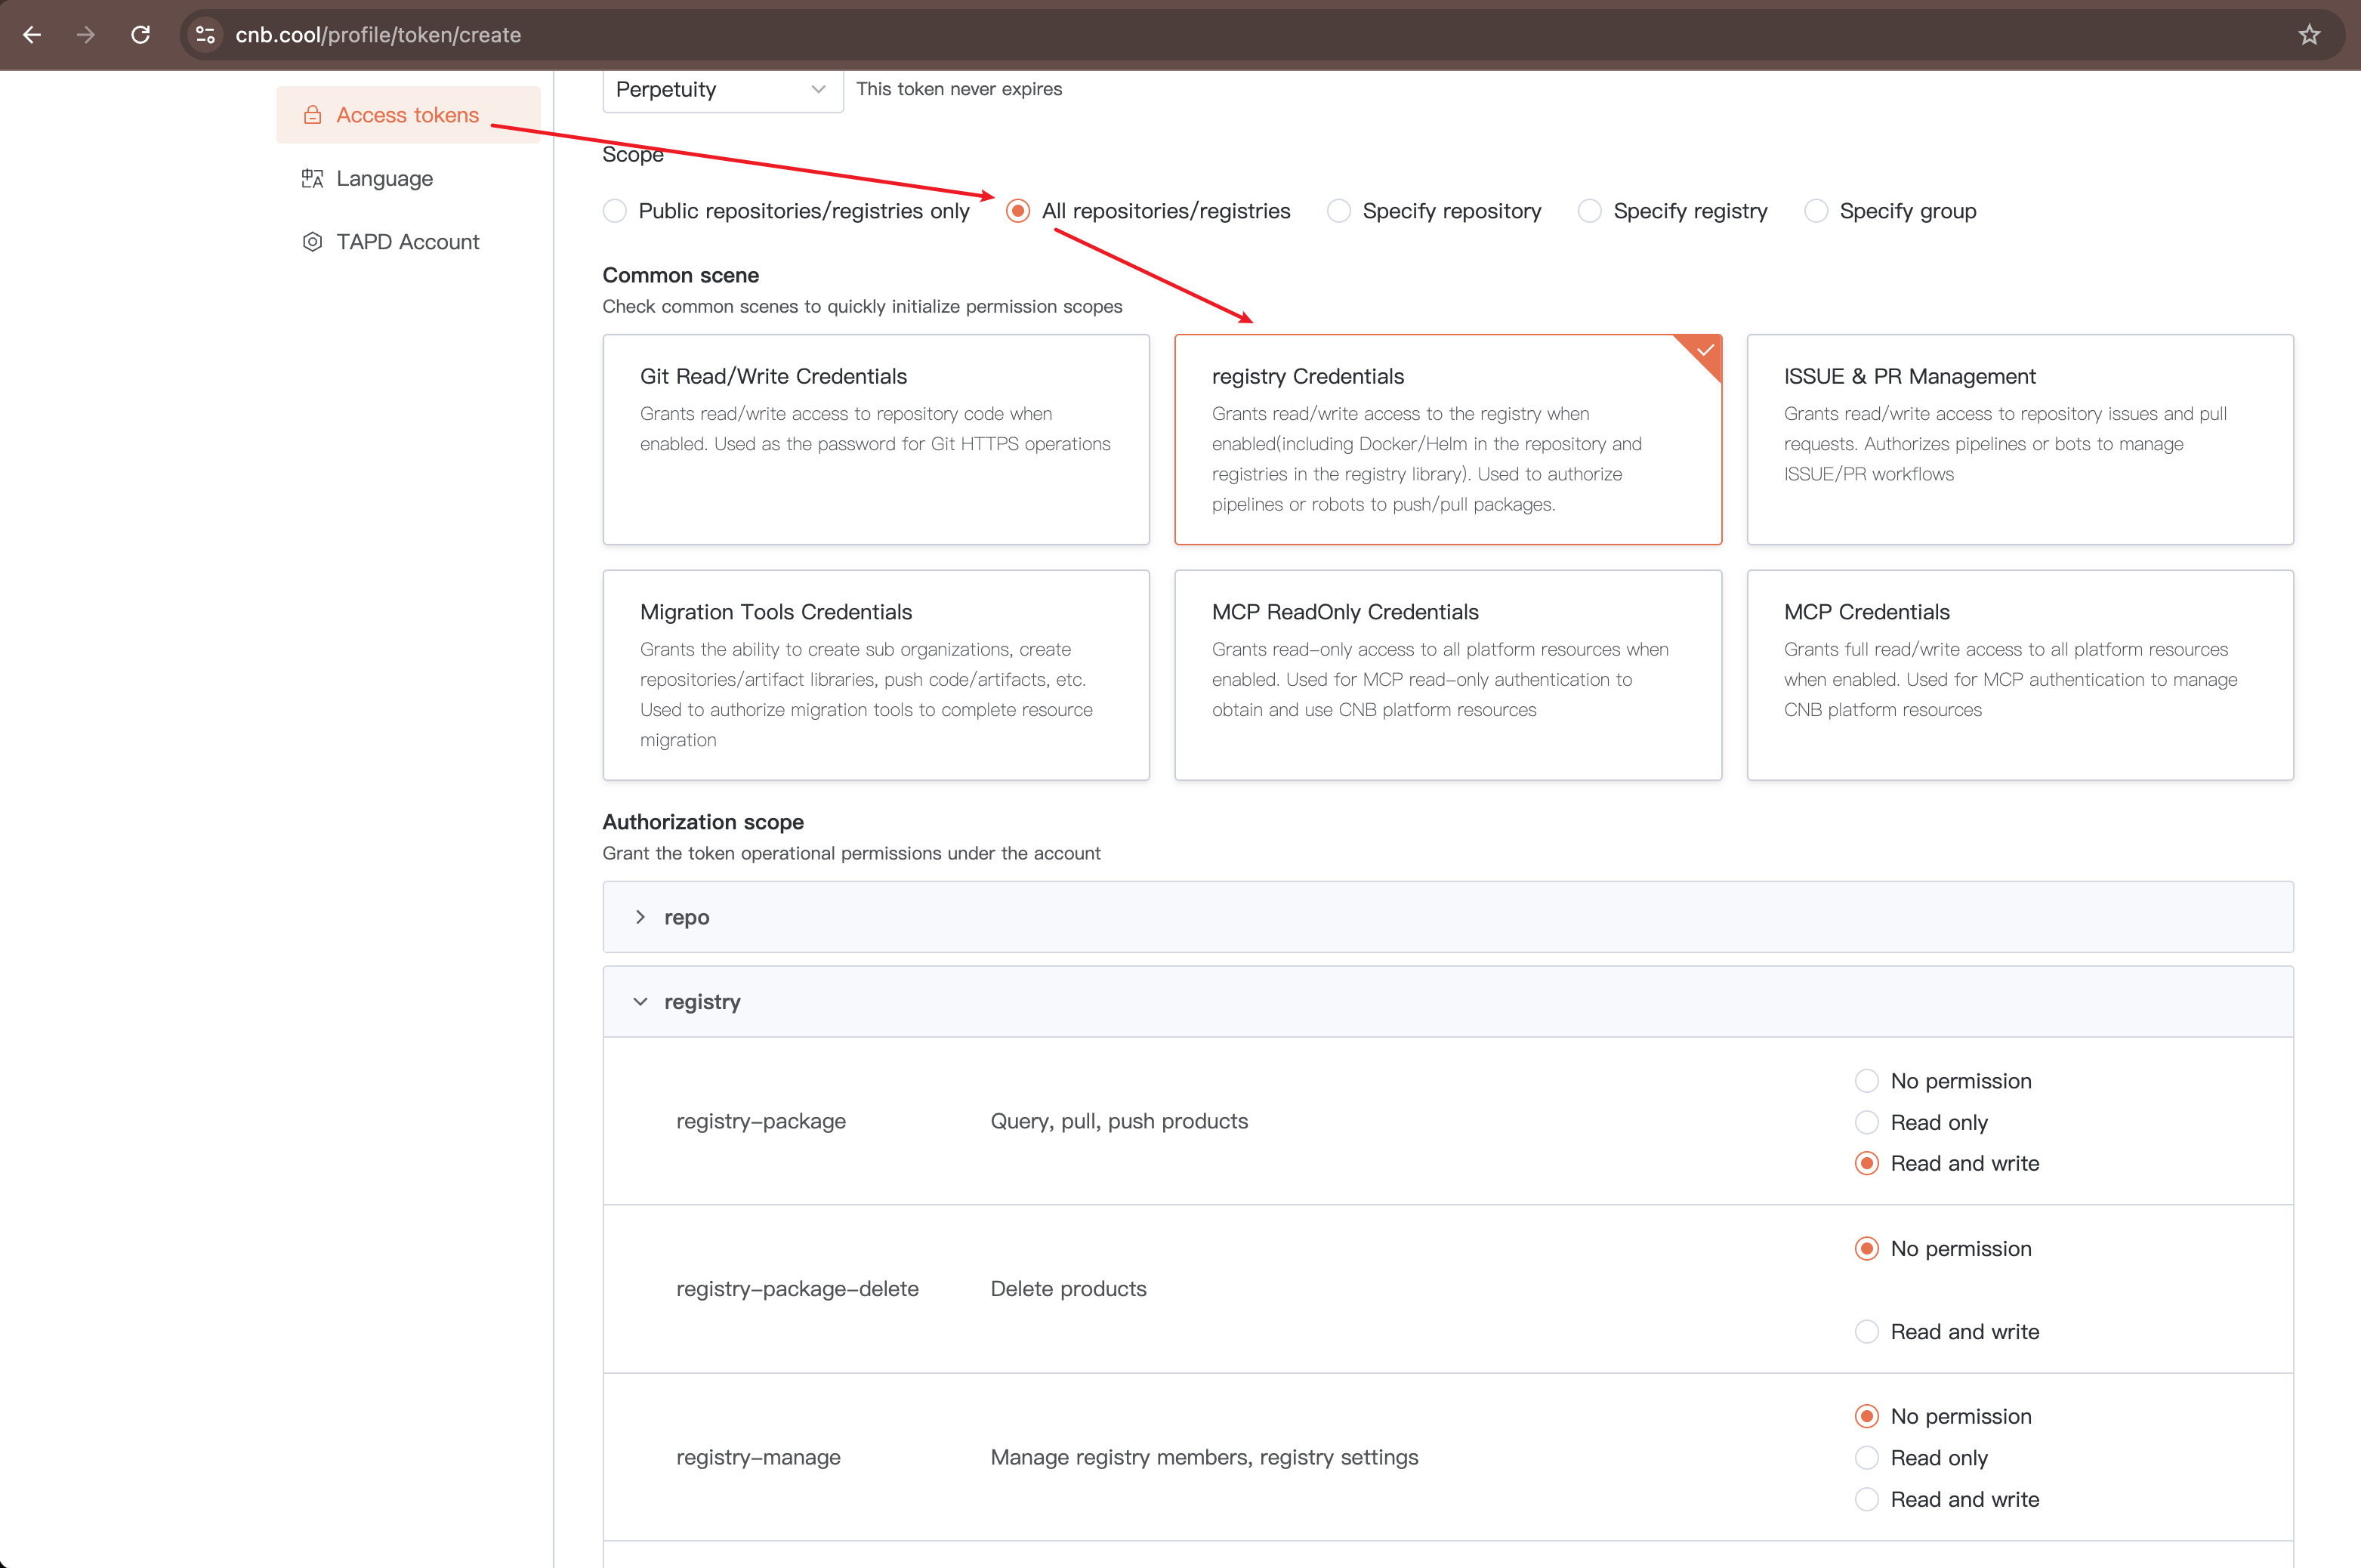
For access token permissions, only the "Authorization Scope" registry section needs attention.
When selecting "Common Scenarios" as "Artifact Registry," only registry-package read/write permissions are granted by default.
If you need to delete artifacts via command-line tools (e.g., npm unpublish), you must also check registry-package-delete read/write permissions.
Additionally, "Specify Artifact Registry" in "Usage Scope" cannot select Docker, Helm, and Docker Model artifacts. Instead, select "Specify Repository" and then set "Common Scenarios" to "Artifact Registry."
Using Tokens in Workspaces and Cloud Native Build
There are three ways to use tokens:
- Directly use environment variables
${CNB_TOKEN_USER_NAME}${CNB_TOKEN}(recommended) - Manually create an
access tokenand use it directly (not recommended) - Manually create an
access token, write it to the Secret Registry, and then import it as an environment variable (neutral)
About Method 1:
CNB provides built-in access tokens for Workspaces and Cloud Native Build (CI pipelines). If no special requirements exist, you can directly use these environment variables without manually creating additional access tokens. For details about the permissions of this access token, refer to CNB_TOKEN.
Capacity Statistics
Billing is based on the storage space occupied by artifacts hosted on CNB.
- For Docker/Helm/Docker Model, you can view the capacity occupied by each artifact in "Repository" > "Settings" > "Usage"
- For other artifact types, you can view the capacity occupied by each artifact in "Artifact Registry" > "Registry Settings" > "Usage"
PS: For Docker/Docker Model artifacts, duplicate base images are deduplicated before calculating capacity.
Artifact Migration
If you need to batch migrate artifacts from other registries to the CNB Artifact Registry, you can refer to and use the CNB Artifact Migration Tool.