Missions Introduction
Missions is a collaborative tool for CNB projects, providing visual task boards to help teams centrally manage Issues/PRs across organizations/repositories.
Creating Missions
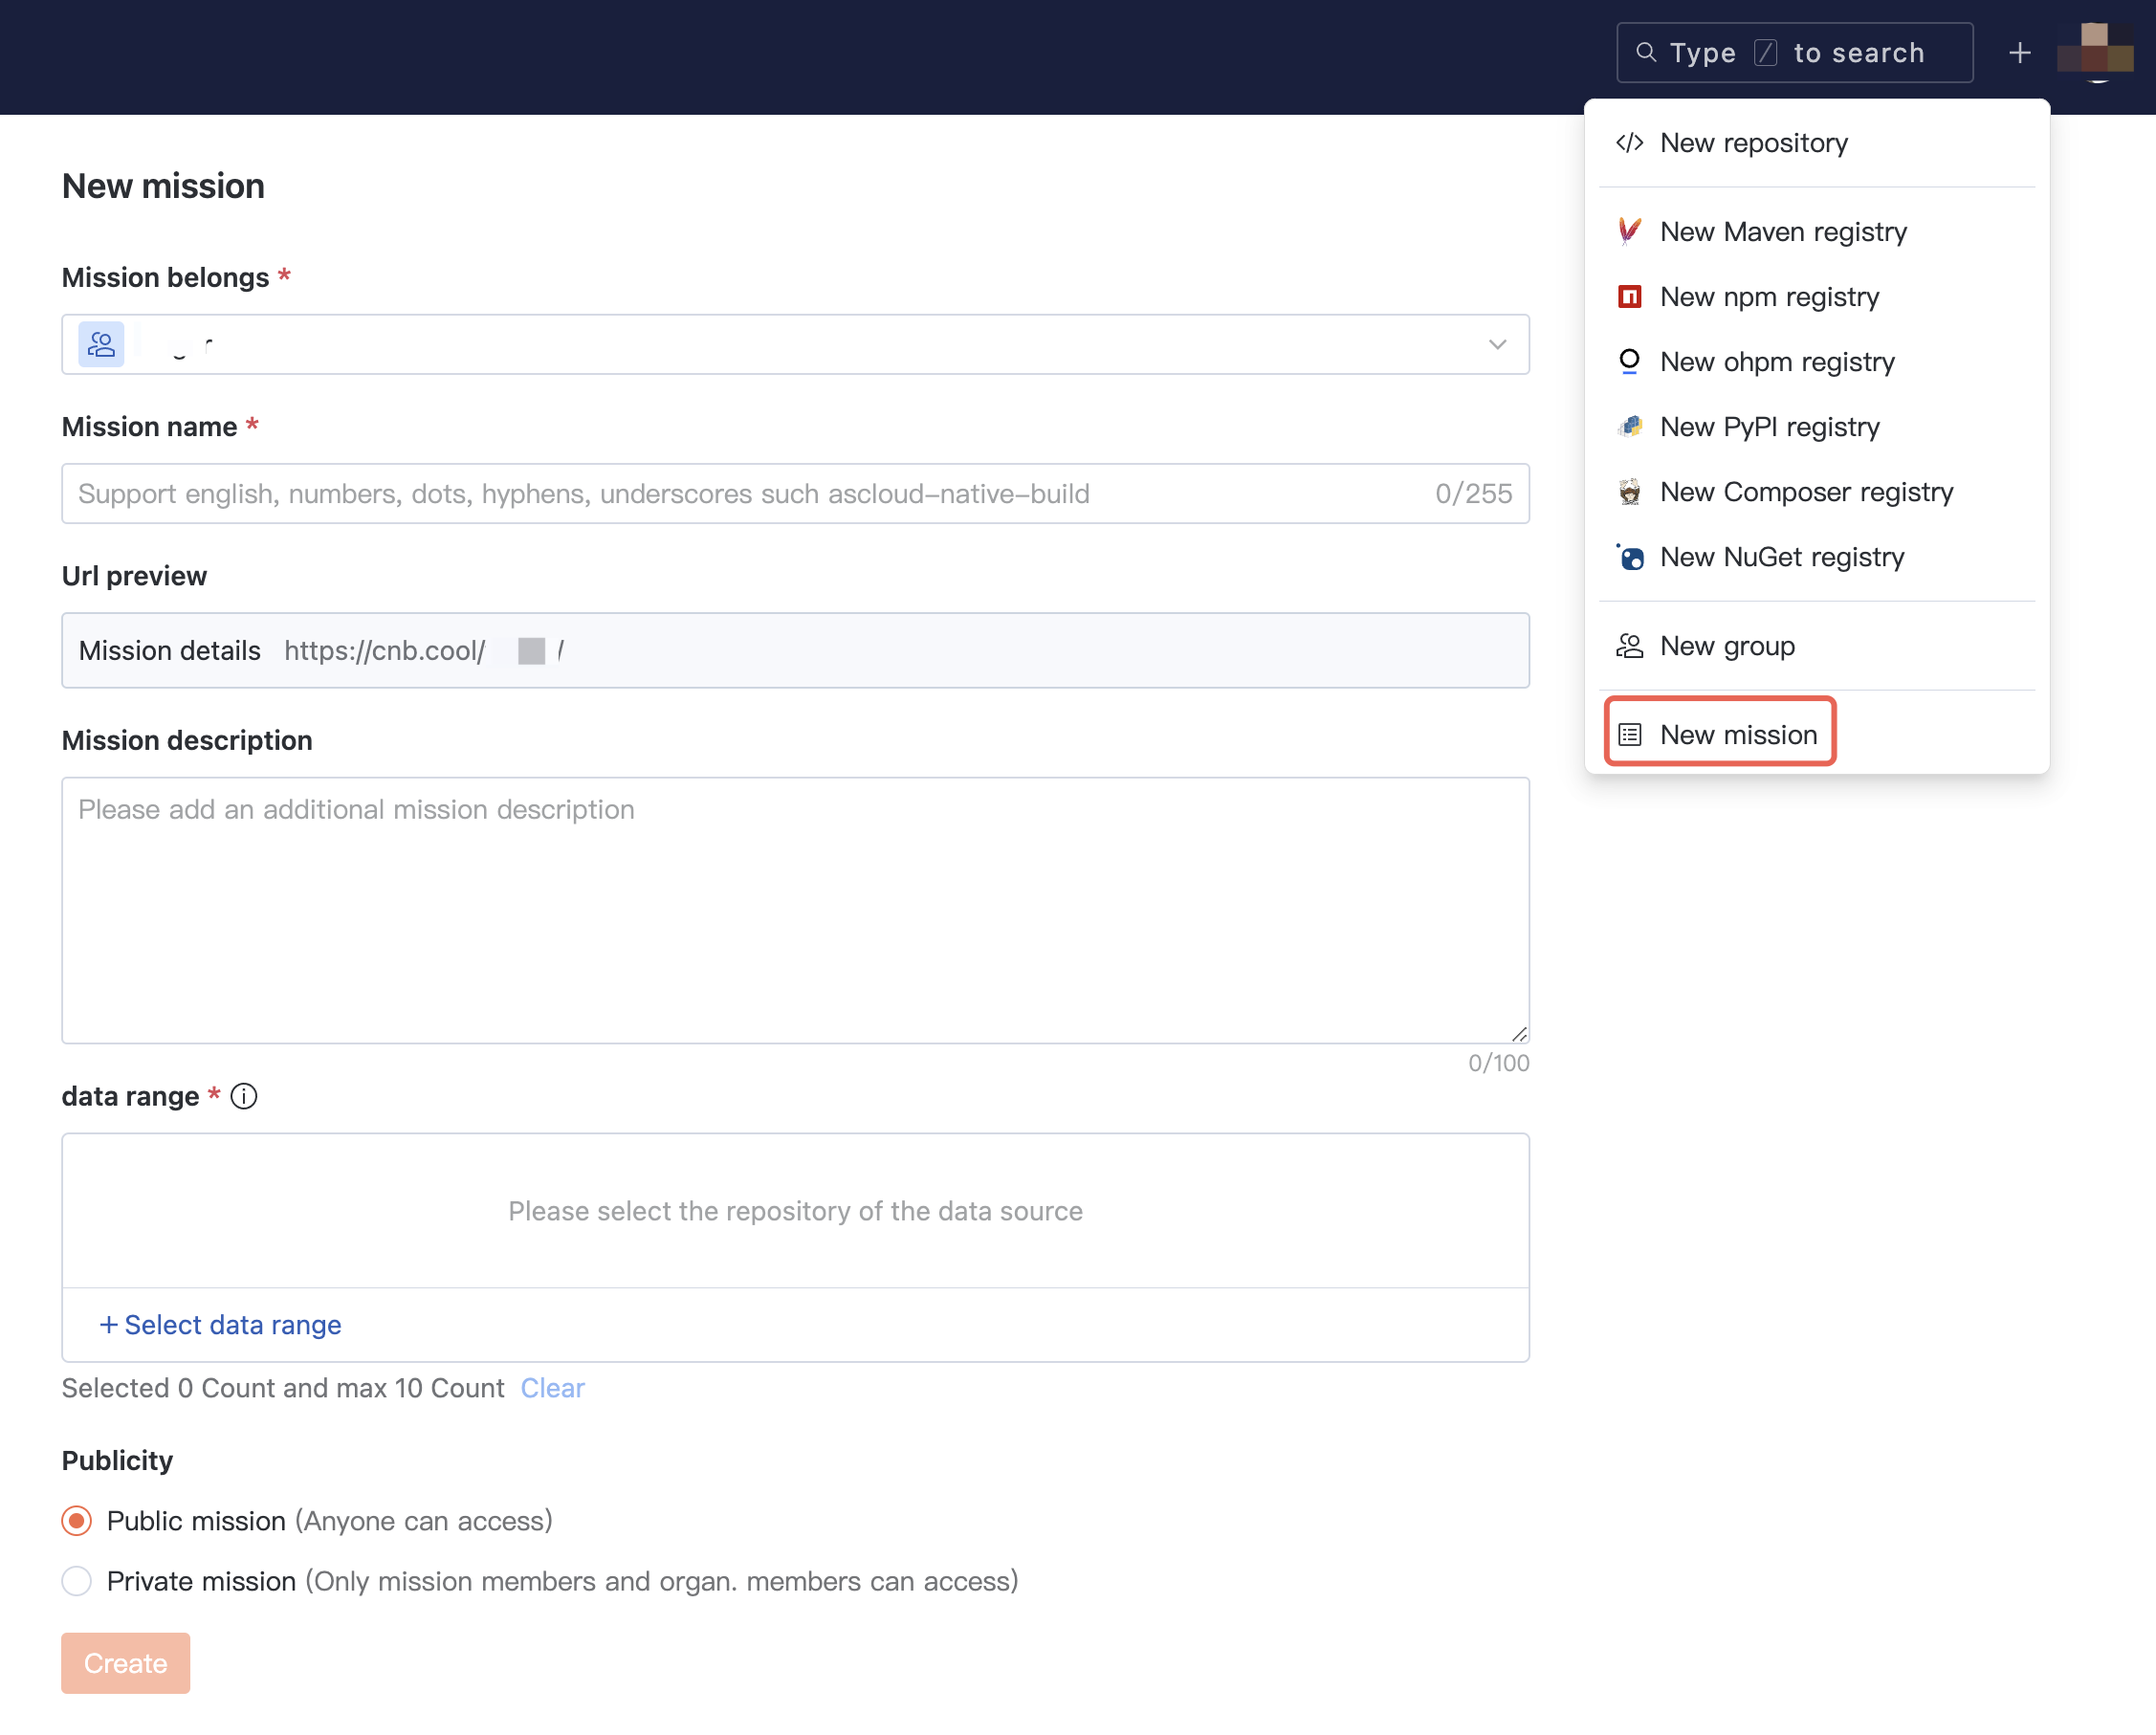
Go to CNB, click the "+" in the top right corner, and select Create Mission;
Or under the organization directory, go to Missions, and click Create Mission in the mission list.
Mission Name: The identifier of the mission, which also forms the access path
Data Scope: Select repositories; the mission will automatically read Issues/PRs from the selected repositories as data sources
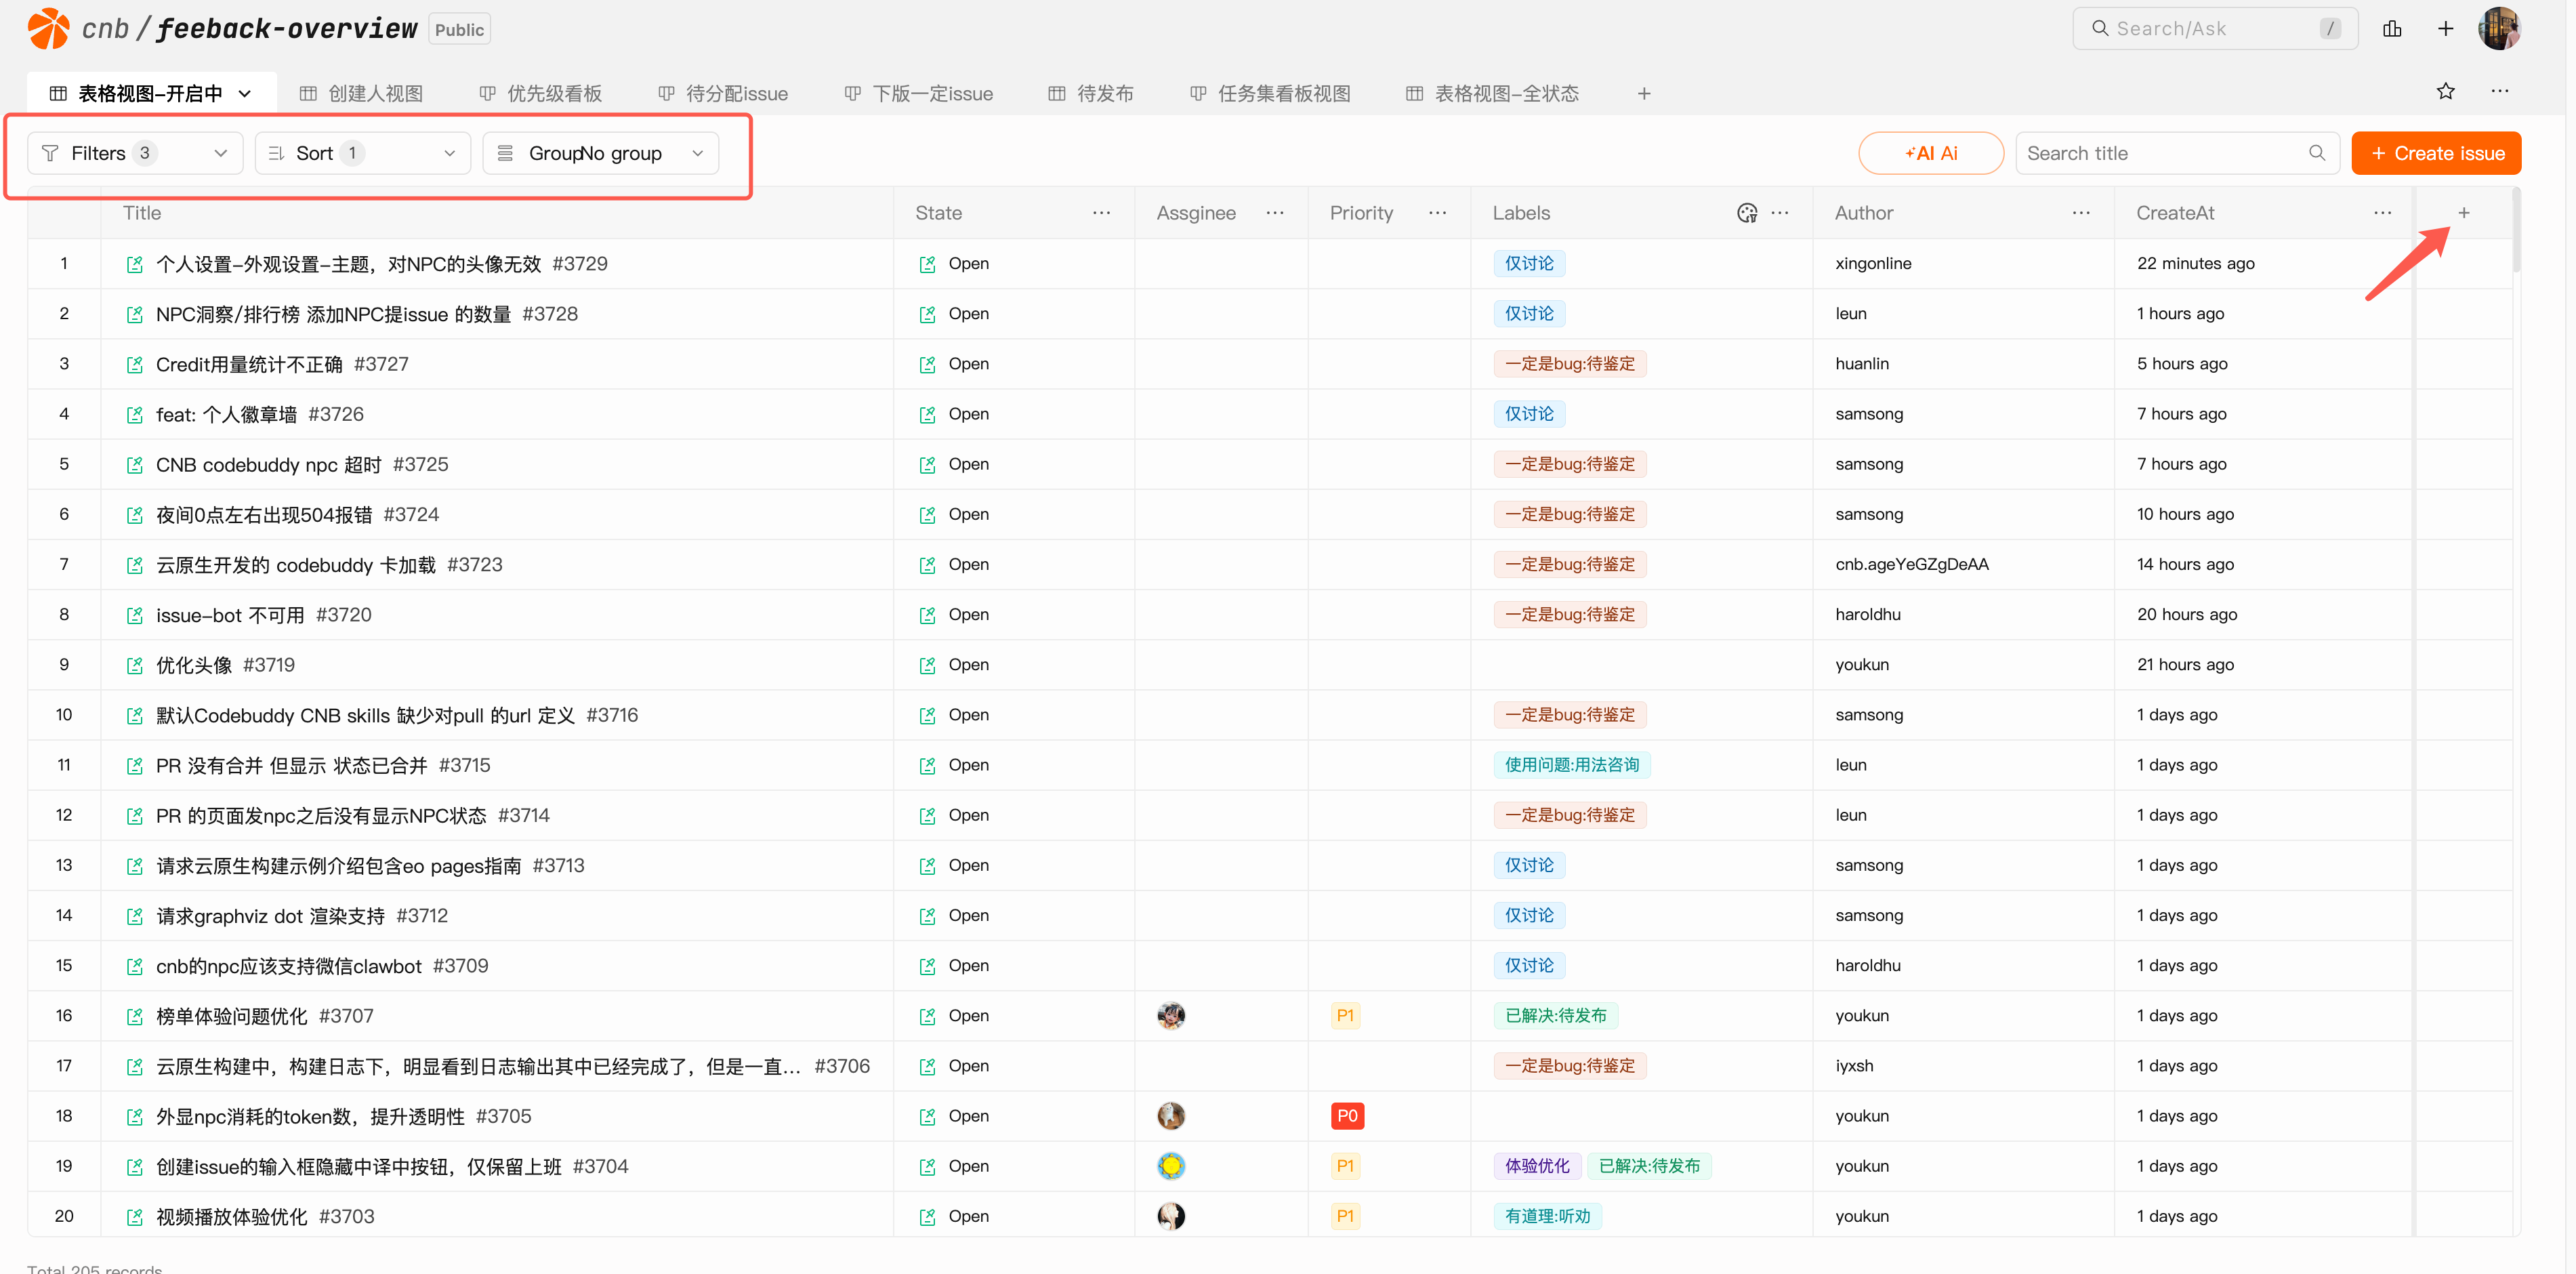
Mission Views
In missions, you can:
- Freely create and switch between table view, kanban view, and Gantt view to manage Issues/PRs from different perspectives
- Customize view structure through filtering, grouping, and sorting
- Quickly create Issues for specified repositories
- Batch modify Issue/PR attributes
- Adjust task priorities by dragging
- Plan Issue start and end times through Gantt view
- Export view data
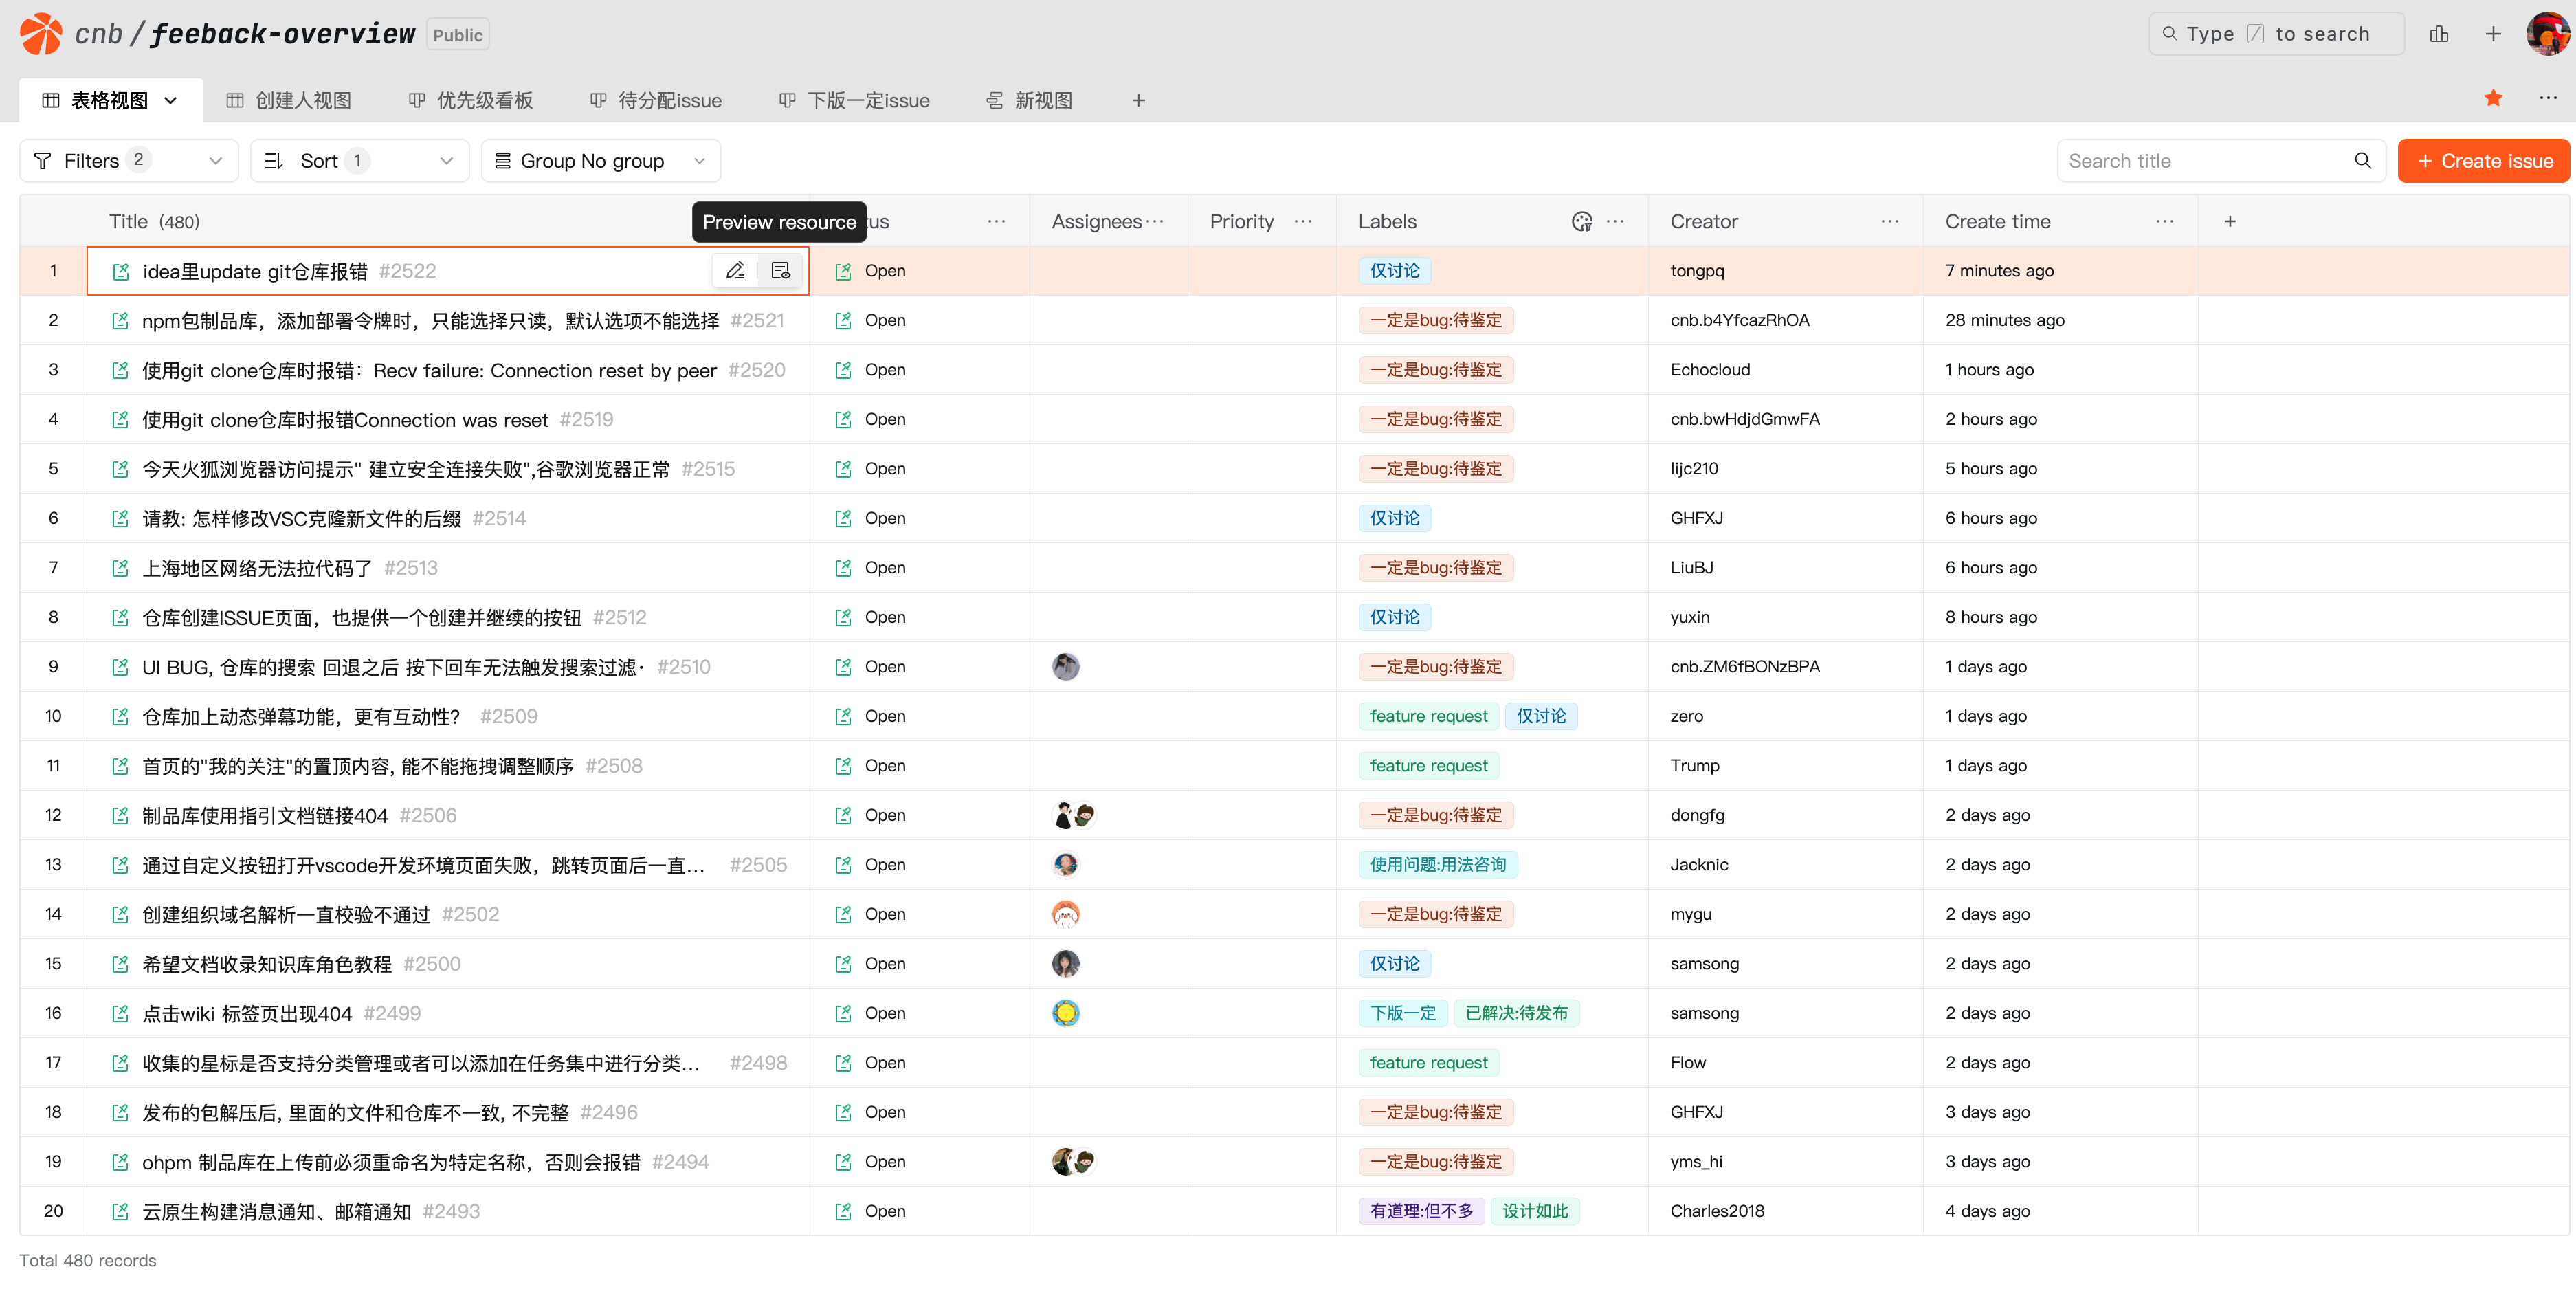
Table view effect is as follows:

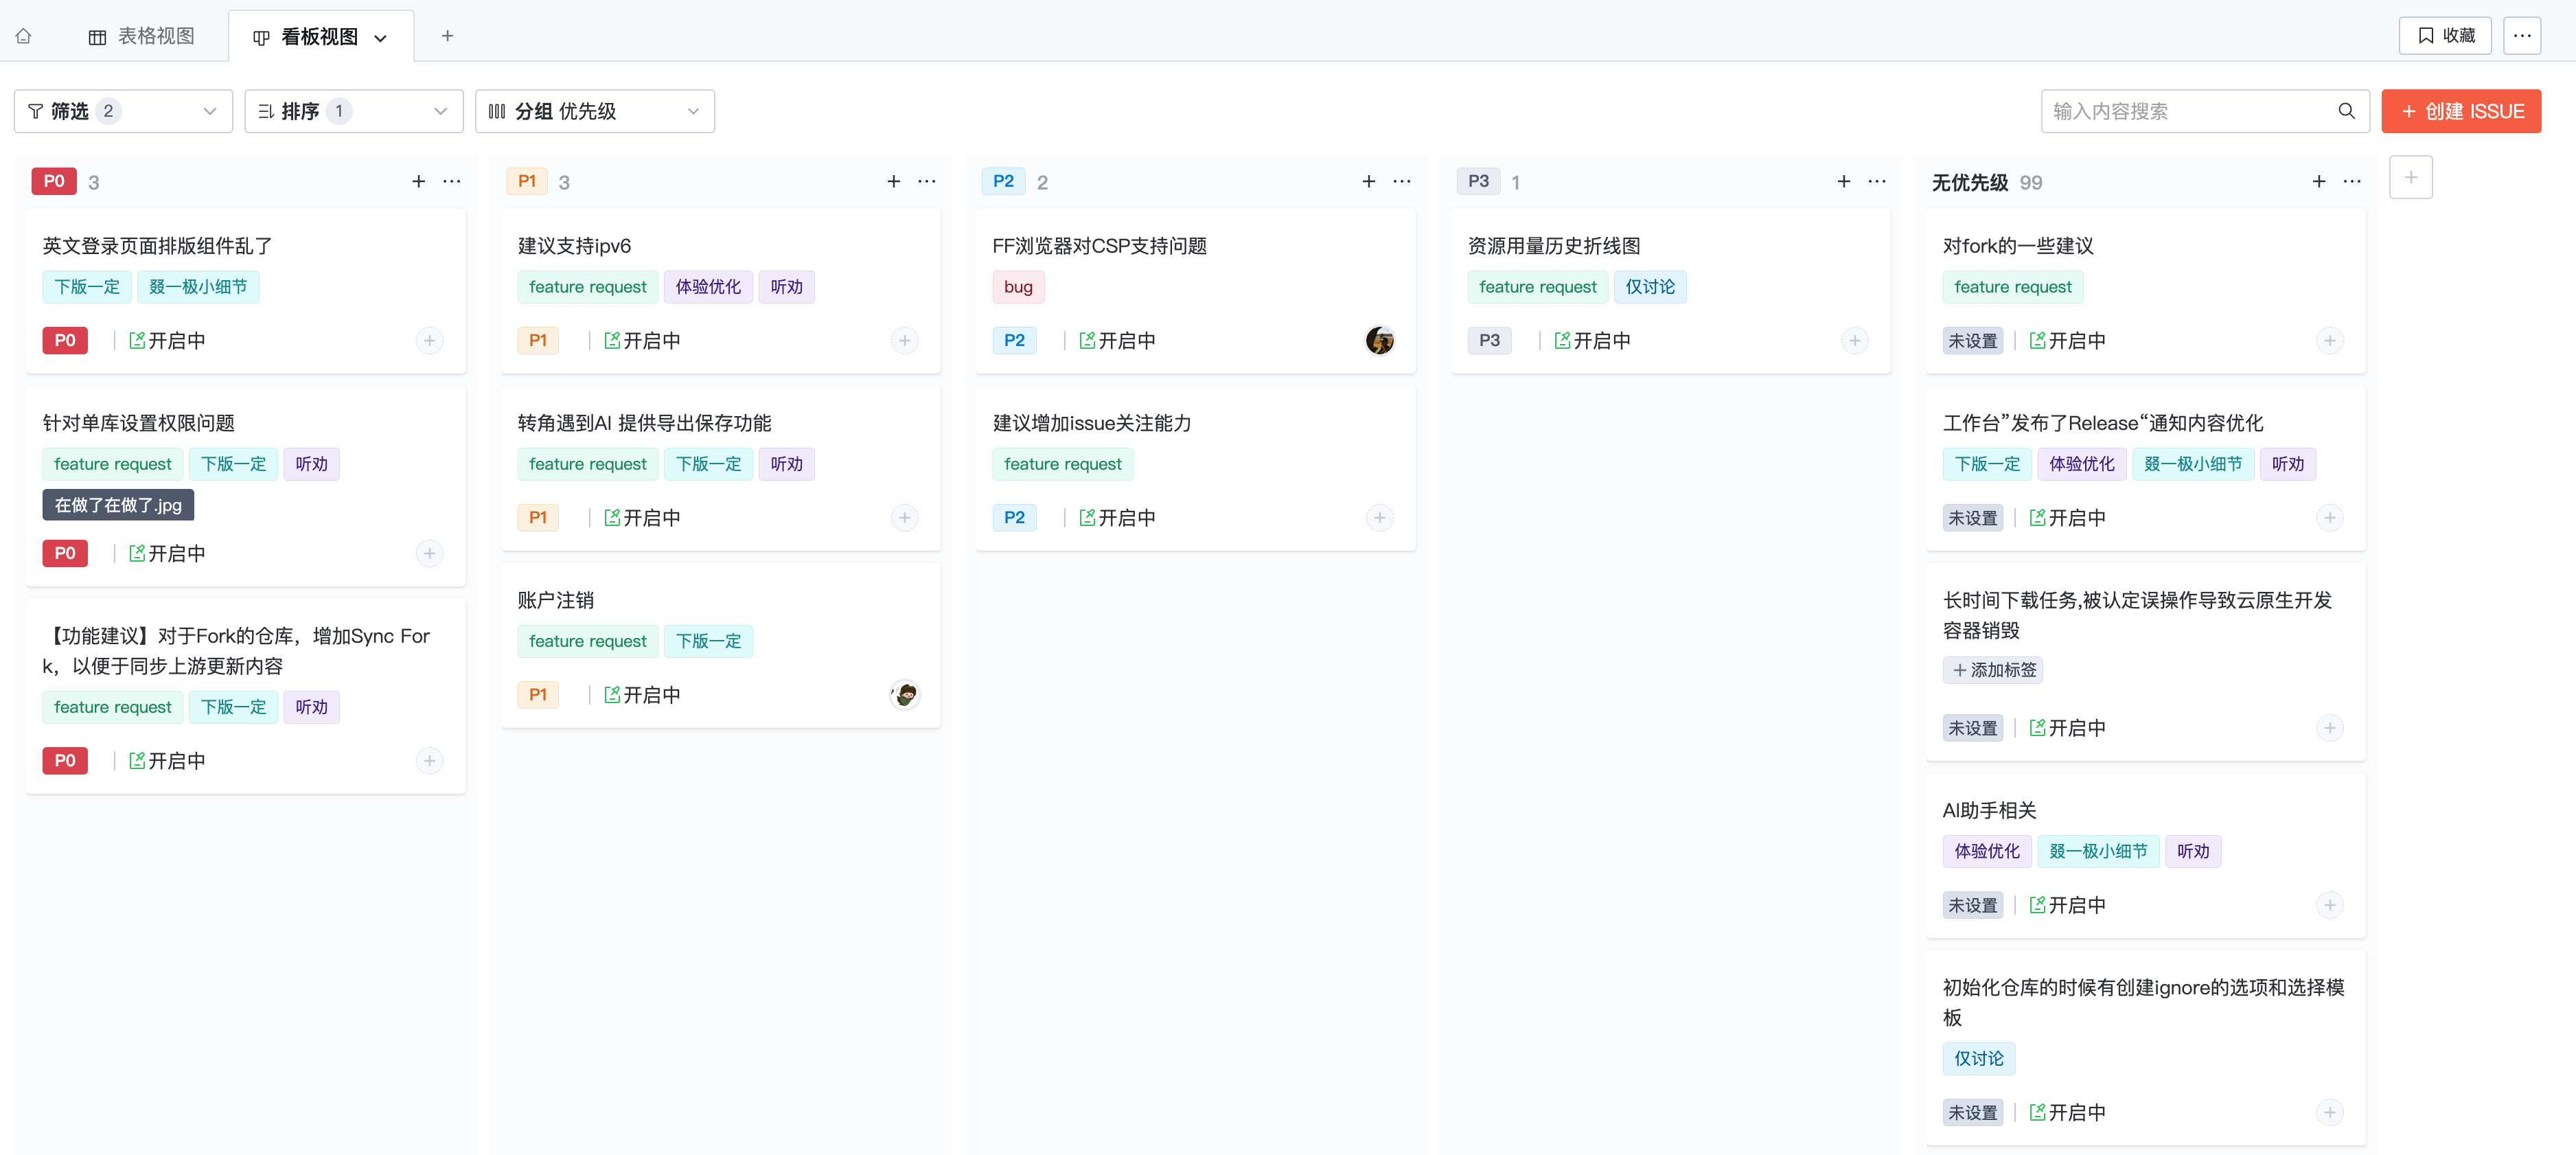
Kanban view effect is as follows:
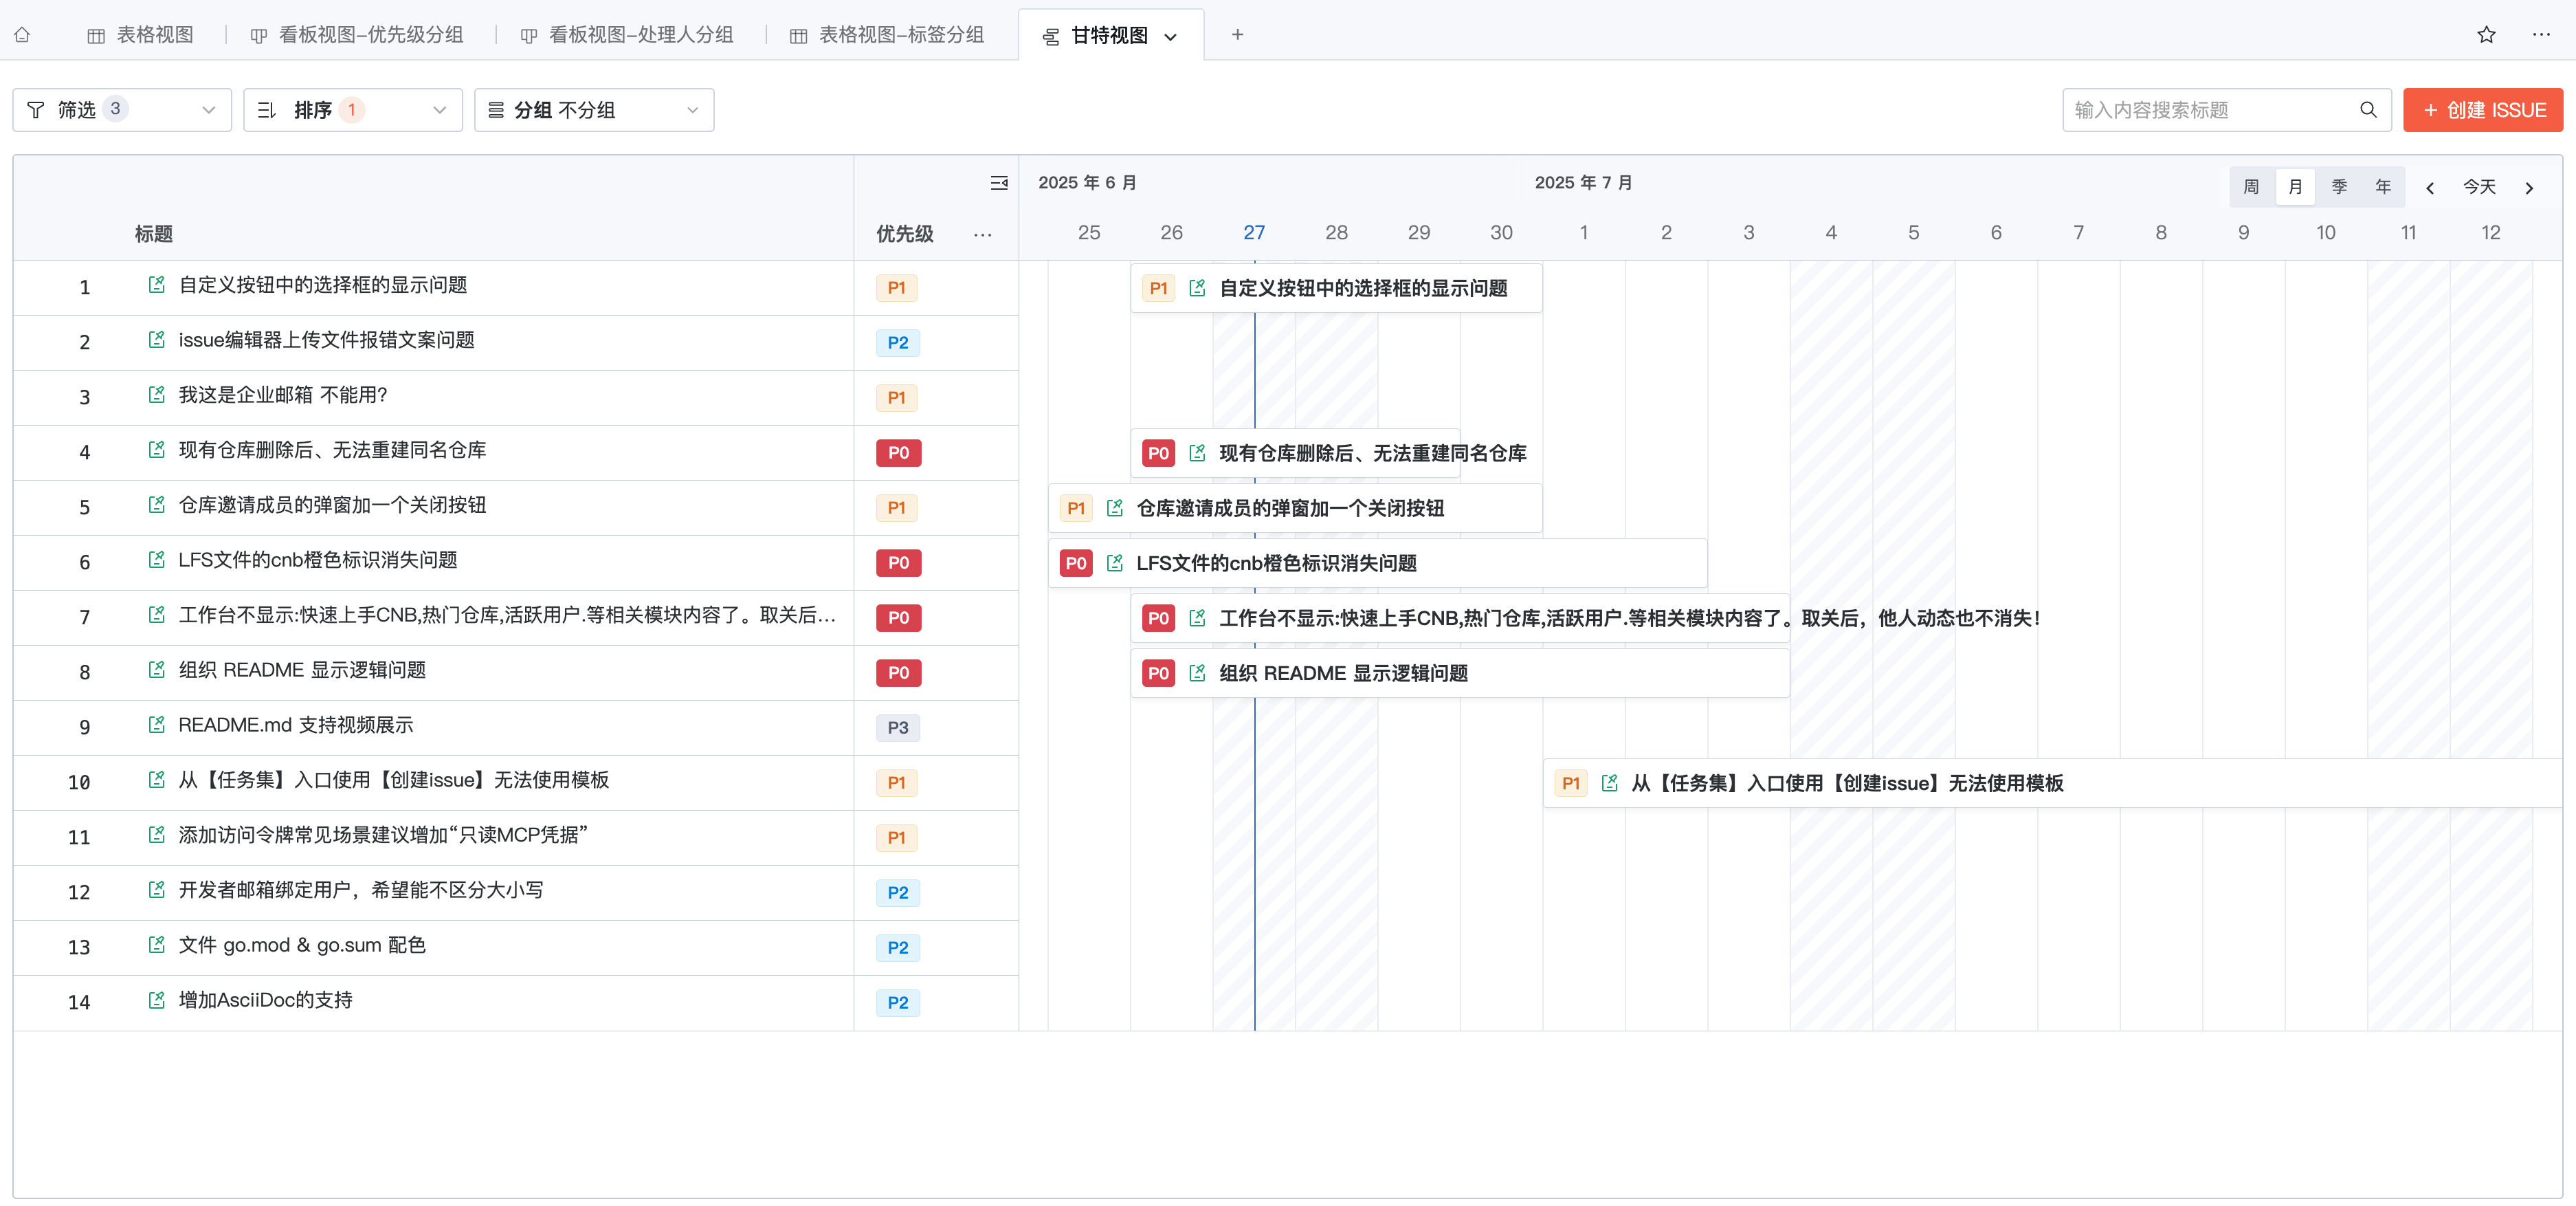
Gantt view effect is as follows:
Mission Practical Features
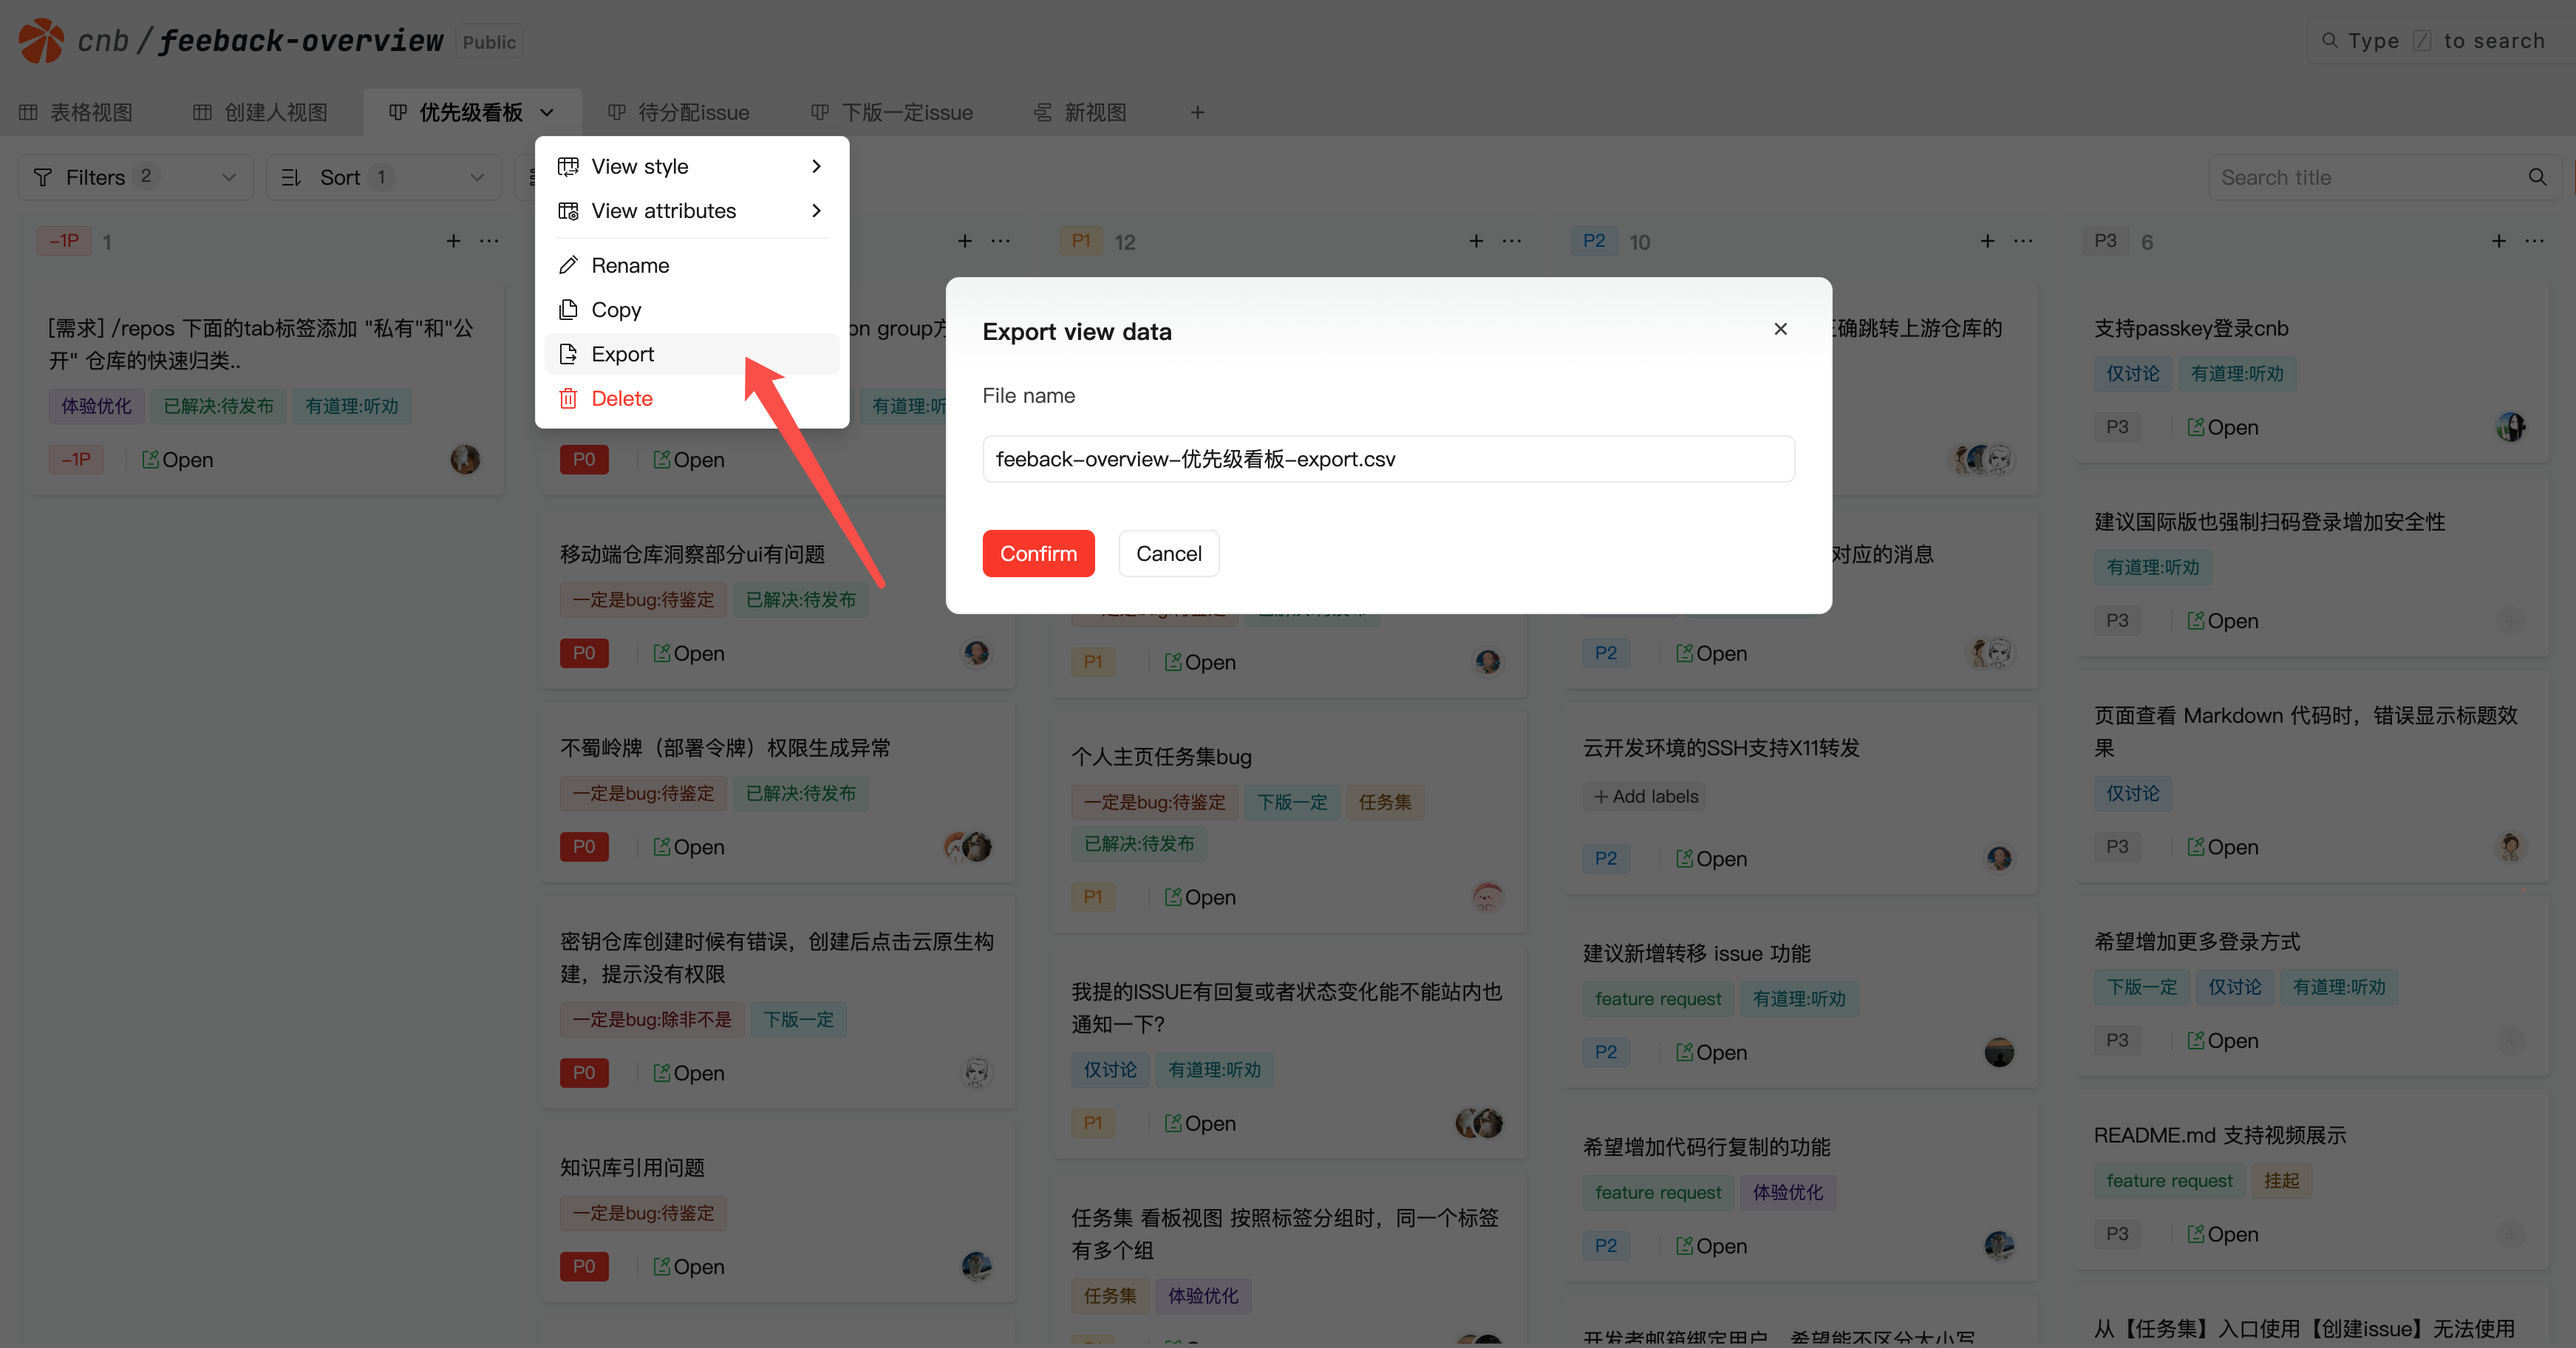
Export View Data
Export data based on view settings such as filtering/sorting.
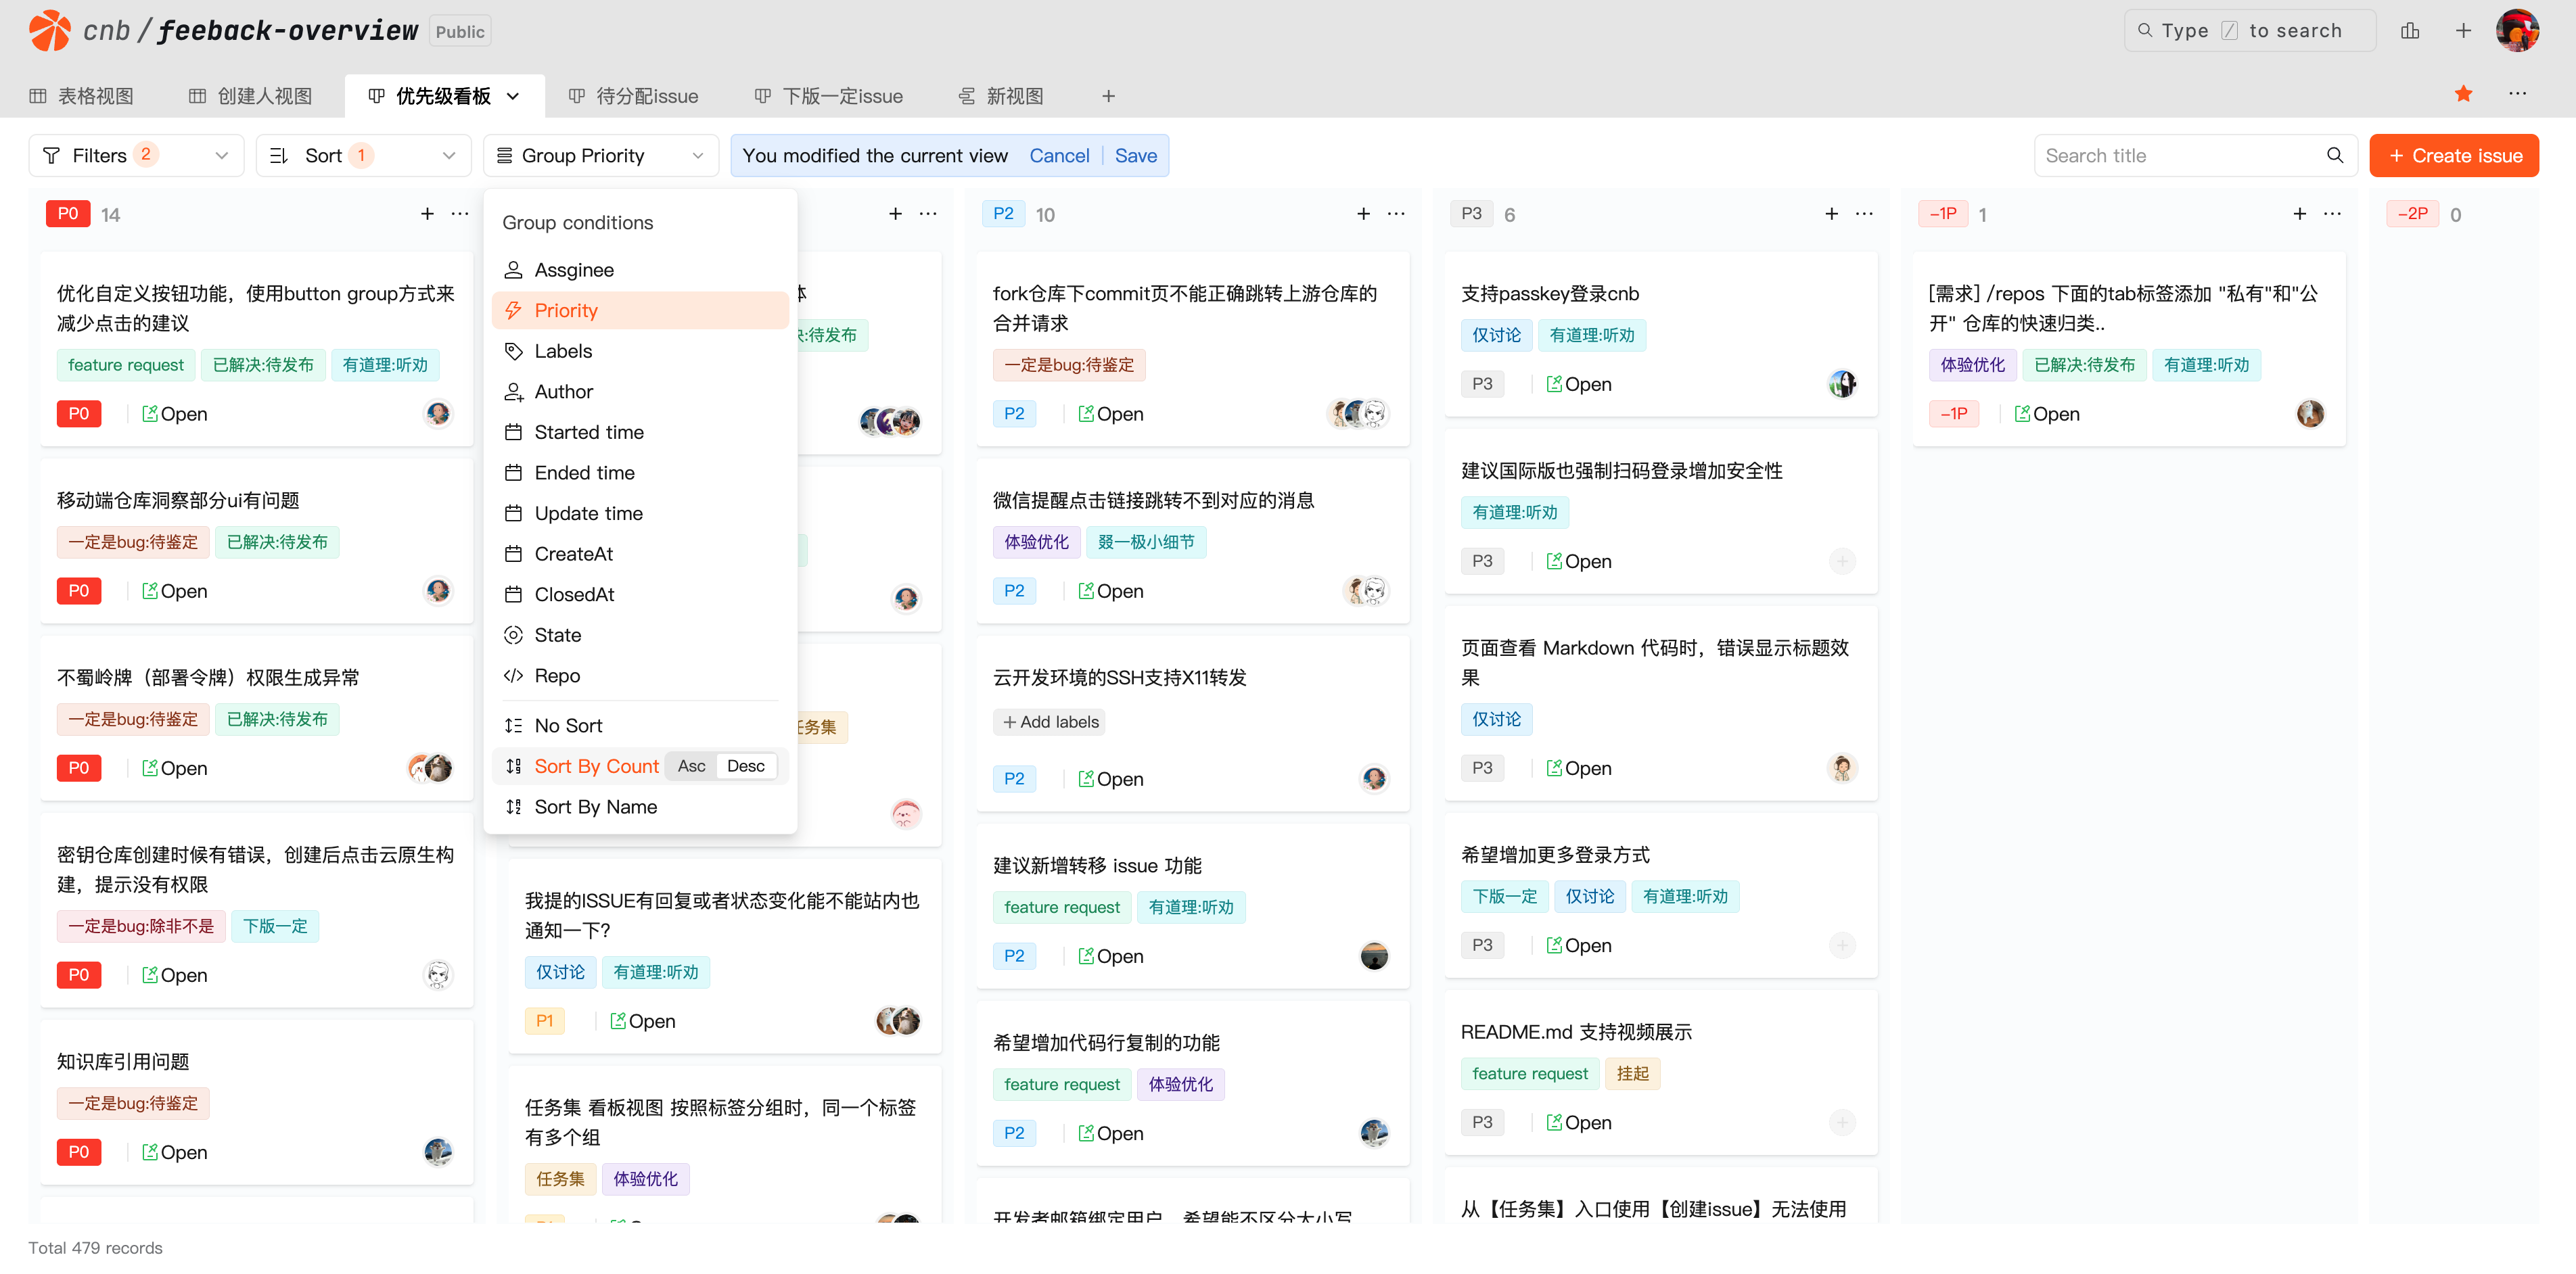
View Grouping and Sorting
After grouping views, you can sort by count/name in ascending/descending order to improve visibility.
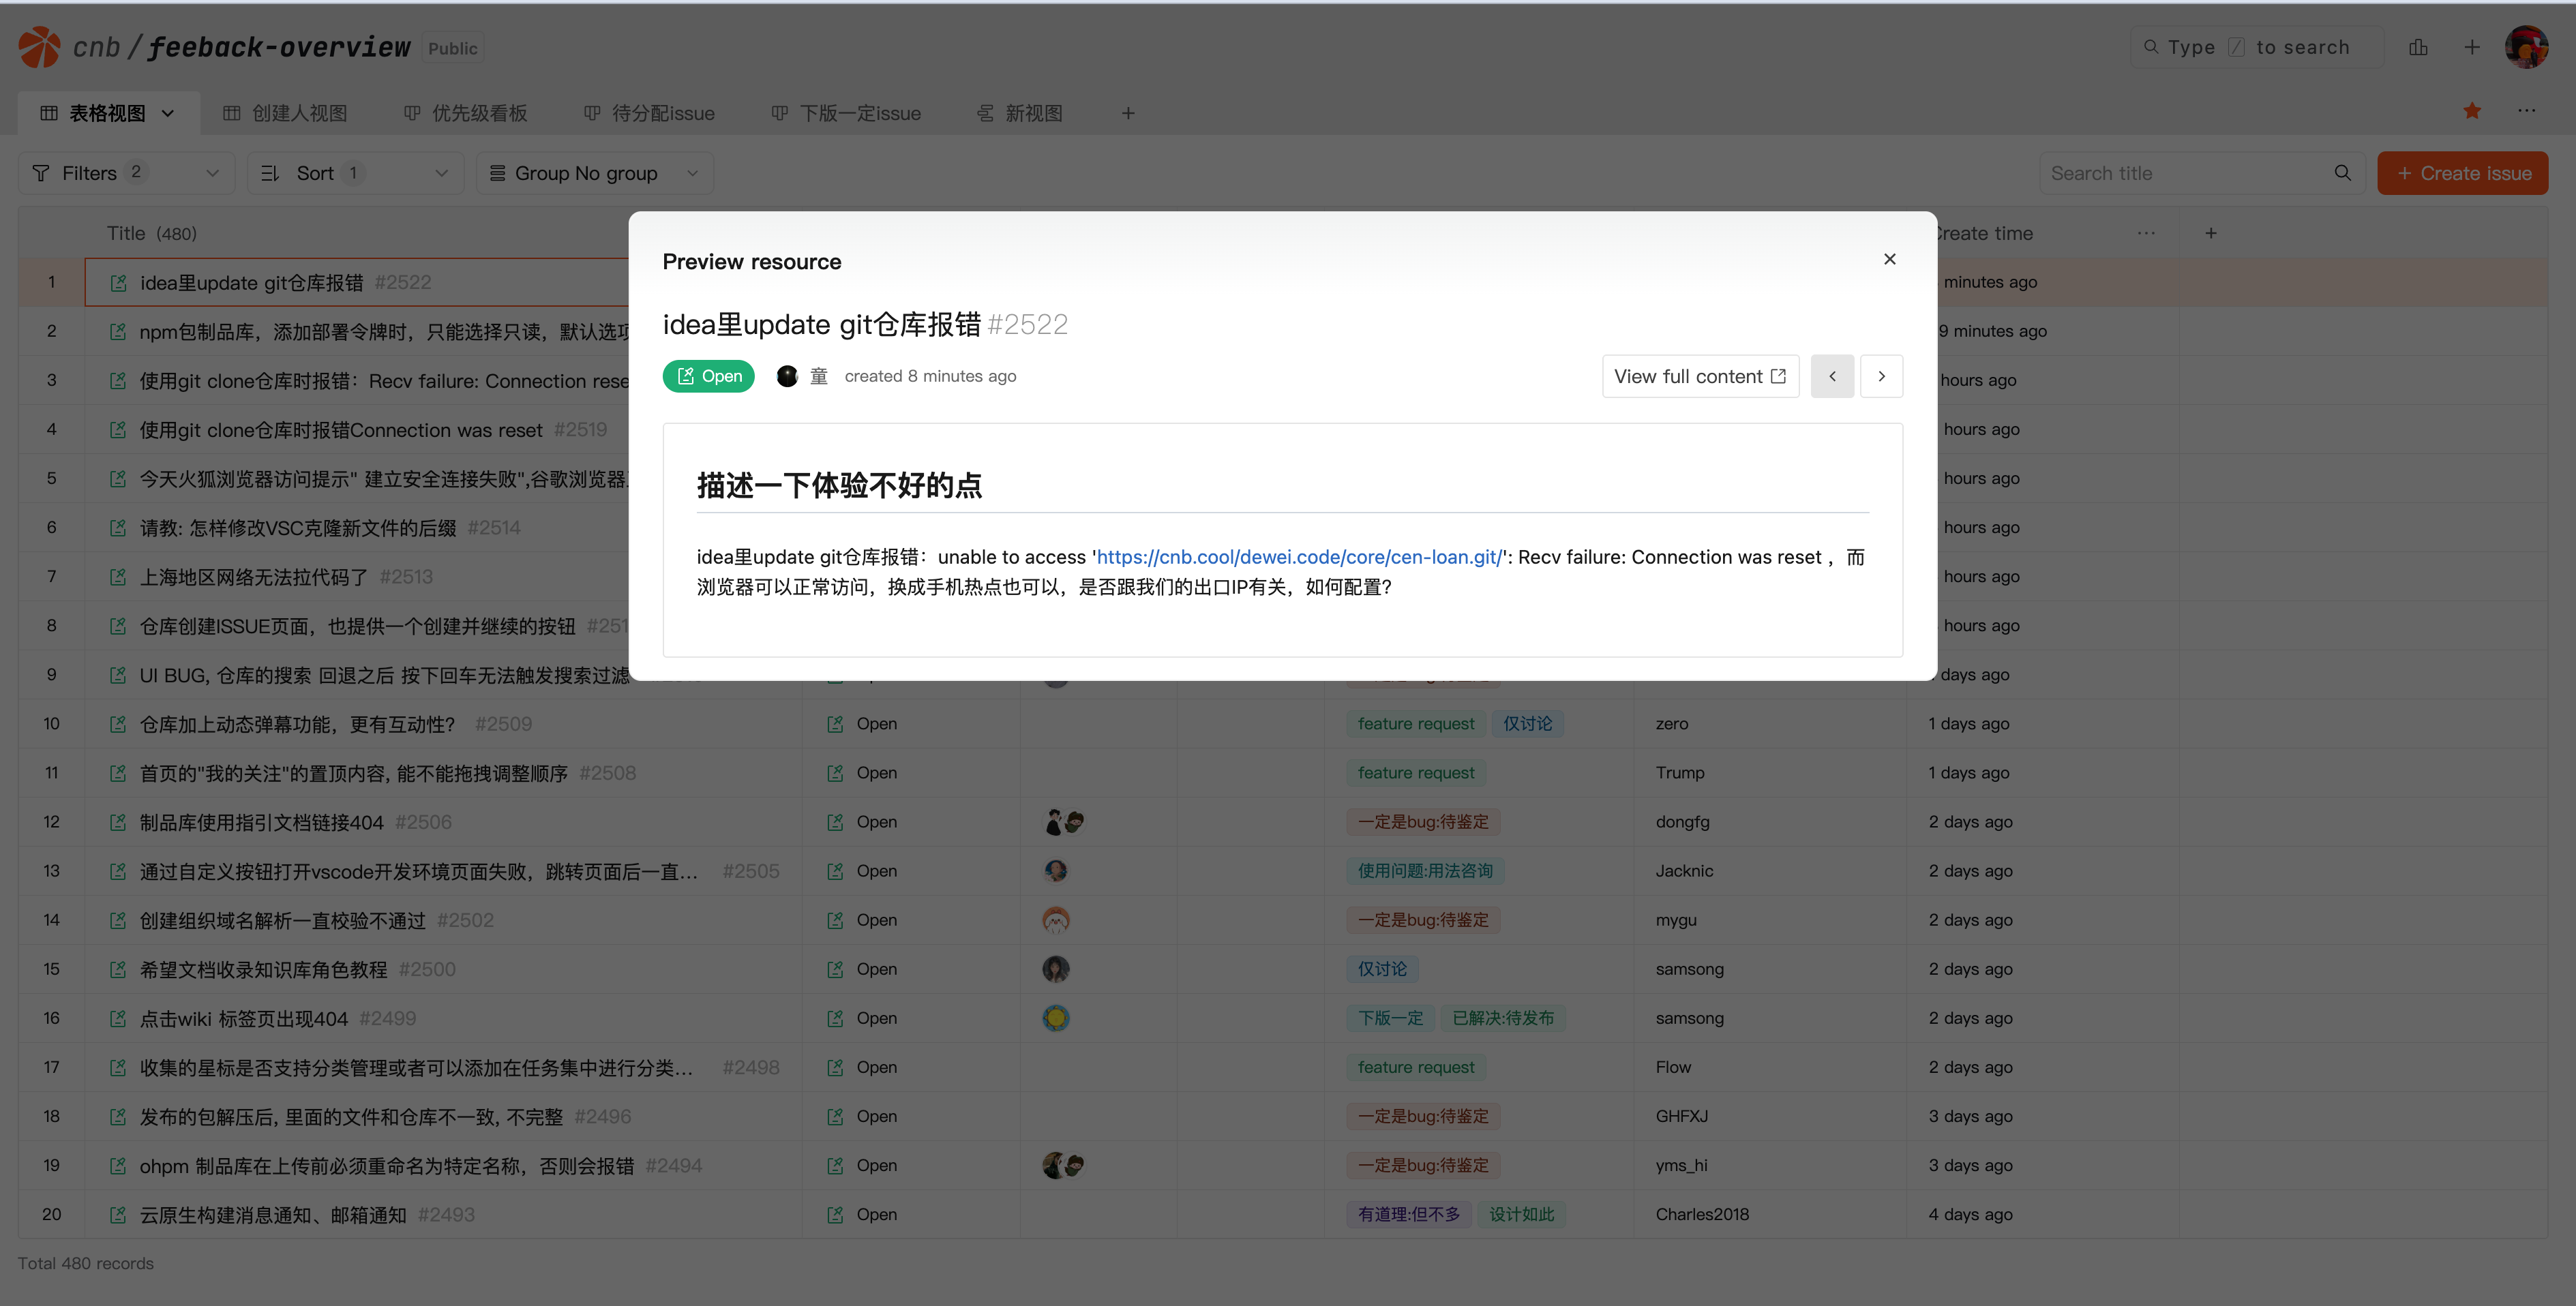
Quick Preview
Allow users to quickly preview items, boosting efficiency.
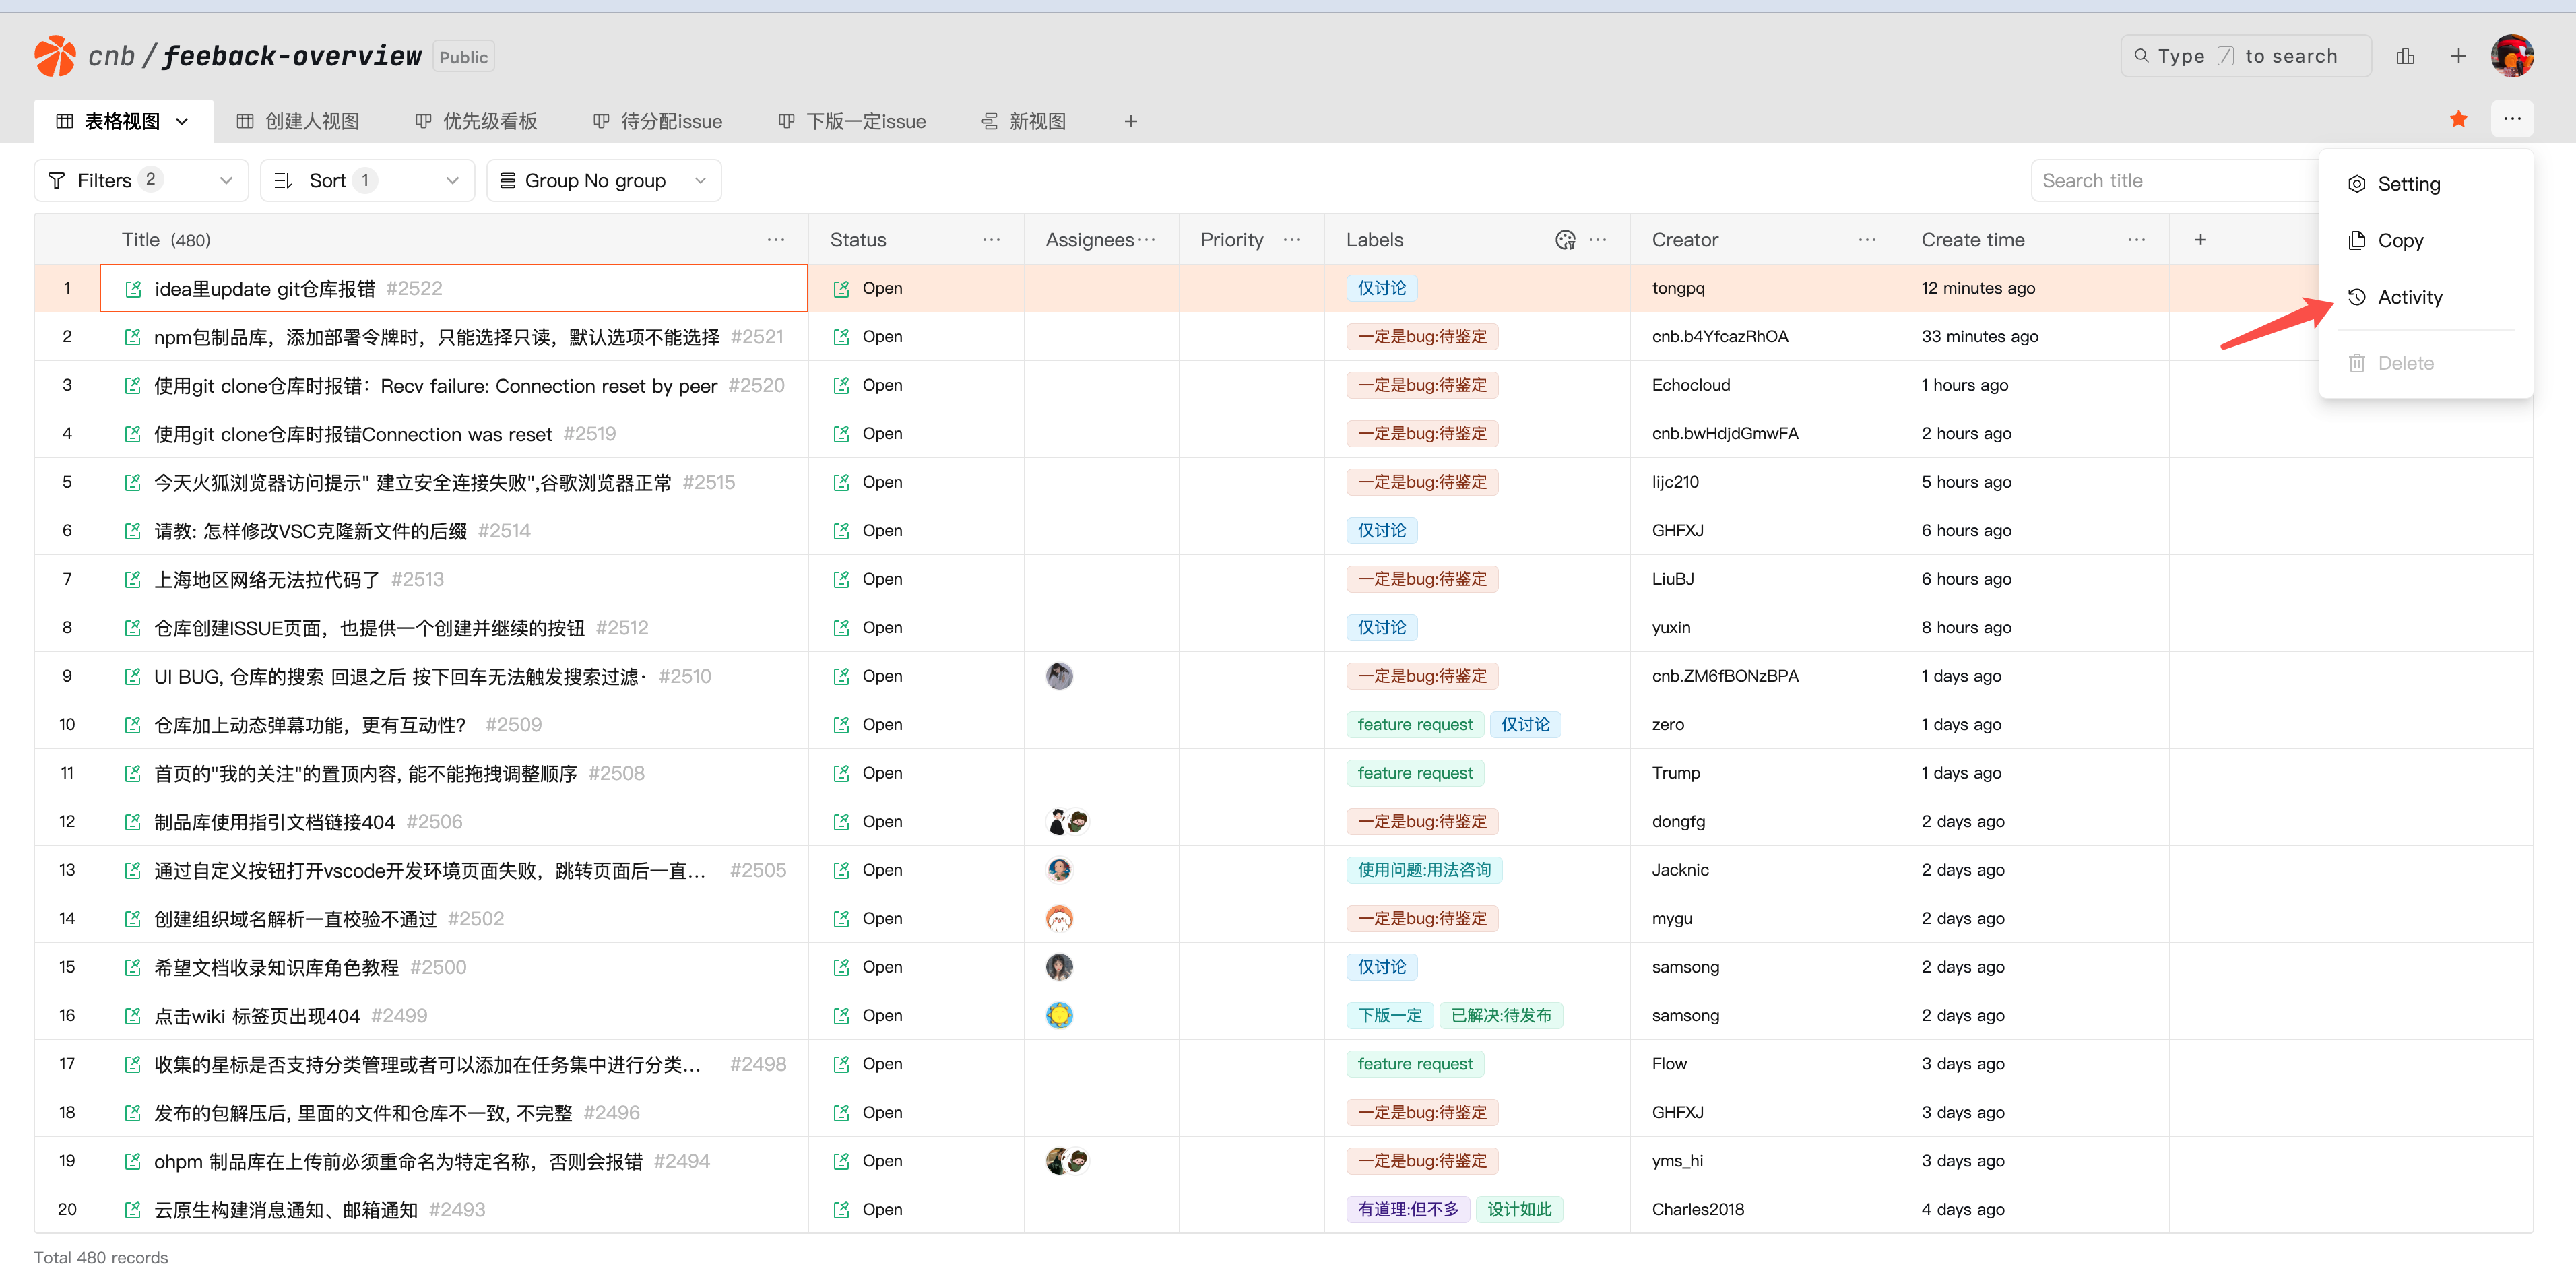
Mission Activity
Record key operations in missions.

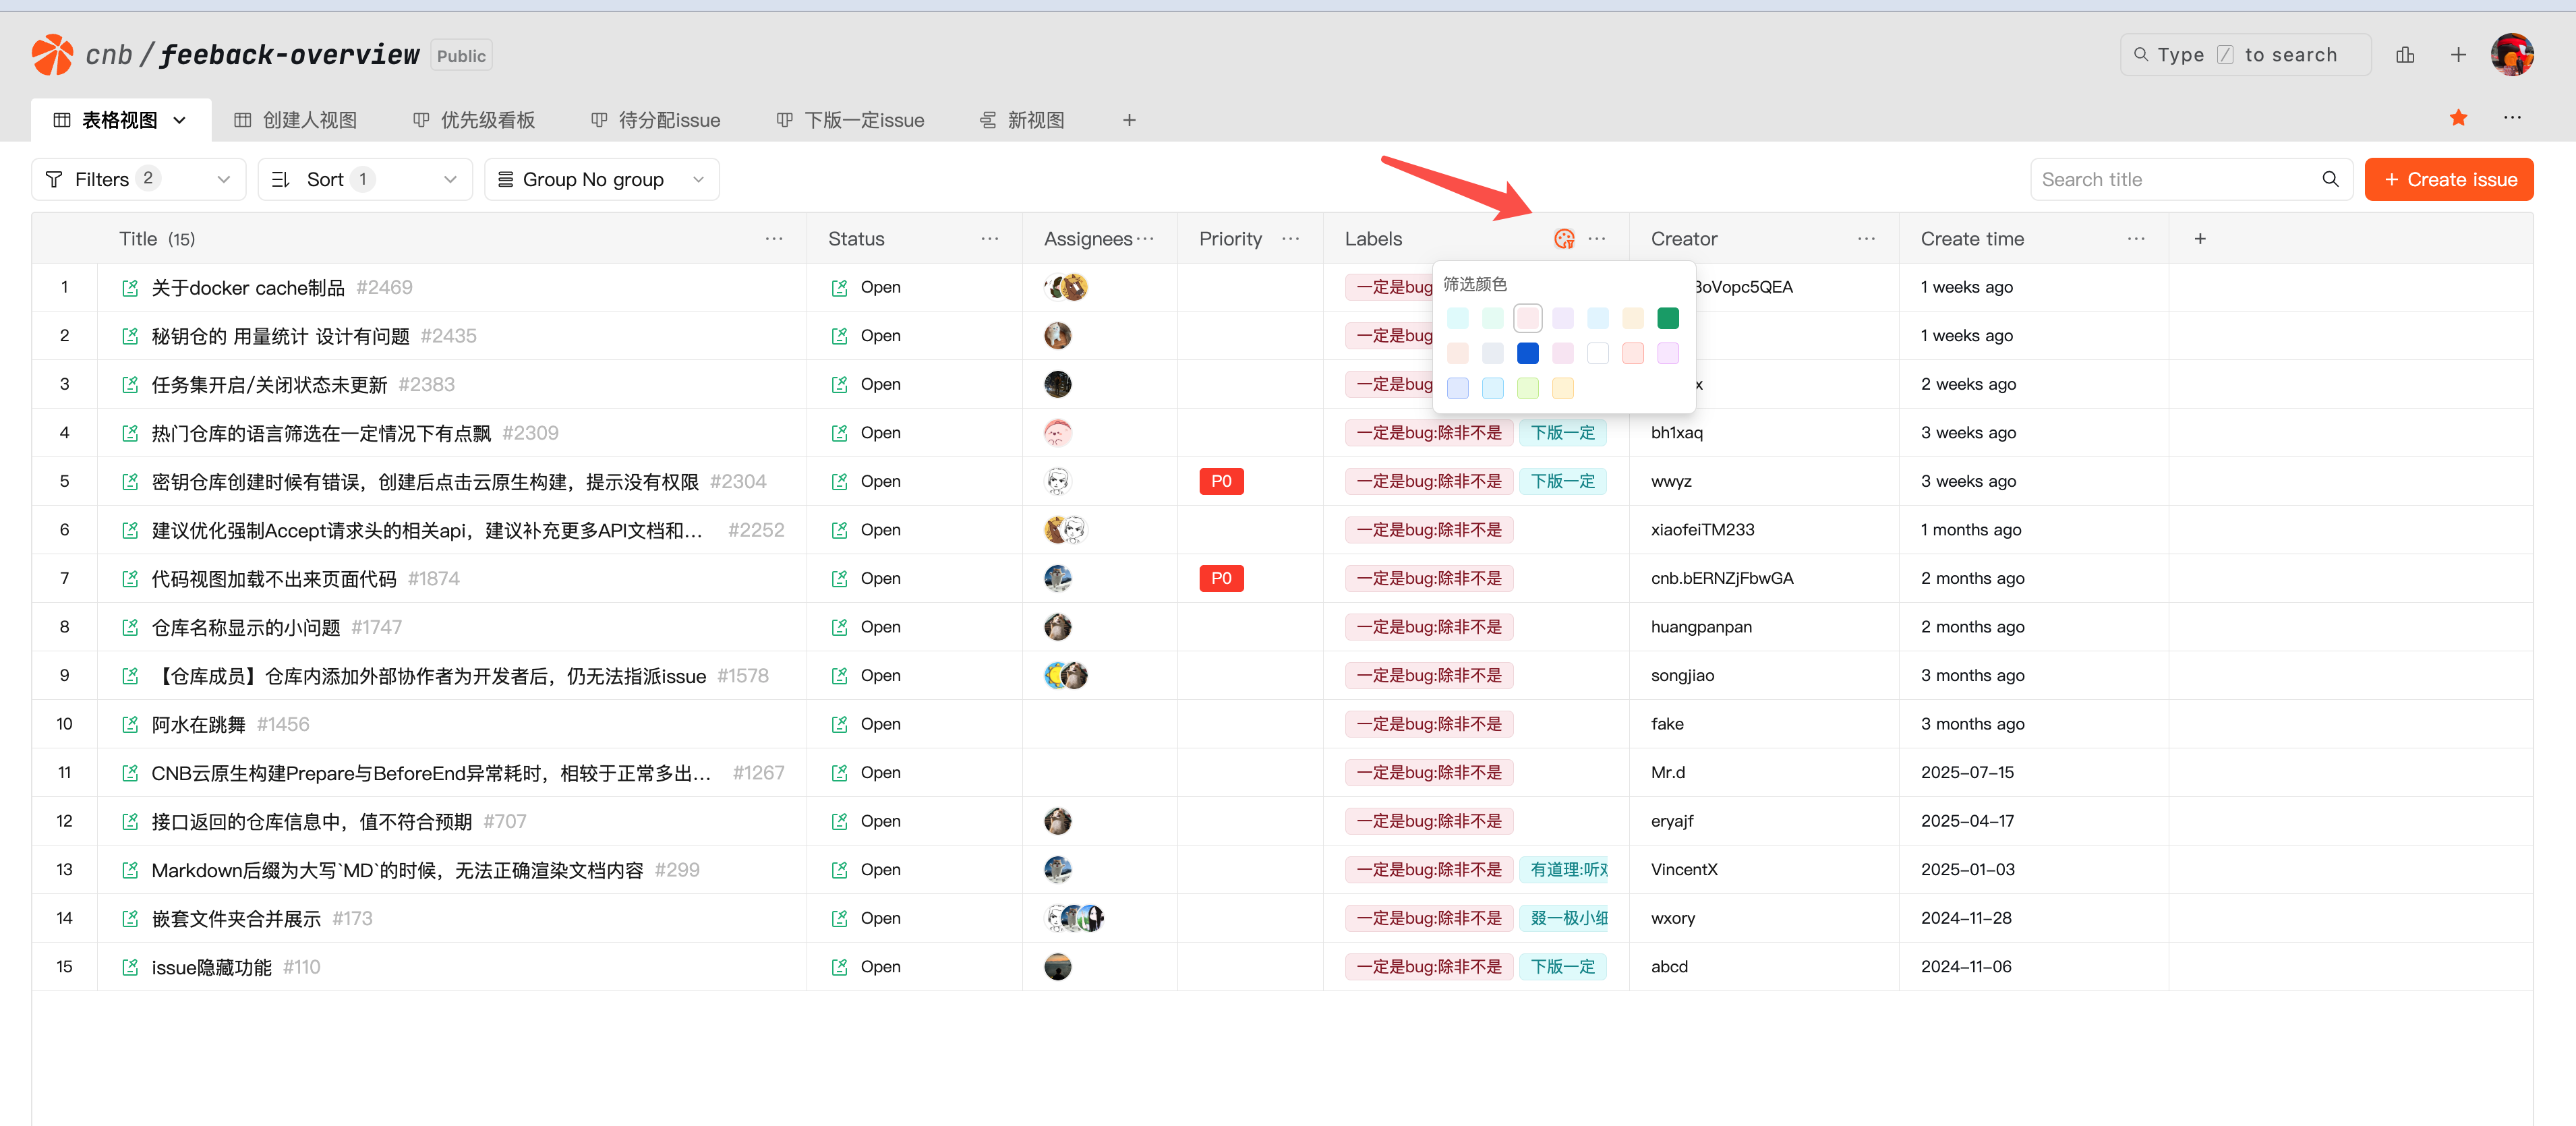
Color Management
Table view supports quick task filtering by label color.
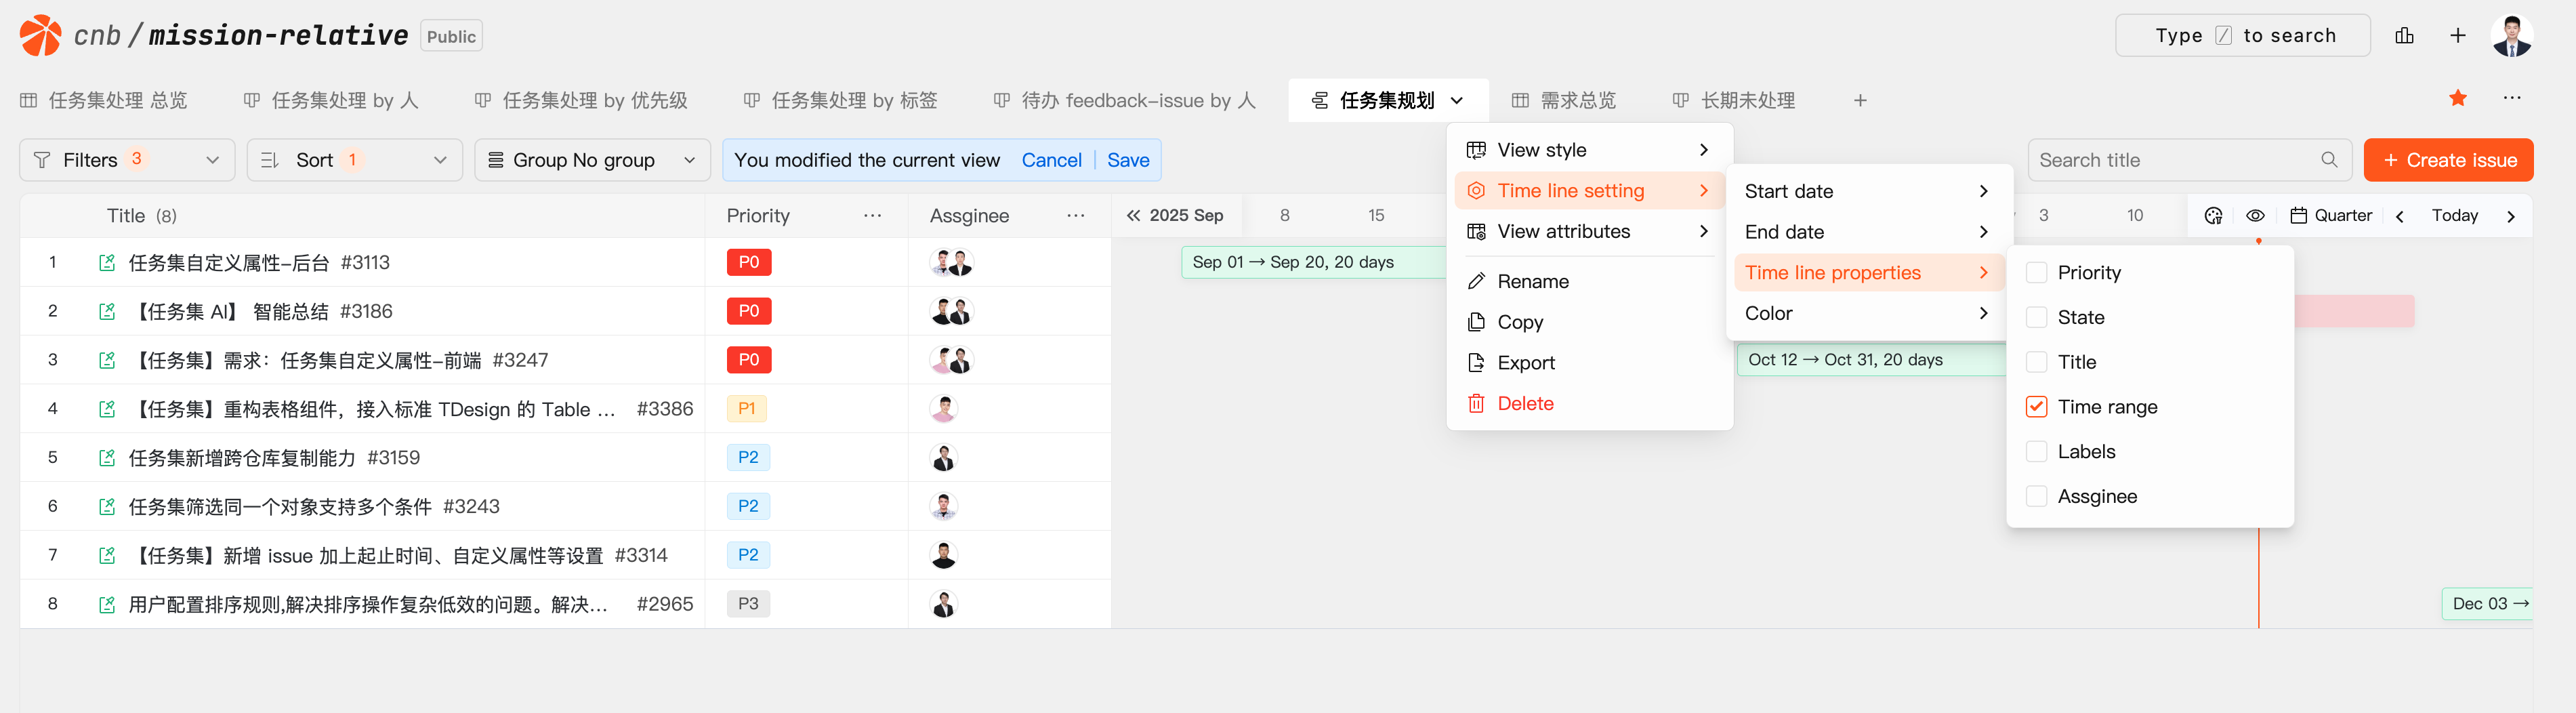
Gantt view can modify timeline colors, and also perform color filtering, hide timeline text, etc., to meet various use cases.

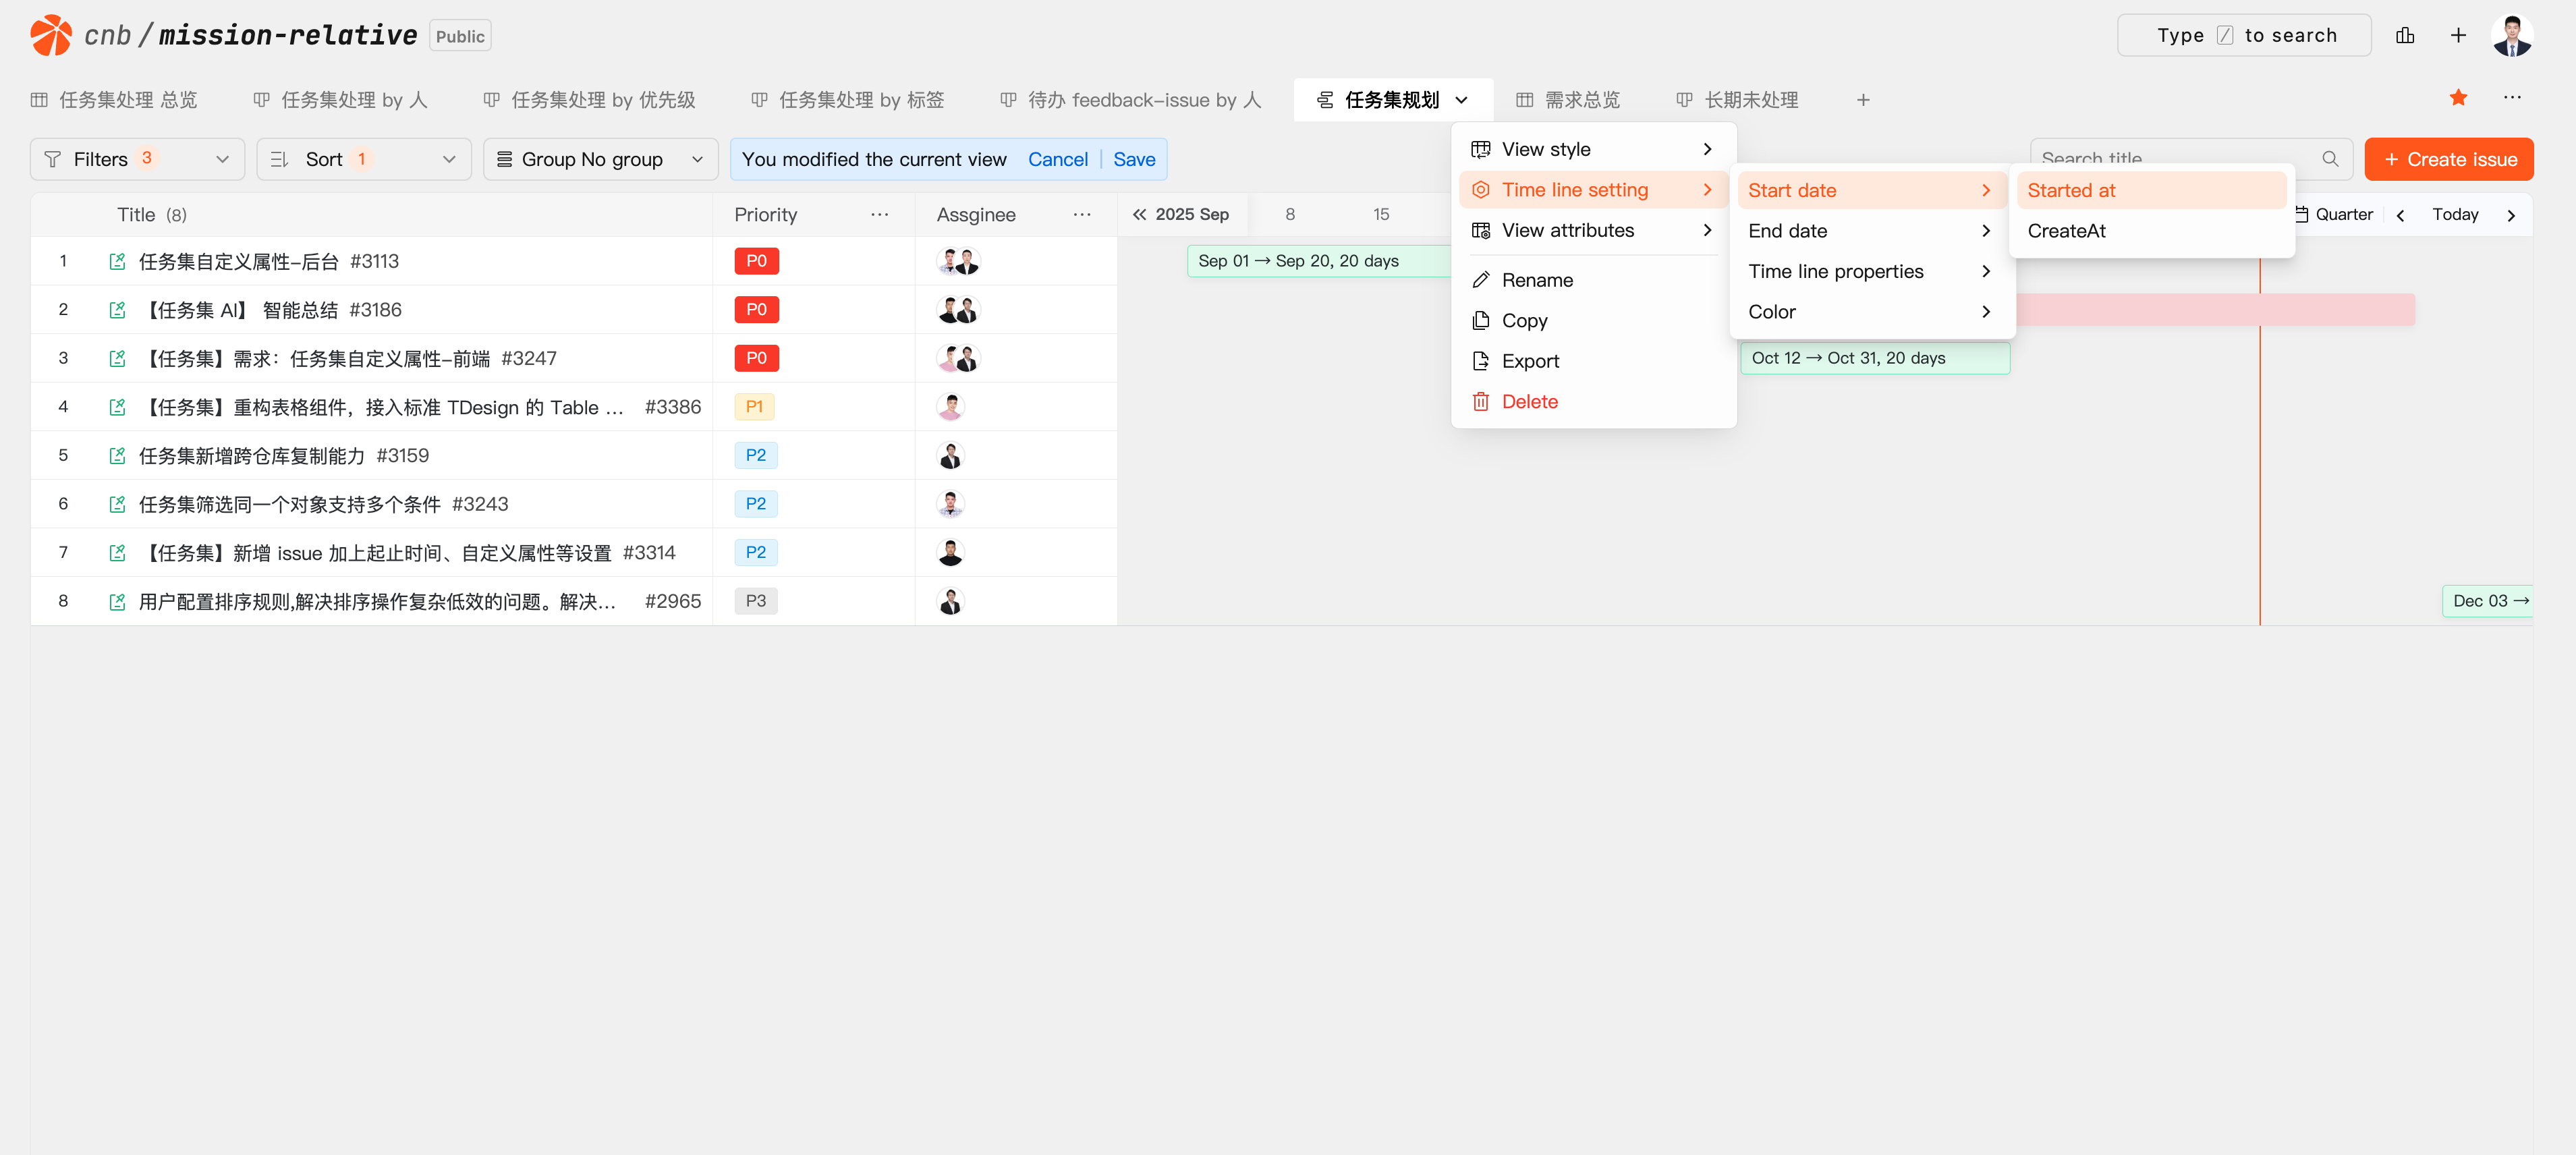
Gantt Chart Timeline Settings
Users can set the start/end dates of the Gantt chart timeline, and also set the text content displayed on the timeline.
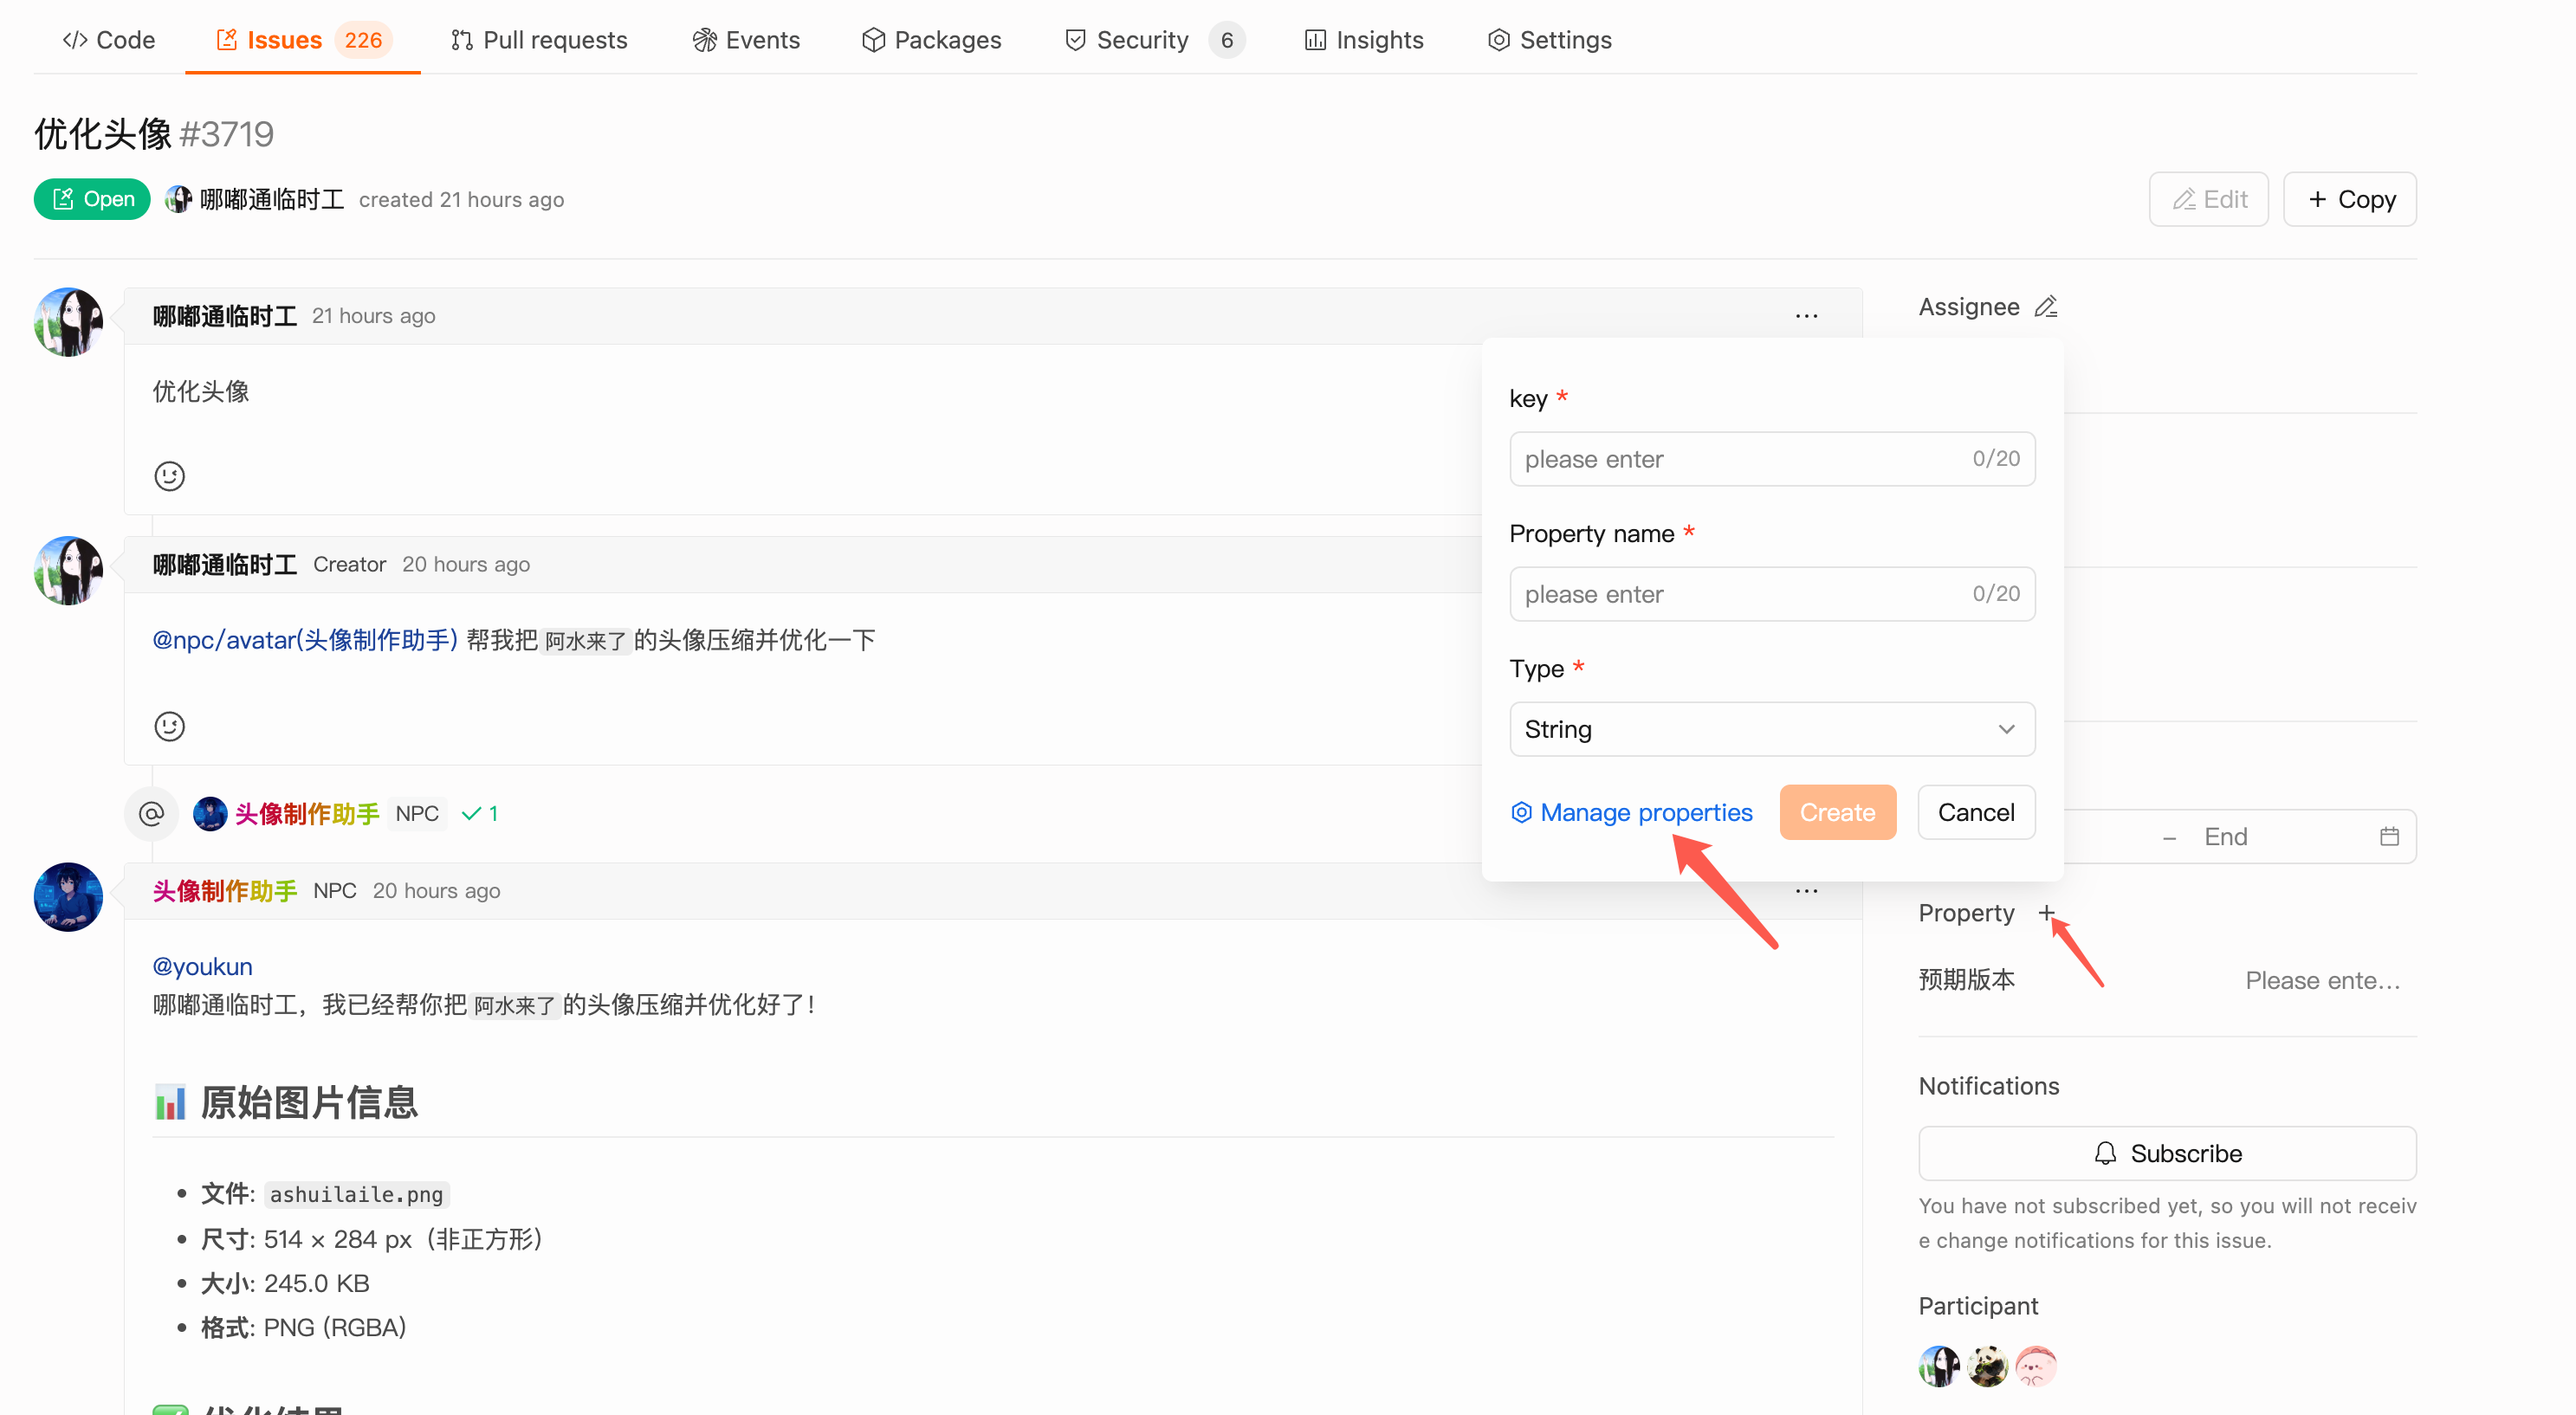
Custom Attributes
Custom attributes support filtering, sorting, and grouping, enhancing the flexibility of data views.
Custom attributes can be managed on the repository's Issue detail page to supplement existing attributes.
Mission Settings
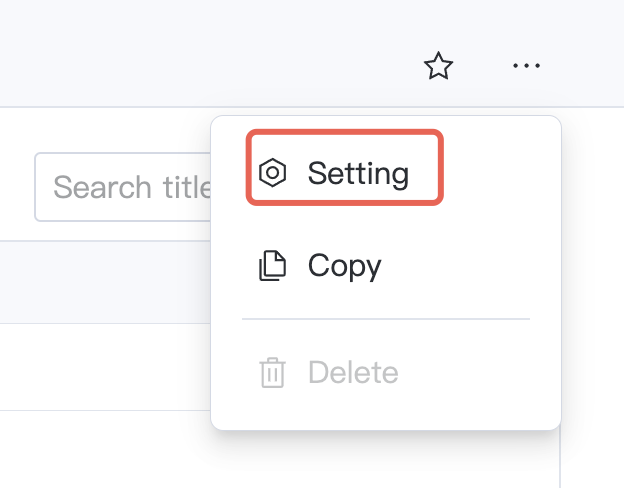
Click the ![]() on the right side of the mission, select Settings to enter the mission settings page. You can configure basic settings, advanced settings, attribute settings, and manage members.
on the right side of the mission, select Settings to enter the mission settings page. You can configure basic settings, advanced settings, attribute settings, and manage members.
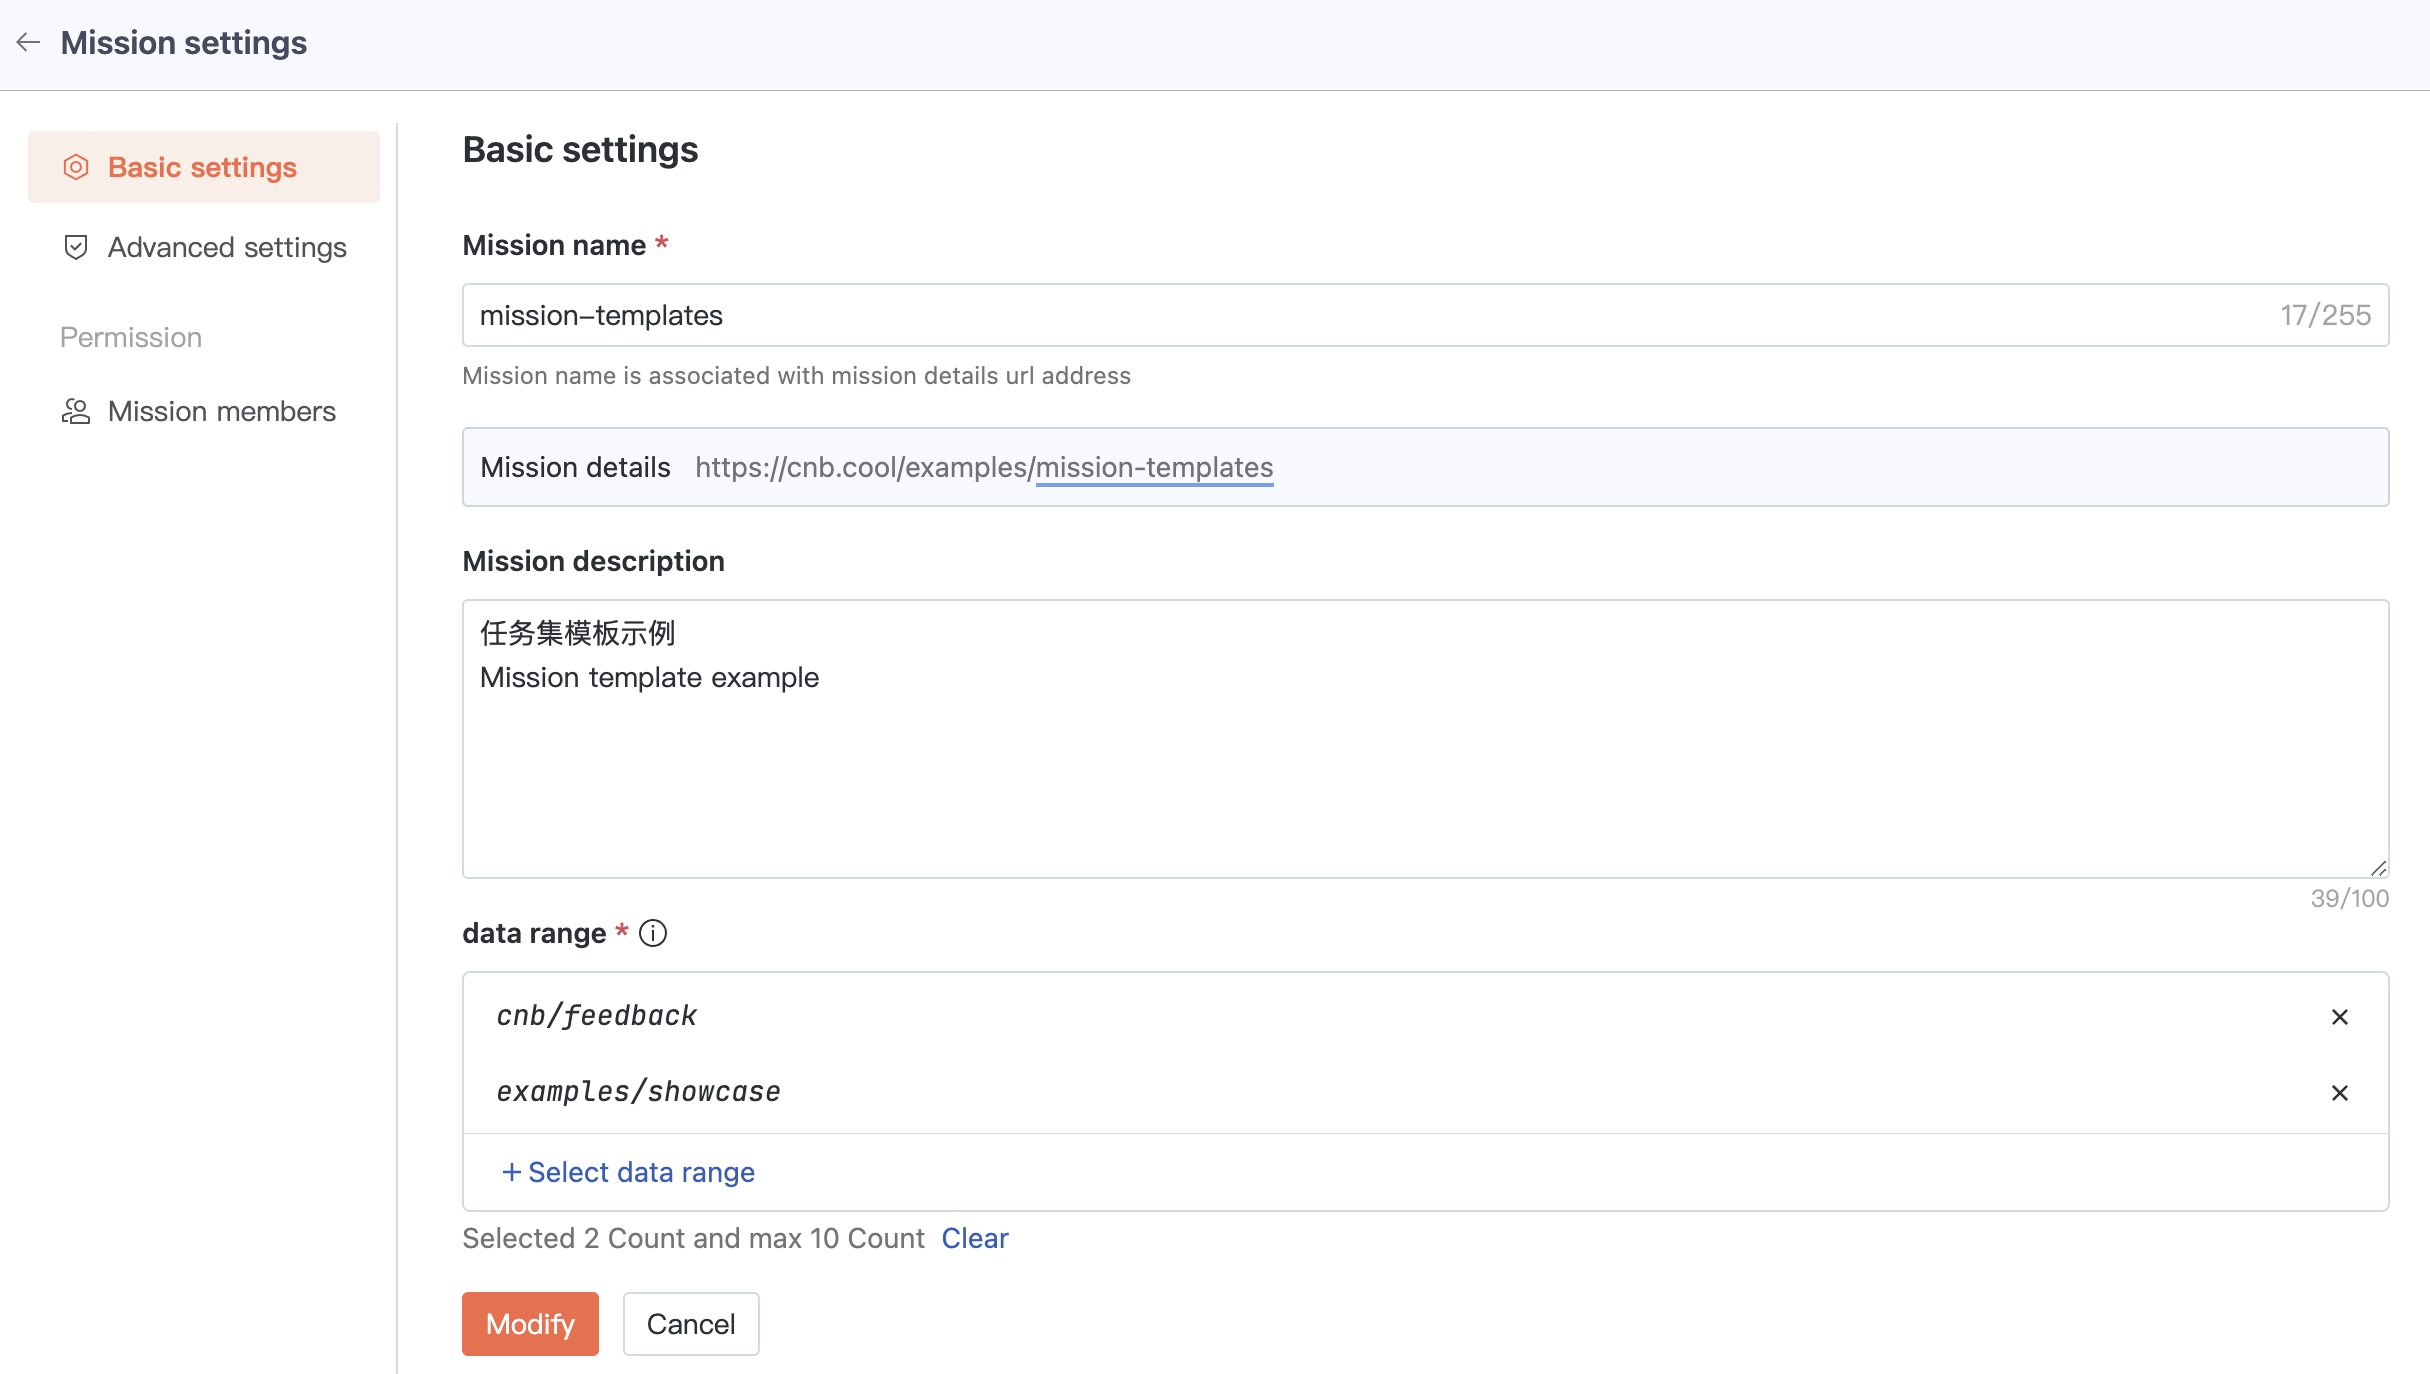
Basic Settings
You can modify the mission name, edit data scope, and other basic information.
Tips
Modifying the mission name will change the mission's access URL, so operate with caution.
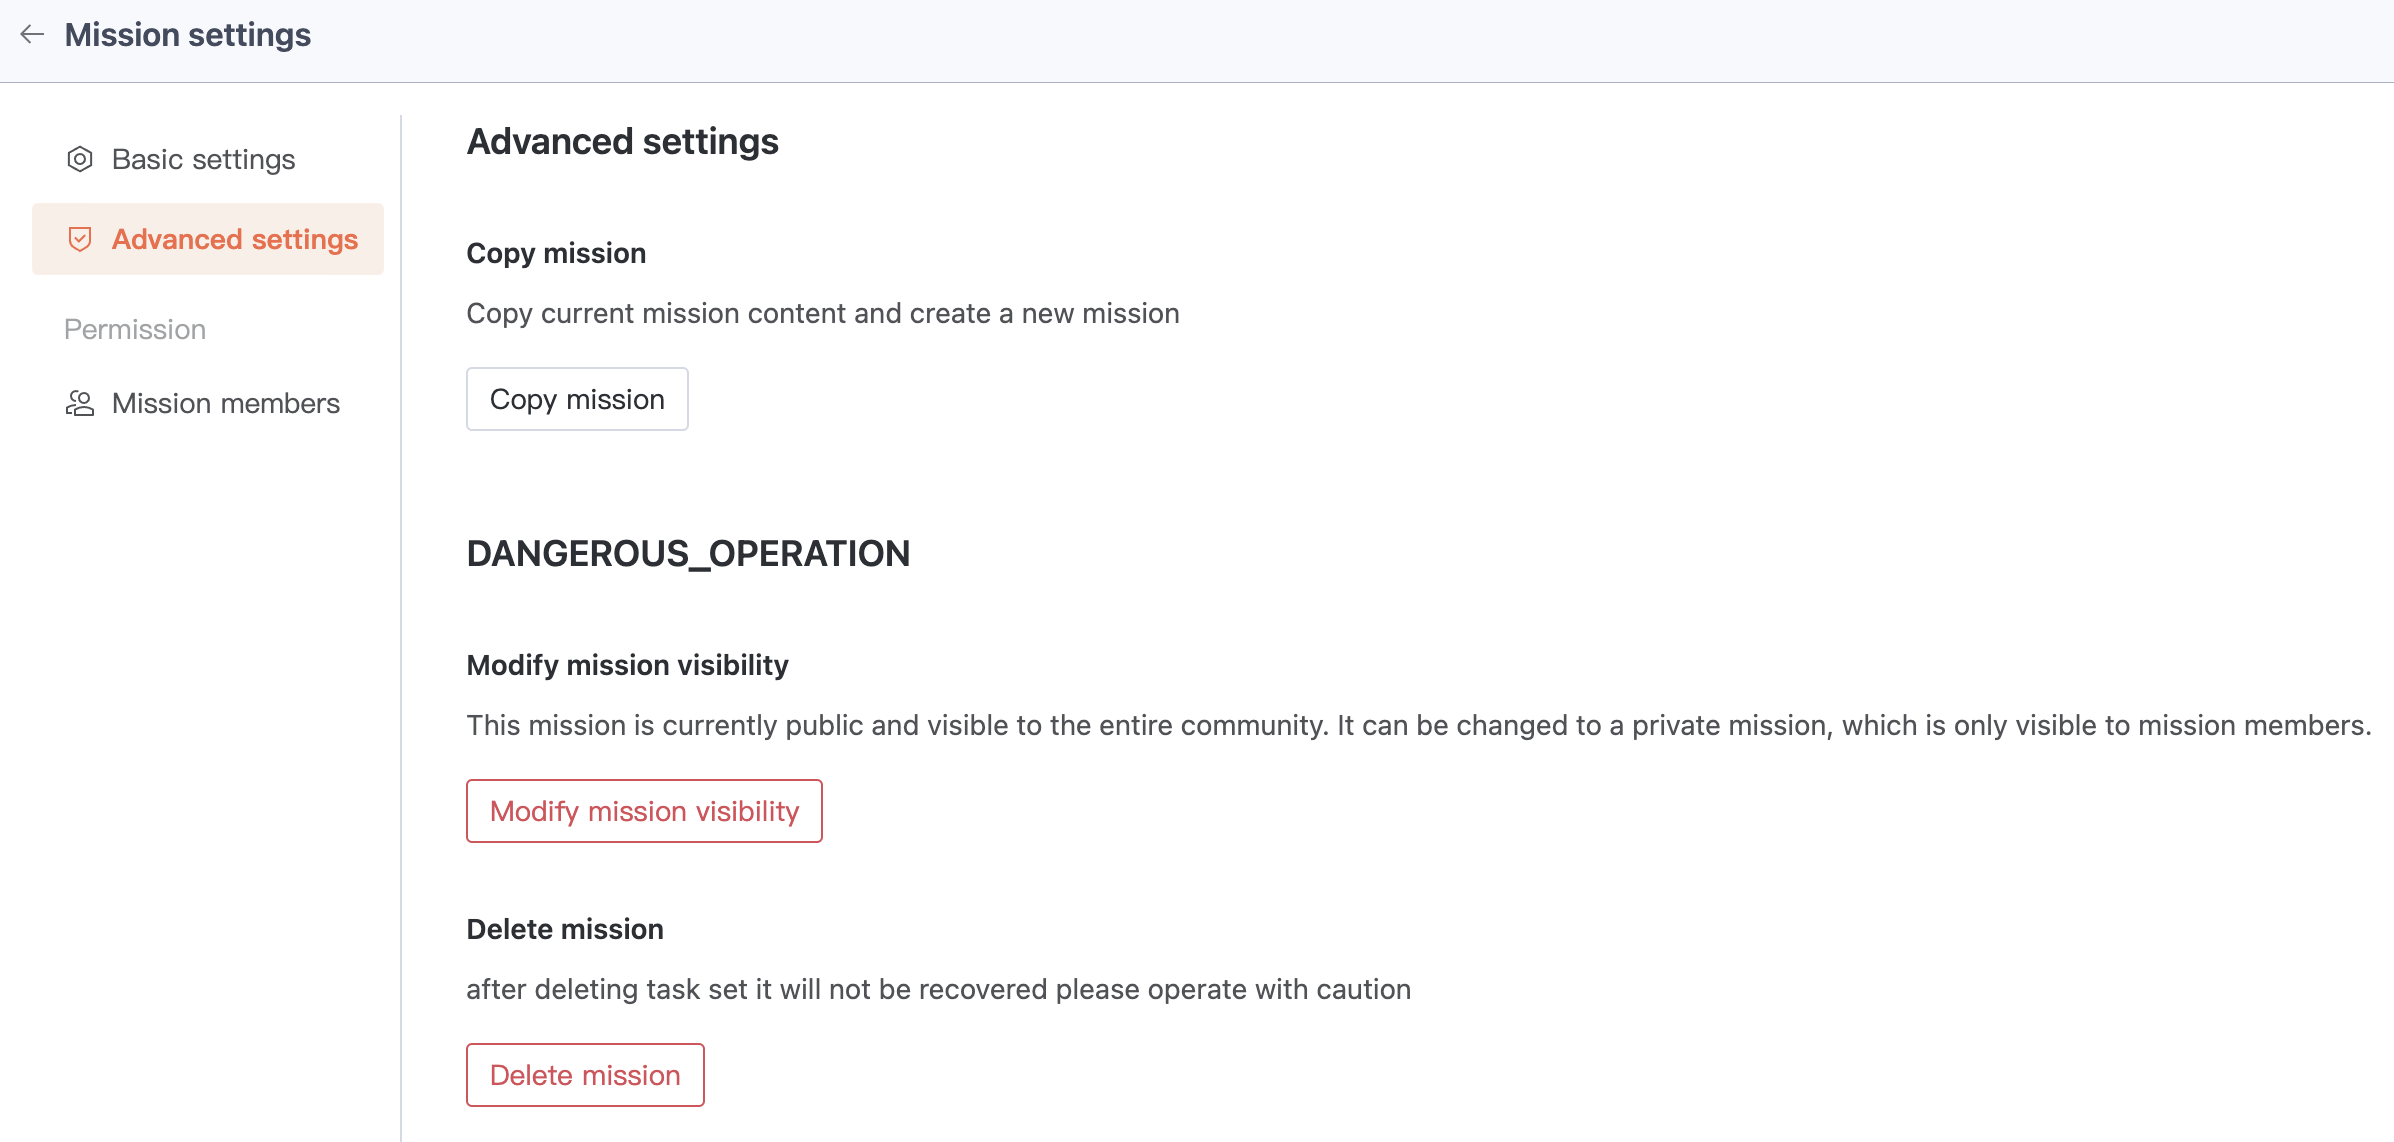
Advanced Settings
Supports copying missions, modifying visibility, and deleting missions.
Tips
Modifying mission visibility will affect the mission's access scope, and data cannot be recovered after deleting a mission, so operate with caution.
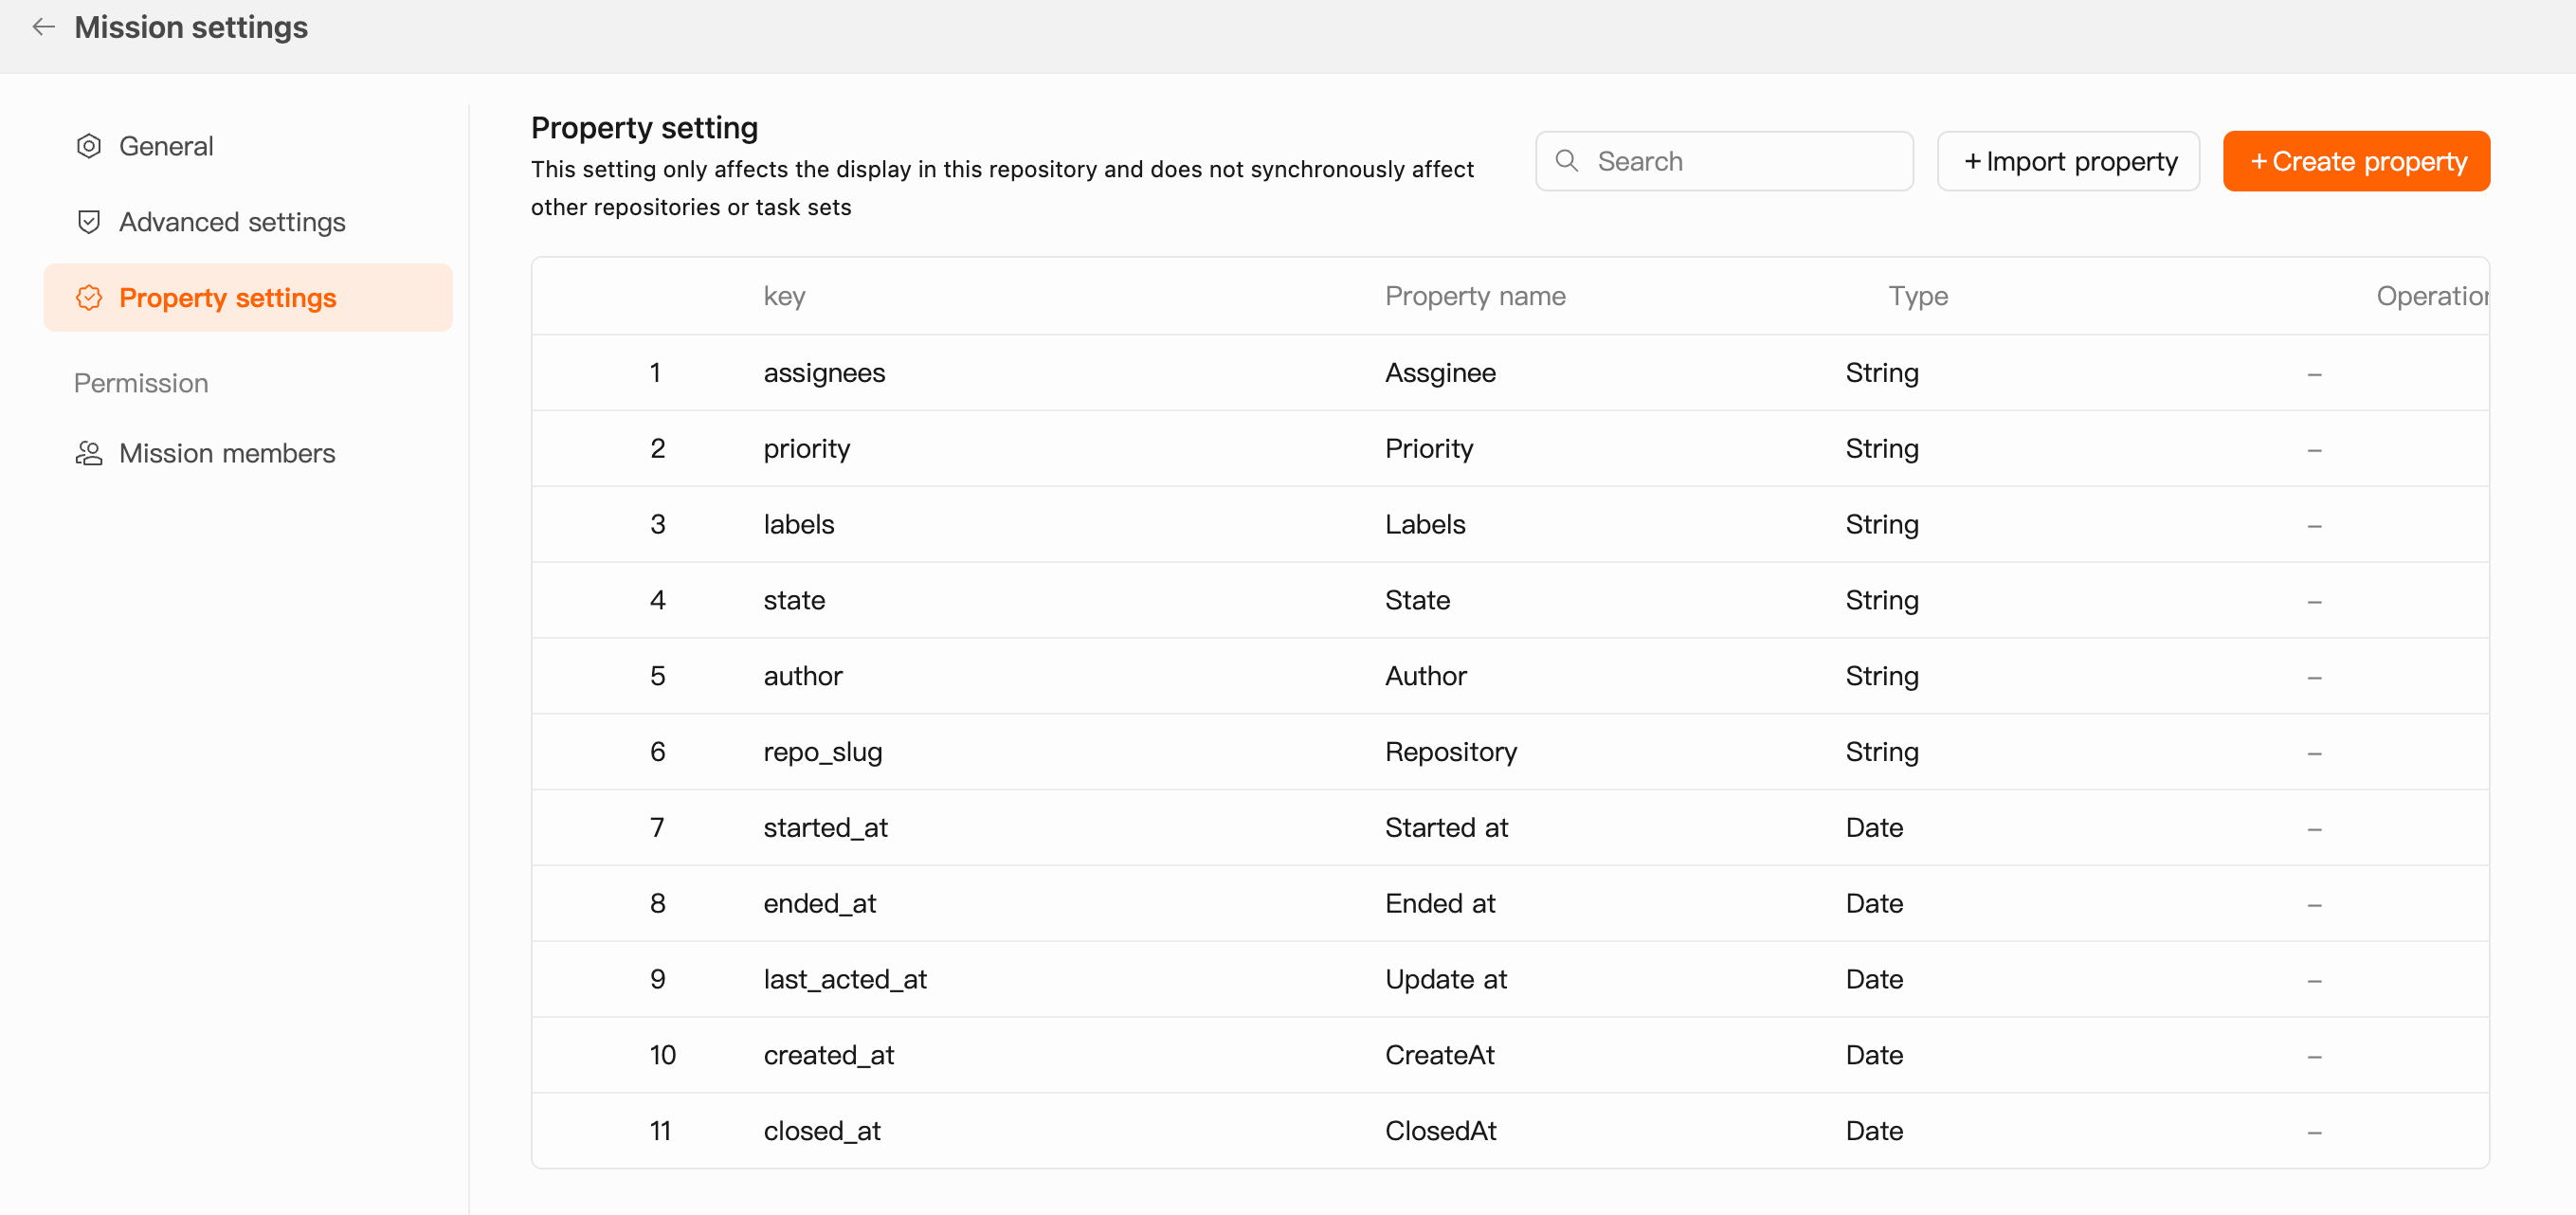
Attribute Settings
You can create or import custom attributes that already exist in repositories to supplement the attribute dimensions in the task set view.
Tips
If the same attribute key exists across multiple repositories, it will be merged into a single attribute within the current task set.
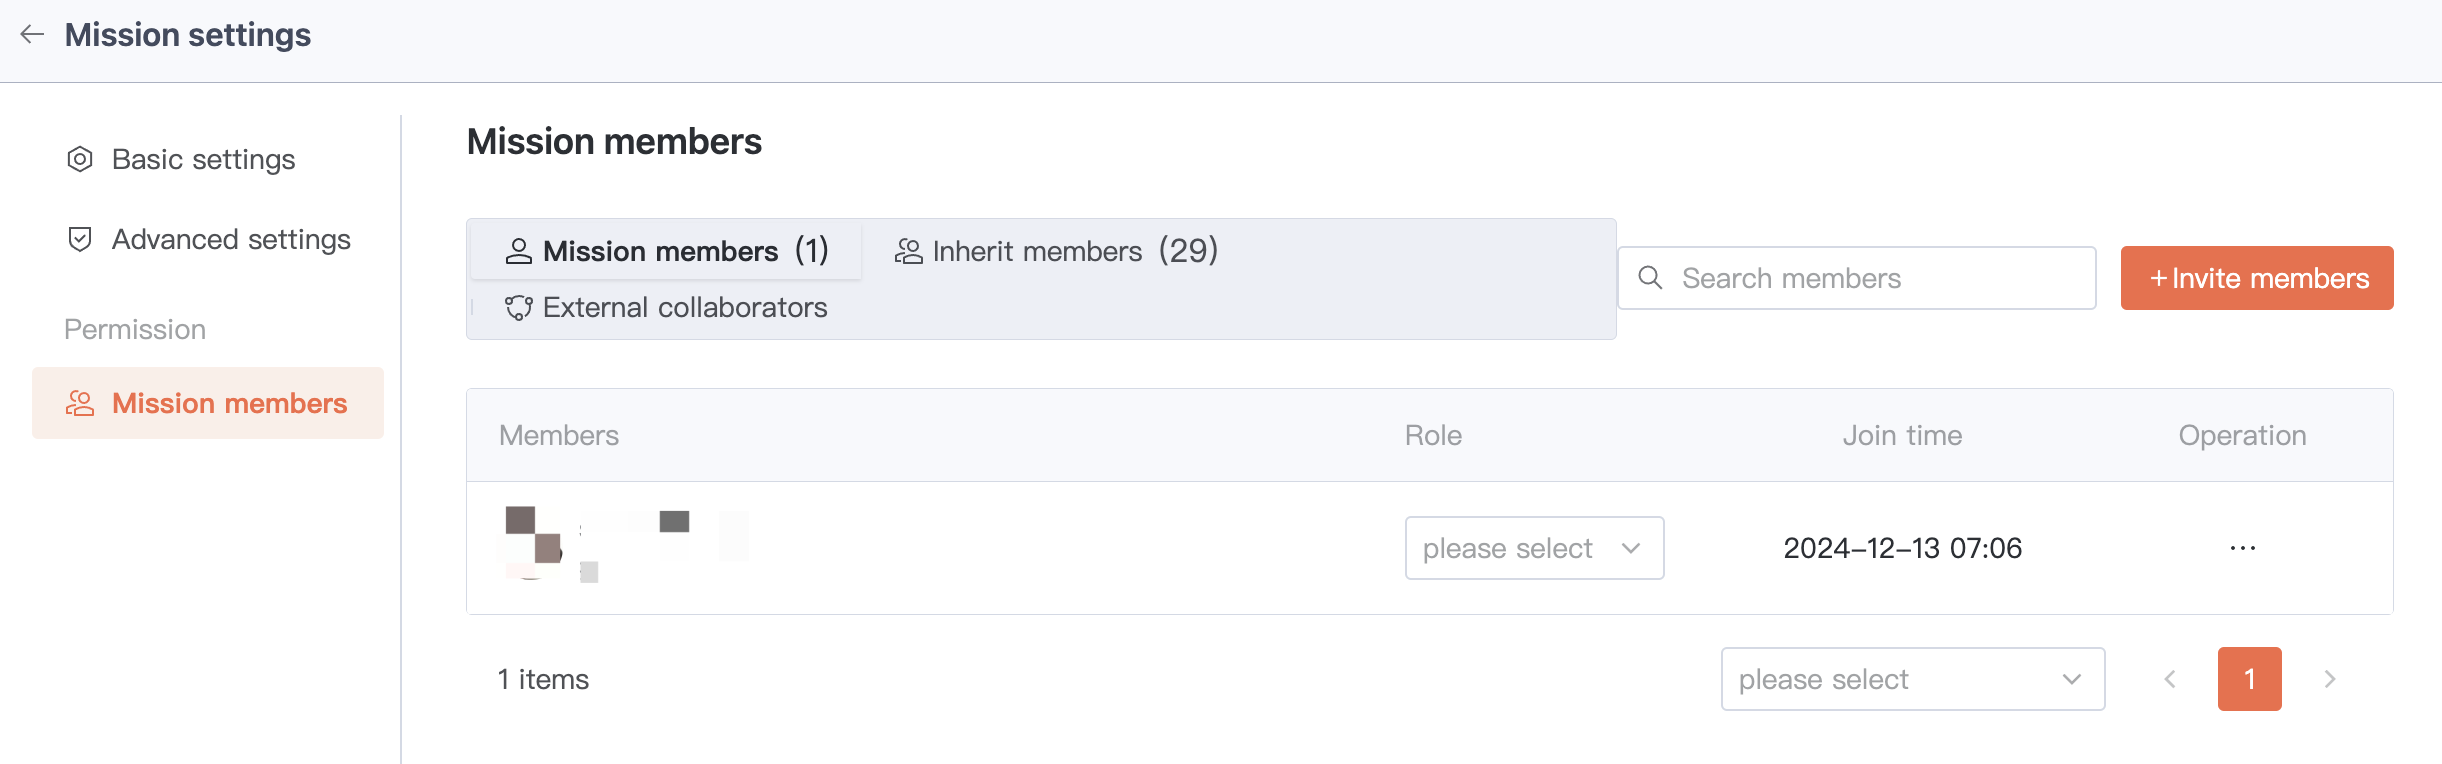
Mission Members
By default, inherits all member permissions from the parent organization. Click Invite Members to invite users to the mission, with roles divided into "Mission Members" and "External Collaborators". External collaborators are suitable for temporary collaborators.
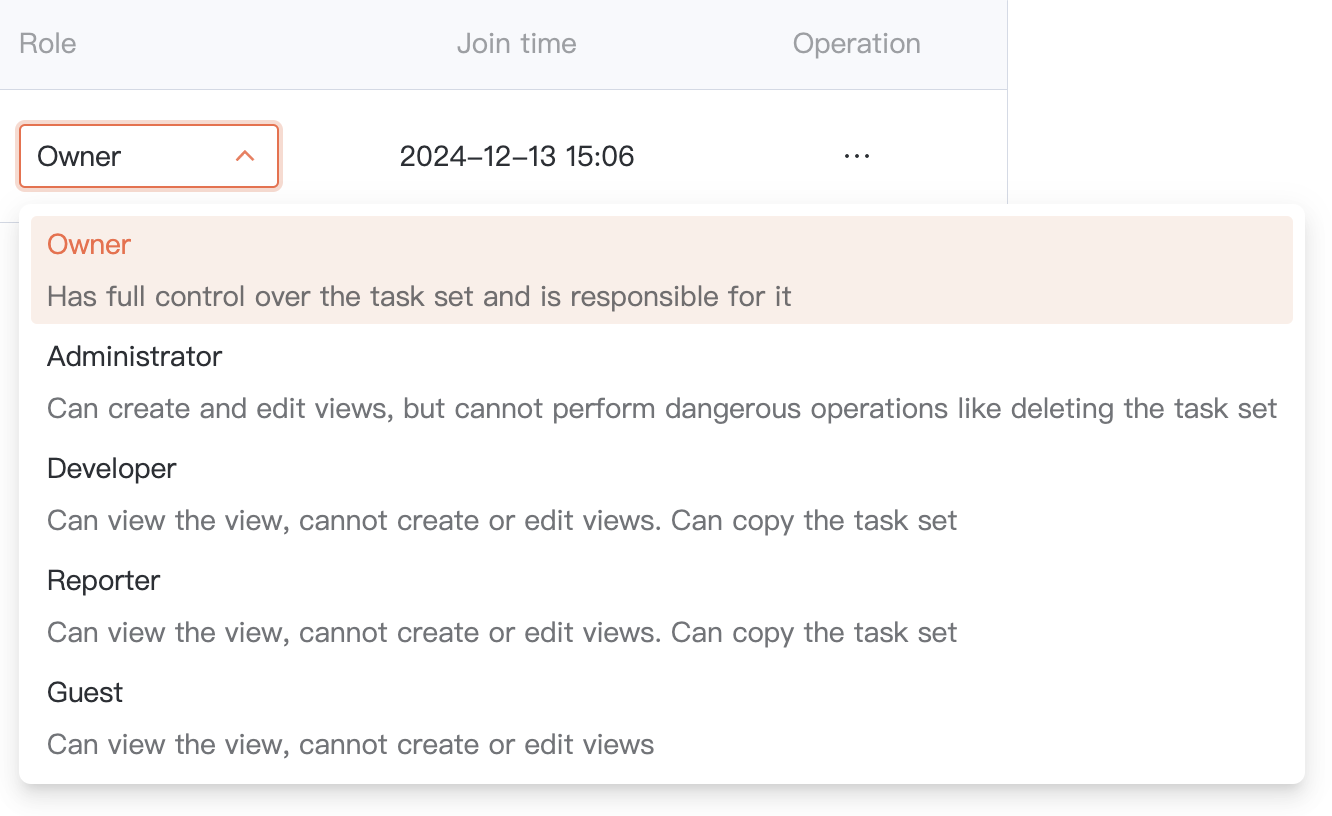
Member role permissions are as follows:
Mission Permissions
To access mission views, users must meet both of the following conditions:
- User is a member of this mission
- User is a member of the repositories associated with this mission
User's operation permissions on Issues/PRs in missions are consistent with their permissions in the corresponding repositories.
Mission A is associated with Repository A and Repository B. Xiao Ming has permission to edit Issue titles in Repository A, but only has read permission for Issues in Repository B. Then in Mission A, Xiao Ming has permission to edit titles for all Issues in Repository A, but only has read permission for all Issues in Repository B.