Quick Start
Cloud Native Build provides out-of-the-box CI/CD capabilities. The core concept is declarative configuration: define a series of tasks to be executed automatically when specific events occur on specific branches.
This guide covers two tasks:
- Create and run your first pipeline: Experience the complete workflow from code submission to automated build
- Write a practical PR pipeline: Learn to configure a common pipeline for code quality gating
Part 1: Run Your First Pipeline in 5 Minutes
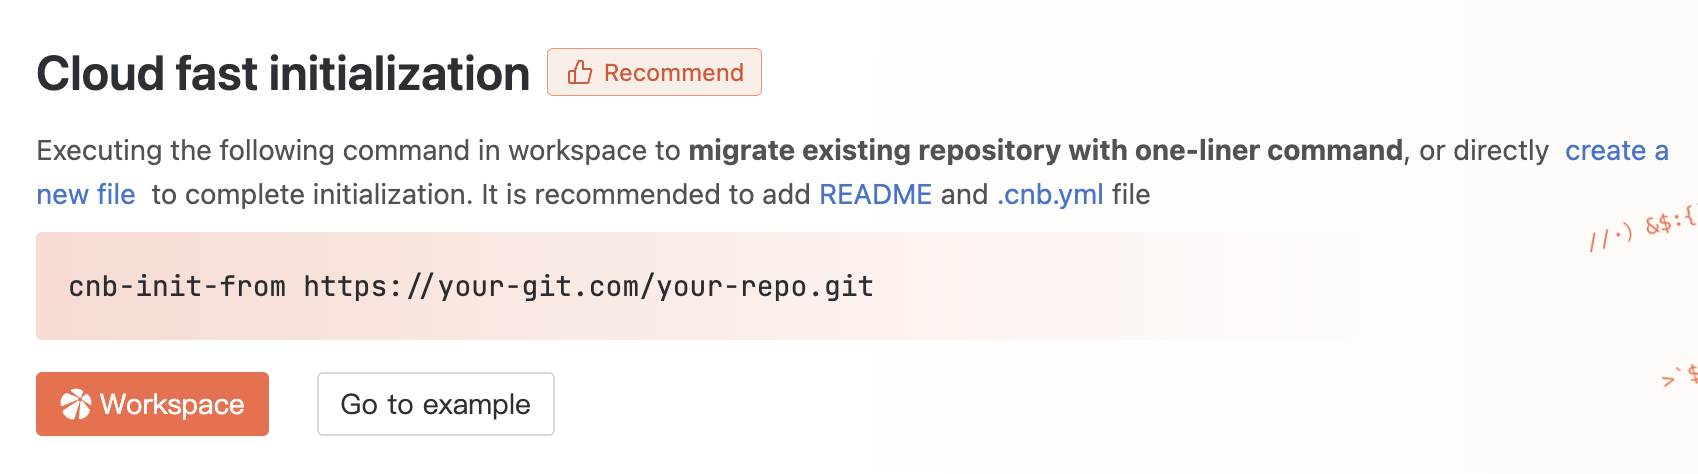
Step 1: Create a Repository and Enter the Dev Environment
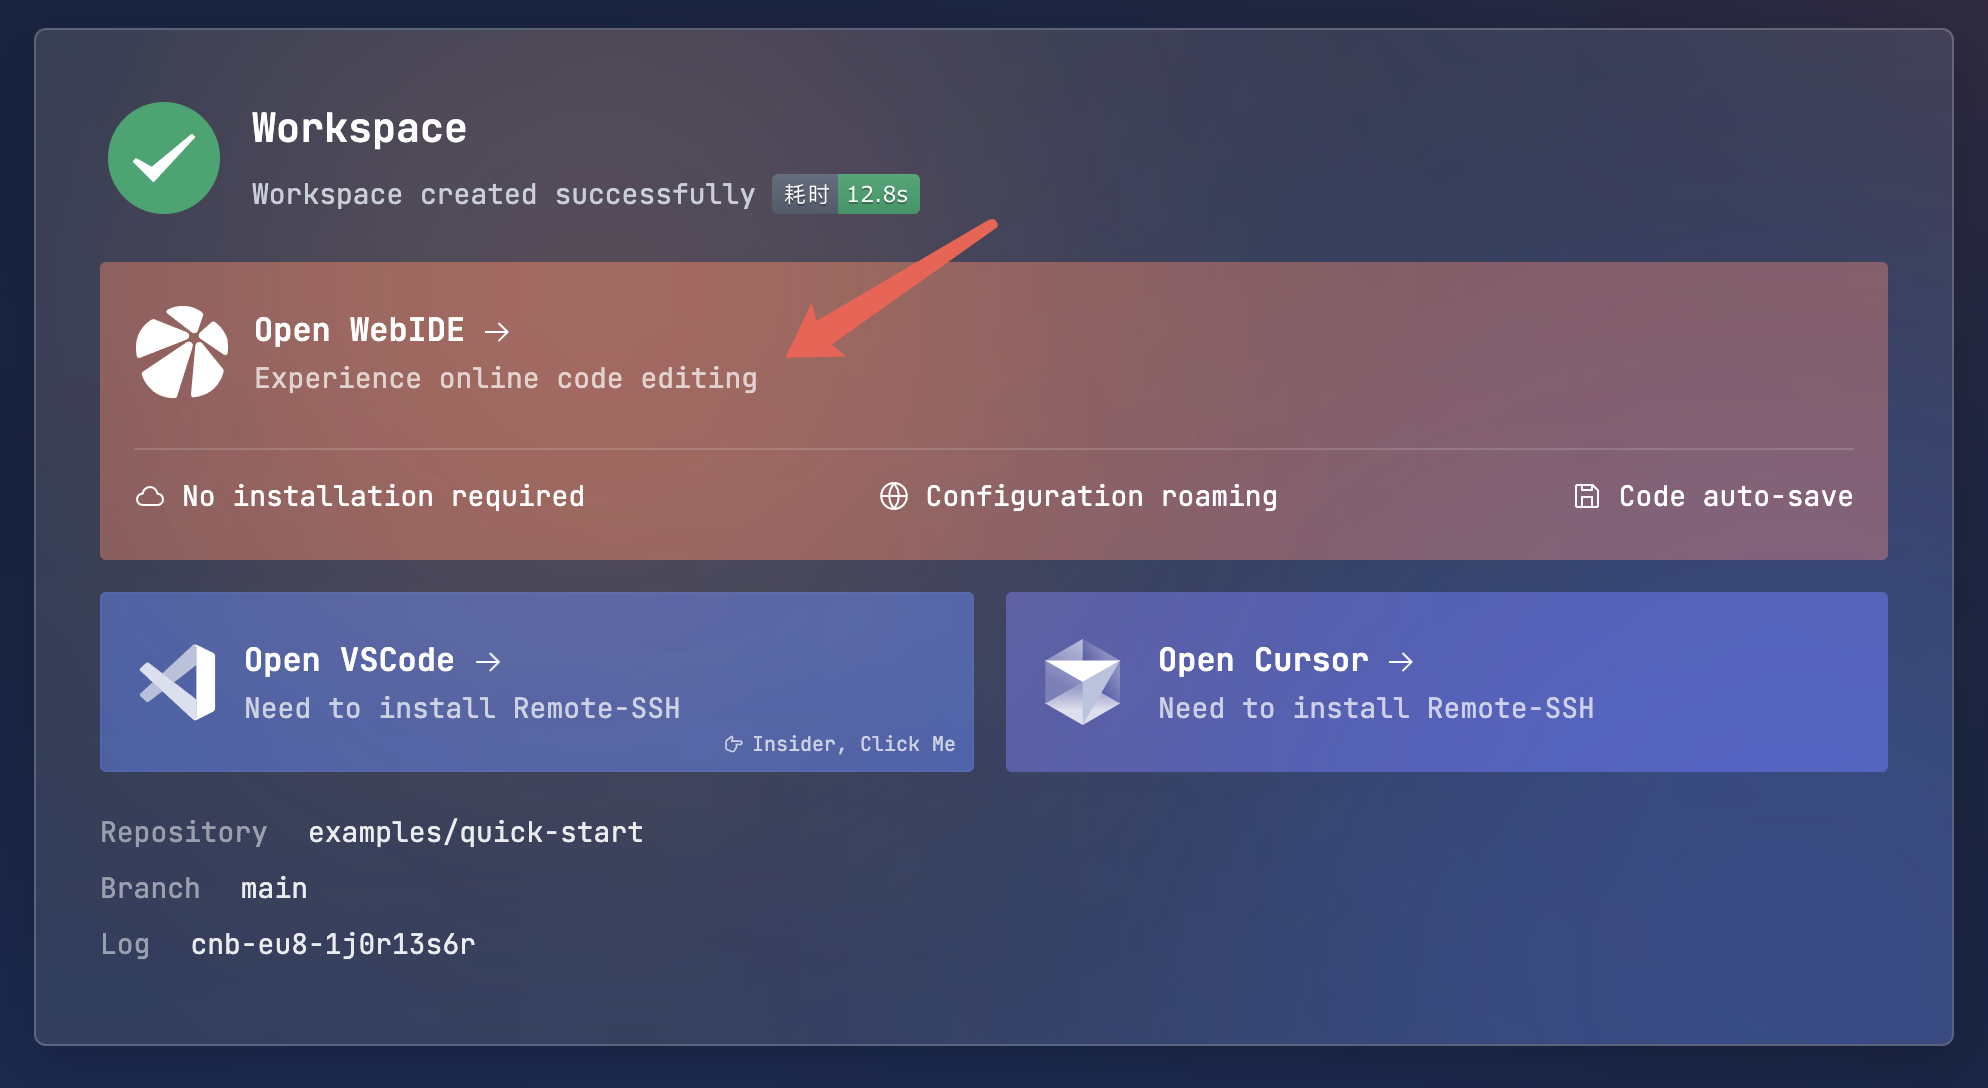
If you don't have a code repository, create one first. After creation, click the Workspace button on the page to quickly create a development environment.
Select WebIDE to enter the online development environment for a quick start.
Step 2: Create and Submit the Pipeline Config File
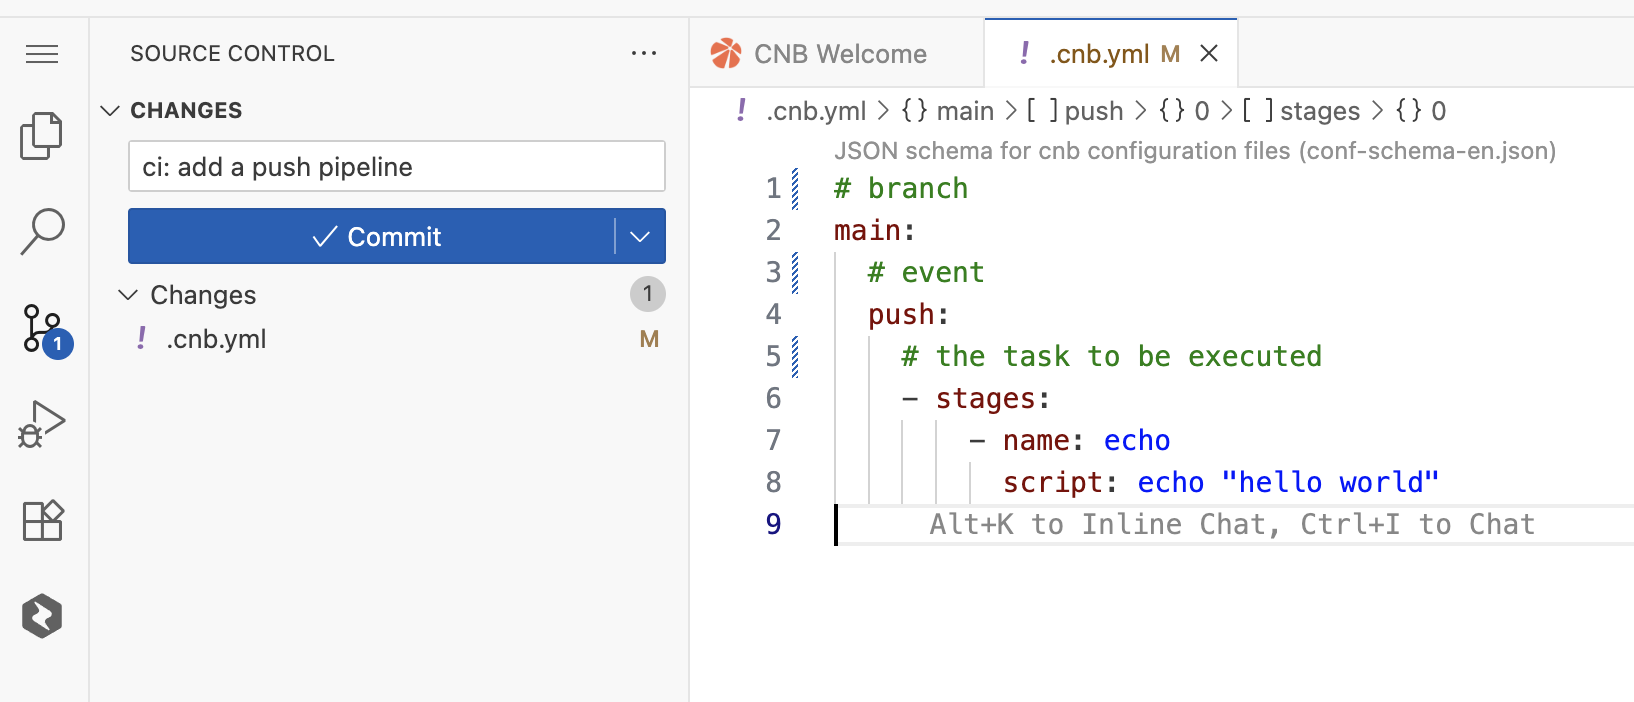
In the WebIDE, create a file named
.cnb.ymlat the root of your repository.Copy the following YAML configuration into the file and save it. This configuration defines: When code is pushed to the
mainbranch, automatically run a task that outputs "hello world".main: push: - stages: - name: echo-hello script: echo "hello world"Commit and Push these changes to the remote
mainbranch.
Step 3: View the Pipeline Execution Results
The pipeline will trigger automatically after the push.
- Return to your repository homepage.
- Click the
Eventstab to view all build records.
- Click on the latest record (triggered by the
pushevent) to view detailed build logs and status.
Congratulations! You've completed your first CI/CD practice.
Part 2: Write a Practical PR Validation Pipeline
Now let's implement a more practical scenario: Configure a Pull Request pipeline for the main branch to automatically perform code checks (lint) and tests (test), and notify the team upon failure.
1. Define the Branch, Event and Tasks
First, specify the target branch (main) and the event (pull_request), then define a pipeline named pr-check with two sequentially executed tasks.
main:
  pull_request:
    - name: pr-check
      stages:
        - name: lint
          script: echo "Running linting tools..."
        - name: test
          script: echo "Running test suites..."
2. Define Failure Handling
If any task in the main sequence fails, use failStages to automatically execute alert tasks.
main:
  pull_request:
    - name: pr-check
      stages:
        - name: lint
          script: echo "Running linting tools..."
        - name: test
          script: echo "Running test suites..."
      failStages:
        - name: notify-team
          script: echo "Notifying the chat group that the PR check failed!"
Pipeline Execution Logic:
- Listen for
pull_requestevents on themainbranch. - Start the
pr-checkpipeline. - Execute the tasks in
stagesin order (lint → test). - If all tasks succeed, the pipeline status is marked as passed.
- If any task fails, abort immediately and execute the tasks in
failStagesinstead.
Next Steps
- 🔧 Dive Deeper into Configuration: Check out the Configuration Details to explore more advanced features.
- 📖 Master the Full Syntax: Go to the Syntax Guide to learn about all configuration items.
- 🚀 Reference Real-World Examples: Need more inspiration? Visit Best Practices(Open in new window) to fork sample repositories or reuse their configurations to quickly customize your pipeline.